

Hawk
-
Posts
1,324 -
Joined
-
Last visited
-
Days Won
153
Content Type
Profiles
Forums
Gallery
Posts posted by Hawk
-
-
The nice thing about Wool/Terylene blend (for the record Terylene IS a polyester) is that there is much less need for maintenance of the fabric. It's more resilient, and wrinkles less than a full wool. The color stays longer, and the fabric is much lighter. The wool blend should be less expensive, but it also is more prone to color variations. Some sheep just don't like hair dye as much as others. Given the choice, I'll always pick high quality wool, but that's just my preference. Wool/Terylene is nice to work with. The polyester in it causes the wool to behave better (less walk, uniform color, and no stretch) and the wool adds a bit of richness to the fabric; most 100% Polyesters have a reflective sheen to them.
-
The pattern can be found here:
-
The code disc is on a magnet. if it's upside down when you get it, turn it over...
-
It's our standard tunic. ISB Officers need to be modded a little, but the base of it is good.
-
Look for local tailors or seamstresses. We have a base officer uniform pattern on the boards, and they can probably sew it cheaper, AND you will be supporting a local artist.
The photos of the pattern can be found here: http://s268.photobucket.com/user/Hawk220/library/Officer%20Pattern%20ID
-
This last year, Anovos had a display up at Discovery World in Wisconsin. I've made a few Staff Officer uniforms, and have even posted the links to the patterns. I am very accurate, but Anovos is even more. there are little details that, as a tailor, I noticed that most other wouldn't. Their suits are amazing, even more so in person. If I didn't have my abilities with a sewing machine, I would be tempted to get one of theirs.
-
Fabric cost me $12.00 USD, and the belt AND buckle cost about $5.00 USD. I am sure there is a local tailor/seamstress that would have made yours for MUCH cheaper. The pattern is on the boards.
-
Seems expensive, of course mine only cost me fabric, so maybe I have a distorted sense of price. The cut looks fine, I can't see anything wrong with the garment, but like i said, seems a bit expensive.
-
She can order Stormtroopers around. That should account for something. She might not be ranked, but that doesn't mean she isn't part of the empire. She is in local law enforcement, and to give that a DZ seems wrong to me. I think we are a little too caught up with the whole "Sides" debate. I personally don't think it should matter if she is Imperial or not. She's a cool costume, and that is what should count. If she give orders, she should be considered an officer and fall into this detachment.
-
The stabilizer I use is just a fusible interfacing. It irons on to the fabric and is very easy to sew. As far as the visor stabilizer, I use a standard (it's Pellon 950F ShirTailor here in the states) on BOTH wrong sides of the fabric. I think it stabilizes the fabric better. I've made loads of hats with my normal sewing machine, and if she has any questions, feel free to ask!
-
-
This is about to get very picture heavy...

The Photobucket album is at:
http://s268.photobucket.com/user/Hawk220/library/Officer%20Pattern%20ID
I would highly suggest you download the album, and if possible print them as reference.
-
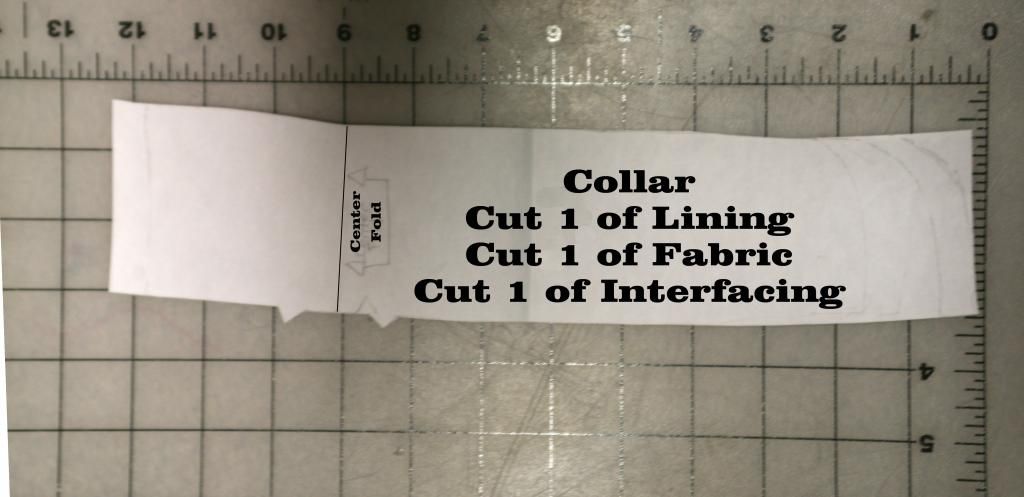
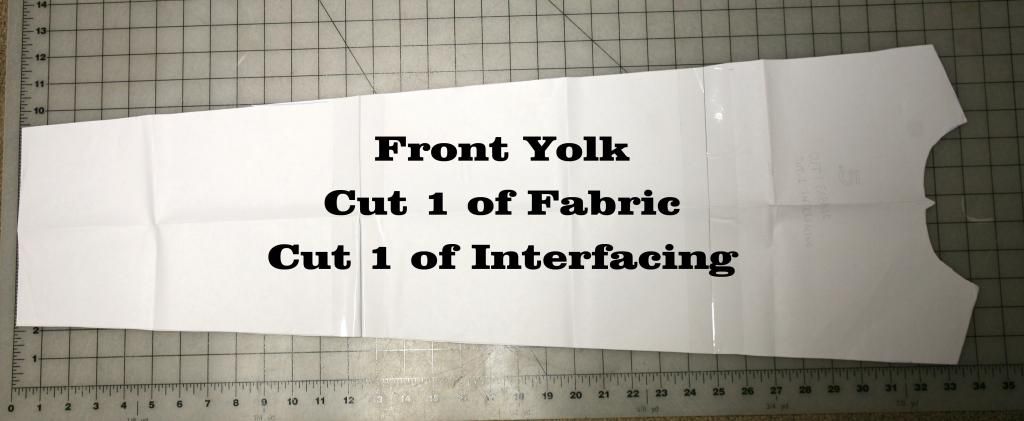
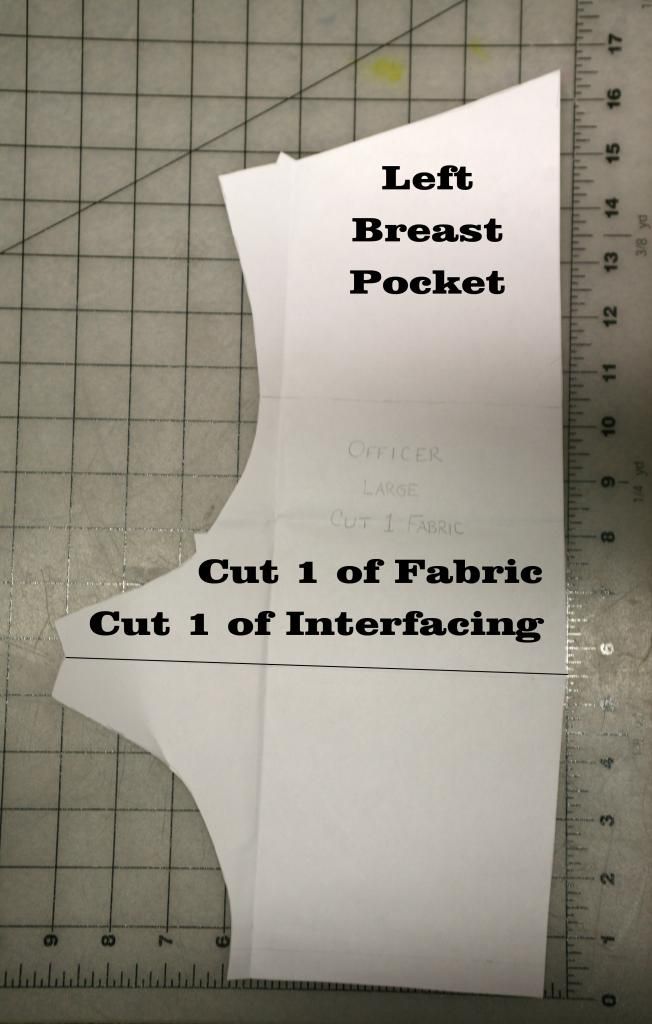
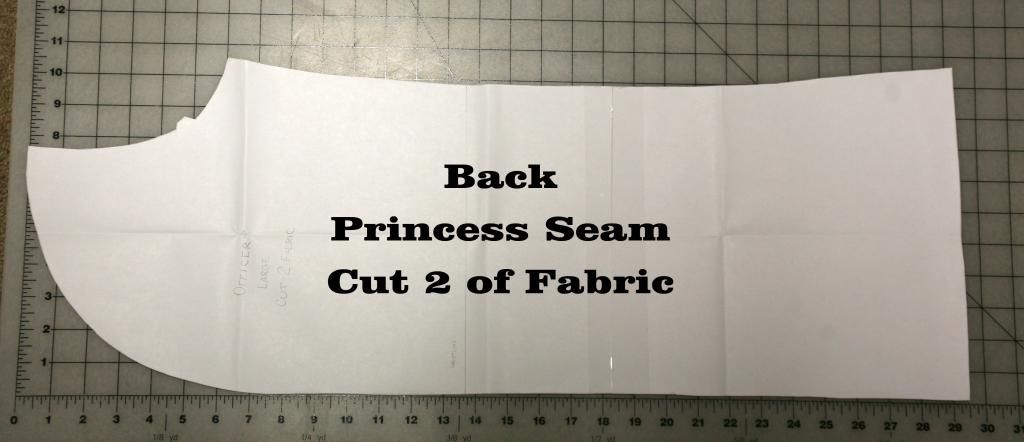
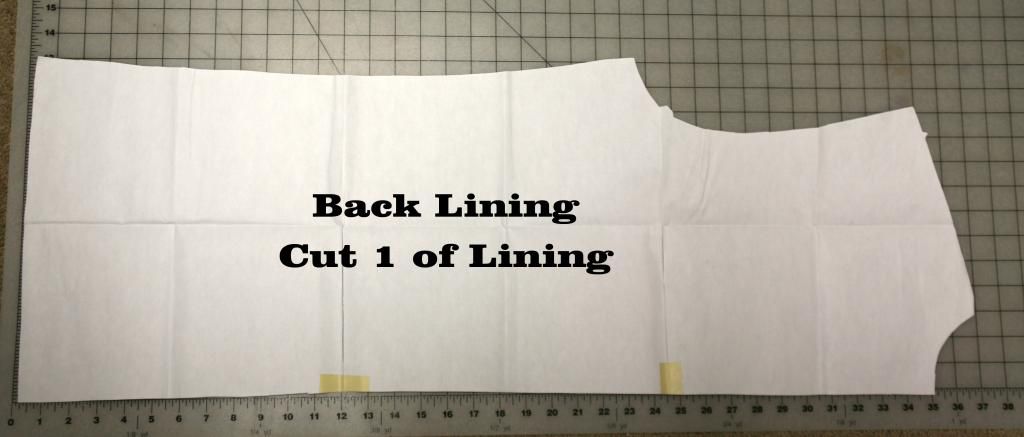
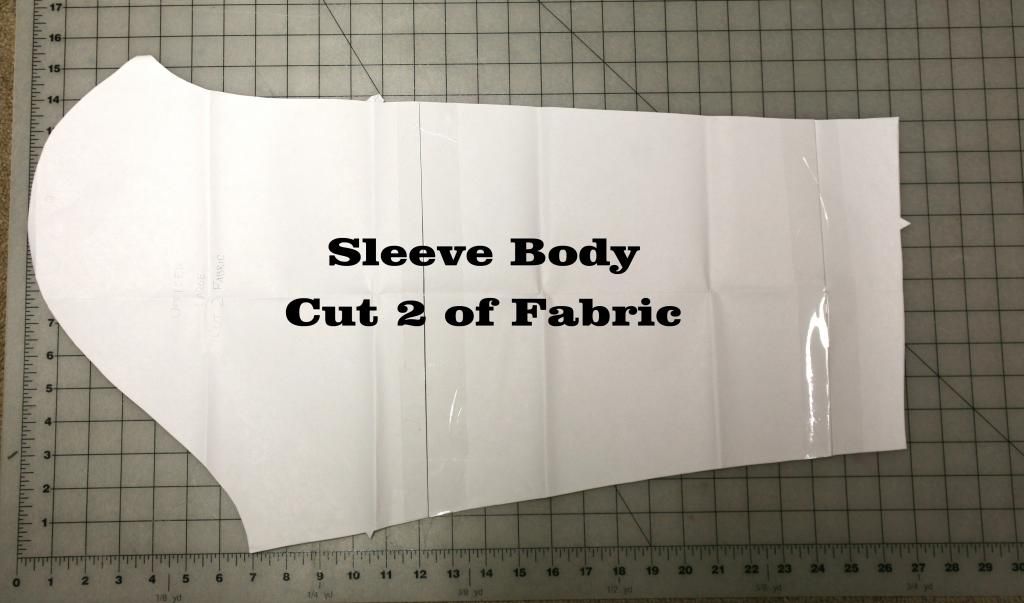
I used a modified version of Kathy VanB's pattern. I spent the day with her going over patterns and fabric shopping. I would HIGHLY suggest downloading her officer .pdf, as it is made with this pattern in mind. Make sure the fabric you get is the same on both sides, and there isn't a right and wrong side. I am about 170lbs and I stand 6 foot tall. This is the pattern I used to make mine, and everything is 1/2" seam allowance. It is a tailored suit, and WILL need to be custom fit. Once you have the shell together, it is very easy to bring in the sides, shorten the shoulders. TAKE YOUR TIME! If you get stumped, ask.
-
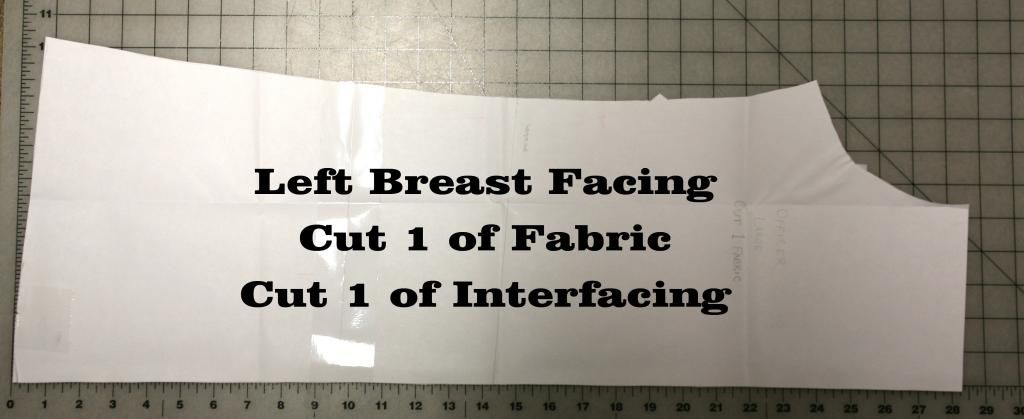
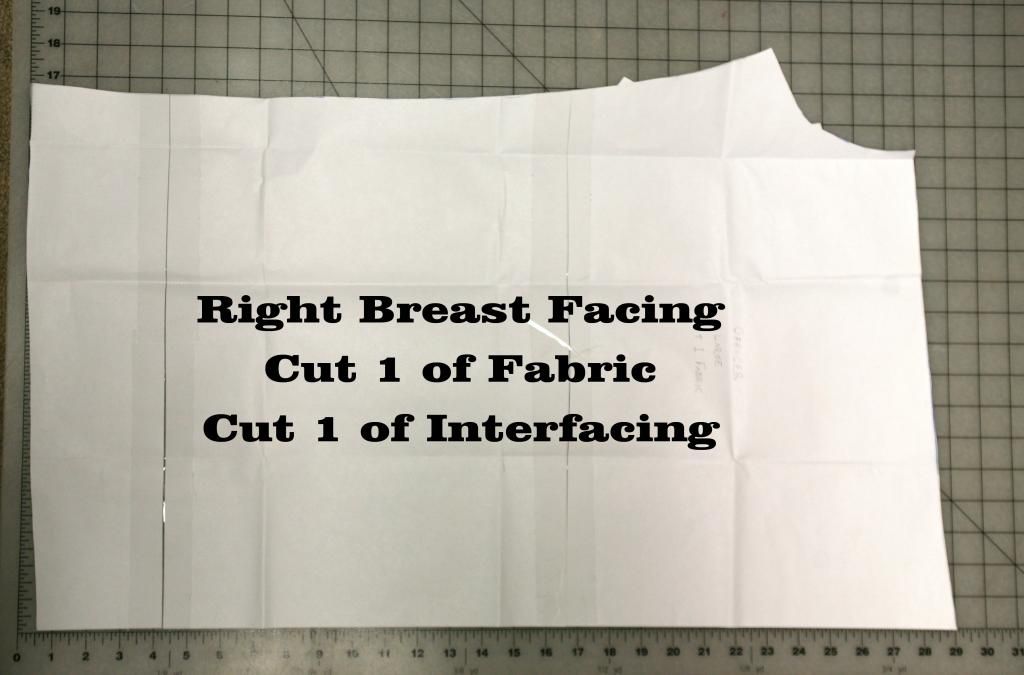
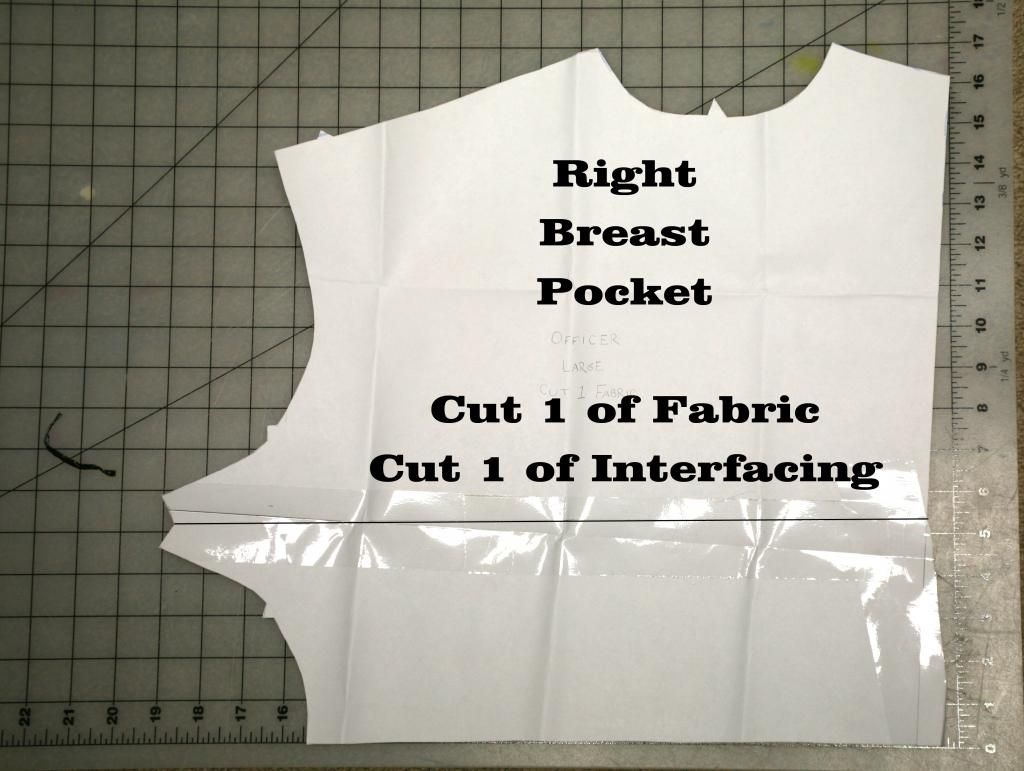
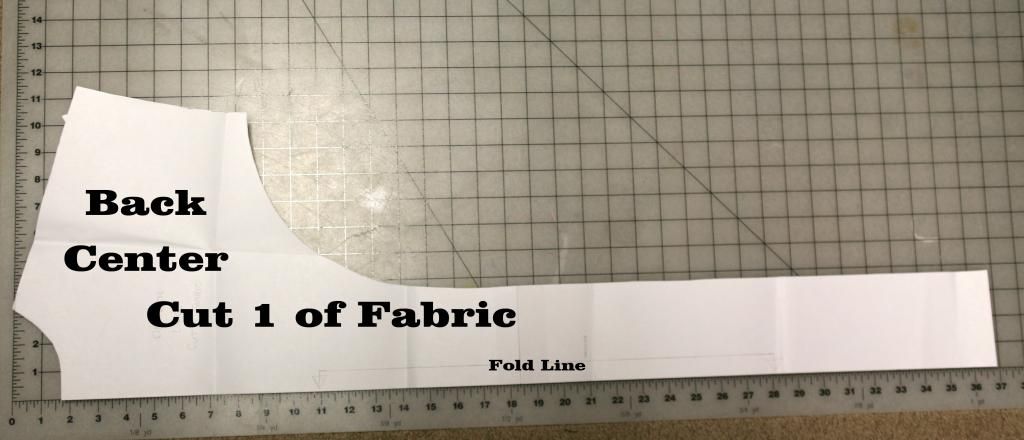
I have a pattern for a Staff (Line or Warrant) Officer tunic and pants, but nothing for Security. I guess it's pretty much the same, with the yoke nipped off. I had to modify my patter, after the fact, because I forgot to add the seam around the waist. I haven't set it up as a tutorial yet, I am still working on the one for the hats, when Halloween suddenly hit... If nothing else, I could take some pictures of my pattern pieces and post them here. It was a really easy build (WAY easier that a jumpsuit) and only took like 2 yards of fabric per piece. There was a lot of "Cut 1 of Fabric" pieces, so I found it faster to just trace every piece and have the fabric fully open. No matter what, it's nice to have someone else here sewing.
-
I don't know if cargo shorts are canon, but seeing as you are in Arizona... What pattern did you use? Looks good, can't wait to see the finished product.
-
Looking at that picture, the hard part is already done. Don't worry about the visor, it goes on later. Just pin the front flap on, then the back flap. That is Fig. 15-17 in the instructions. Sew that on with a 5/8" seam allowance. I always sew those on before I attach the visor. I like having the hat close to what it's going to look like, before I attach it. The visor foes on over the front, just lay it on top of the front. Sew it on. Pull all the flaps down along the seam you sewed to connect everything. That should get you to step 19.
Like I said, things are a bit hectic here, but I will get to picture of a hat soon. I'll probably just end up doing a full build thread on it.
-
That is the single most annoying part of this pattern. The crown is not the size it needs to be; it is way larger. You want to start pining (right side to right side) at the very front of the hat to about the 1/3 mark. Then do the other side, moving from the front along the other side. I normally pin the back middle and work my way around. THERE WILL BE EXTRA FABRIC ON THE TOP. It erked to no end, but when you are dealing with multiple head sizes, or fabric that may well be streaky, it's needed.
But that's step 10... and you said you were up to 14. Maybe if you posted a picture of what you have done, it would be better than for me to try and guess what you are asking.
I have a few hats to make, I will try and get to it soon, and take some pictures for you. I would just throw one together, but that involved pressing interfacing, and that is time consuming. I will try and get to it in the next couple of days.
-
2 questions, First: What exactly are you having problems with? and second, who's pattern are you using? I am VERY familiar with the pattern by Kathy VanB. I have a few hats in progress, and could throw one together to get you pictures, but I need to know what you need.
-
I have always viewed it as if you are playing a part, in costume, you are cosplaying. If you are only wearing or making a costume, then you are a costumer. But that is just my opinion, and likely to be wrong.

- Rhaethe and eugeneeyeo
-
 2
2


Imperial Officer ID Sewing Tutorial
in Costume Questions - Ask Here!
Posted
Alright. First off this is going to be a work in progress tutorial. I would say that this is a intermediate level tutorial. You should know how the machine works and be confident that you can sew a straight line, and there is NOTHING wrong with getting some cheap fabric and making a mock up. I am going to upload it in stages. This is my first tutorial, so there are likely to be loads of questions and changes. I do ask that you let me finish it before asking., It should take me a few weeks.
The pattern I am using can be found at:
http://s268.photobucket.com/user/Hawk220/library/Officer%20Pattern%20ID
This pattern fits M-XL, (slight thin to slightly over weight) for anything else, the pattern will need to be modified.
You will need:
2 1/2 yards of Fabric at 52" wide
2 1/2 yards of Lining at 52" wide
4 yards of interfacing (I use 950F Shirtailor)
I will start this tutorial just after the pieces have been cut out. All seam allowances are 1/2 inch.