

BensID39999
-
Posts
2,209 -
Joined
-
Last visited
-
Days Won
62
Content Type
Profiles
Forums
Gallery
Posts posted by BensID39999
-
-
I don't know that this one is smaller scale for sure. For 15 bucks you could find out!
-
For that price make sure they are metal, and that that is what you want. My 1:1 spring mauser was ten bucks on Ebay, you should be able to find a plastic one for around that.
-
Good luck Motti! Looking sharp!
-
If you are making your uniform, LA fashion district has great sources for fabric; i've gone there for other costumes. Most other officer stuff can be found online. You may be able to find boots to try on in the valley at equestrian stores.
-
For best results on dyeing your gray uniform black, I would buy the Rit color remover (instead of bleach) follow the washing machine instructions, and then buy the Rit black, and do it all in the washing machine including the hat. You will then have it as even as it possibly can get. If it doesn't come out right, well, then there's cosplaysky or amazon. Good luck, and document your experience for the forum! Inquiring minds want to know!
-
hand dying is an option, however, dying hat to exactly same shade at same time would be difficult. I have dyed grey material a olive drab of sorts using rit dye dark green. It was linen however and took the dye well. I also worry about your lining not taking or ever drying/washing out. You may risk ruining garment but could come out nice if carefully executed....
-
-
-
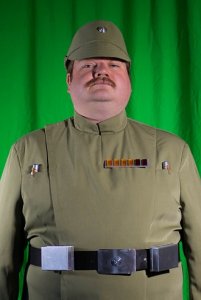
Here is my Deluxe Olive Line Officer from them. Order extra fabric and have someone else on here make your hat. Their pants always need tweaking in my opinion but when it's all said and done this is a tailored, matching uniform for less than $300. Here's mine:
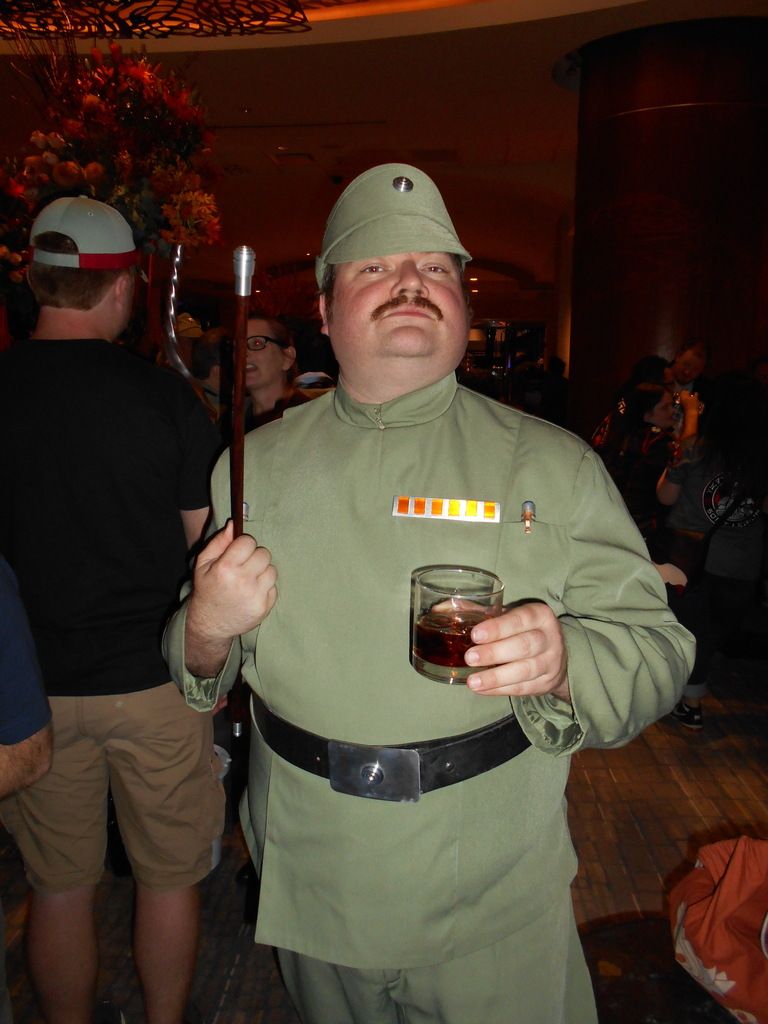
It DOES look more green in sunlight and in person. It's not the best out there, but it is my best suit and i'm very pleased with how it turned out.
-
Phil do you own Tarkin's Pants?! lol
-
Usually gabardine is a poly/cotton blend. I would stick around the 60/40 range. Besides being too shiny, you will sweat in OC! Take it back (or keep it for another project) and look for a blend. Gabardine is really supposed to be wool, but not many do it in these parts of the country, but definitely you want a greater amount of cotton to poly for the look and cooler feel. I have had better luck with Hancock Fabrics than Joanns if you have one in your town.
-
Looking good Bobby, good luck!
-
Looking sharp mate, good luck!
-
-
I've had swords, blasters, replica weapons like flintlock pistols to prop blades and armor in my checked luggage with no problems, as long as it was domestic travel. Overseas, i'd check with destination countries beforehand.
-
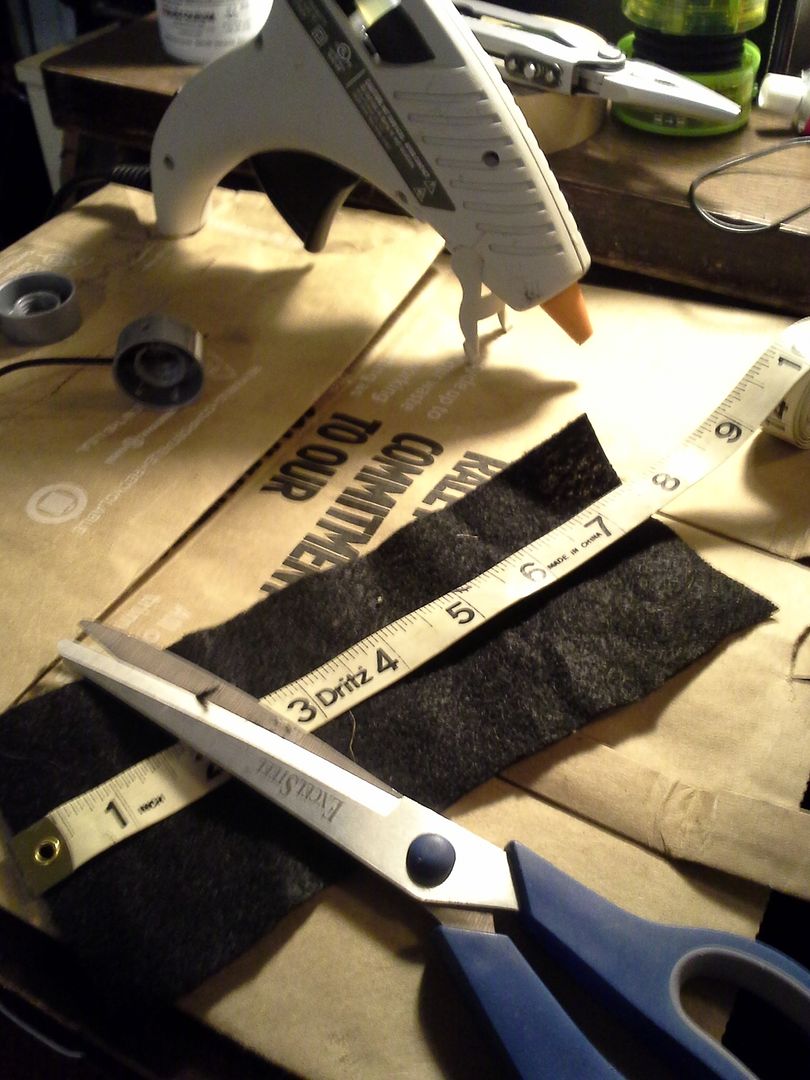
Okay, these are version 2.0, redone and much better fitting. Basically took them apart and made a much longer top piece with the same process of bending a wire hanger and painting it black. I took a closer look at ESB set photos and decided the head pads were definitely leather-like, and very rectangular, not tapered. So this time I cut 2 pieces of vinyl and glued them together instead of wonky looking felt:
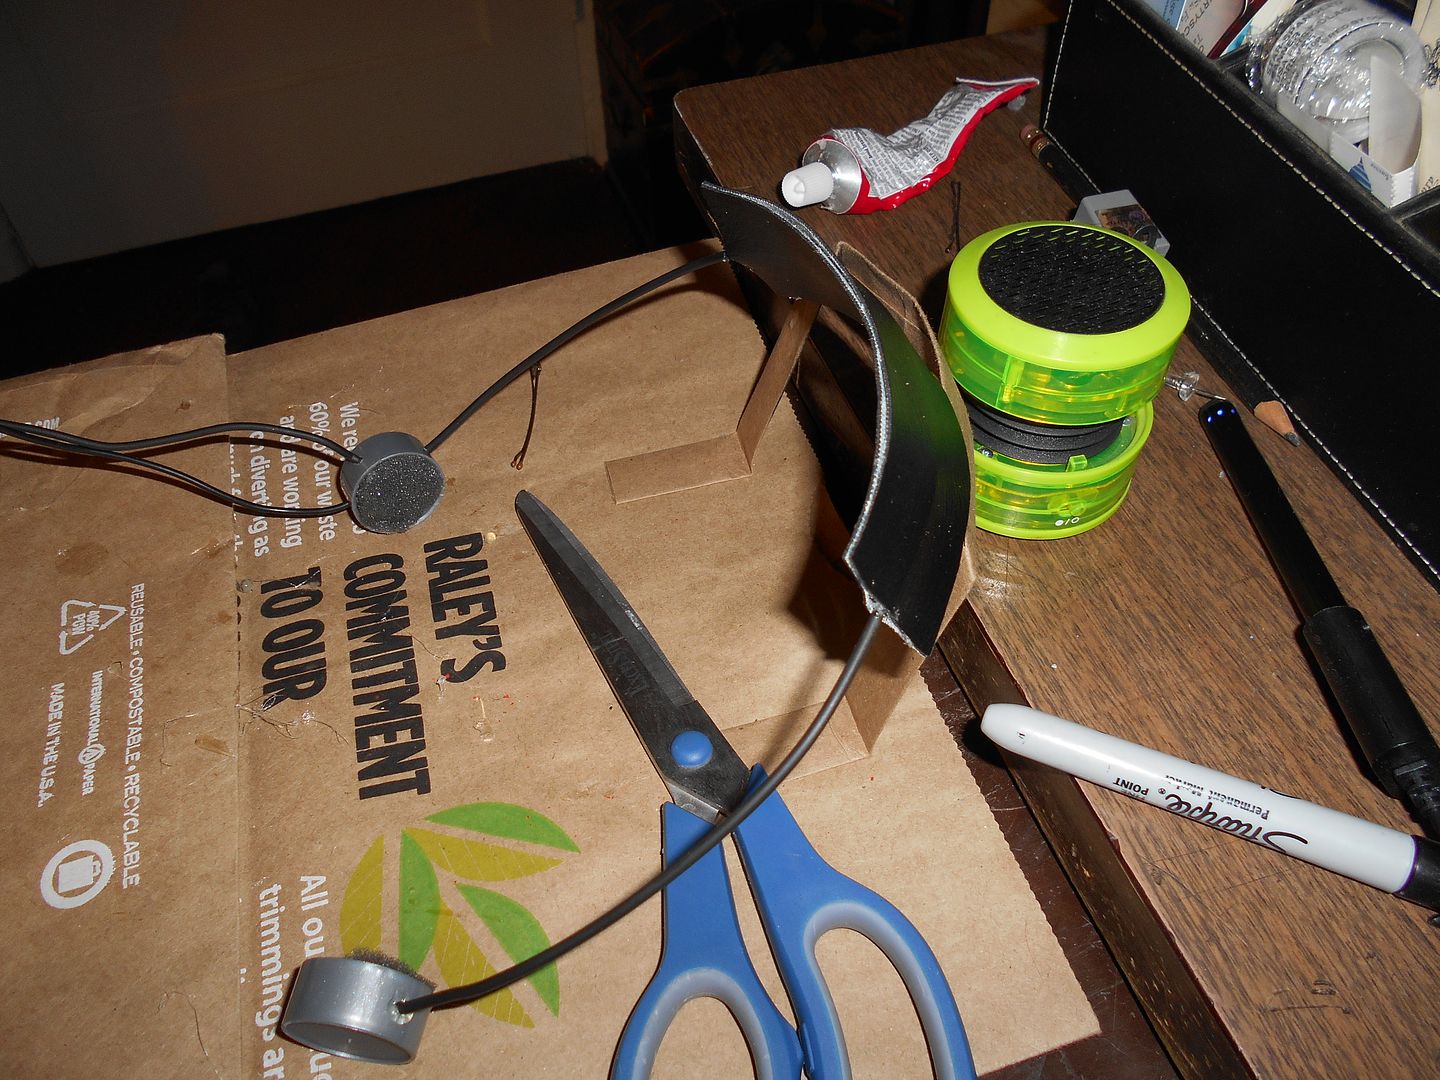
Then I used a glover's needle and hand stitched the sides of the pad for a realistic look and to disguise the vinyl
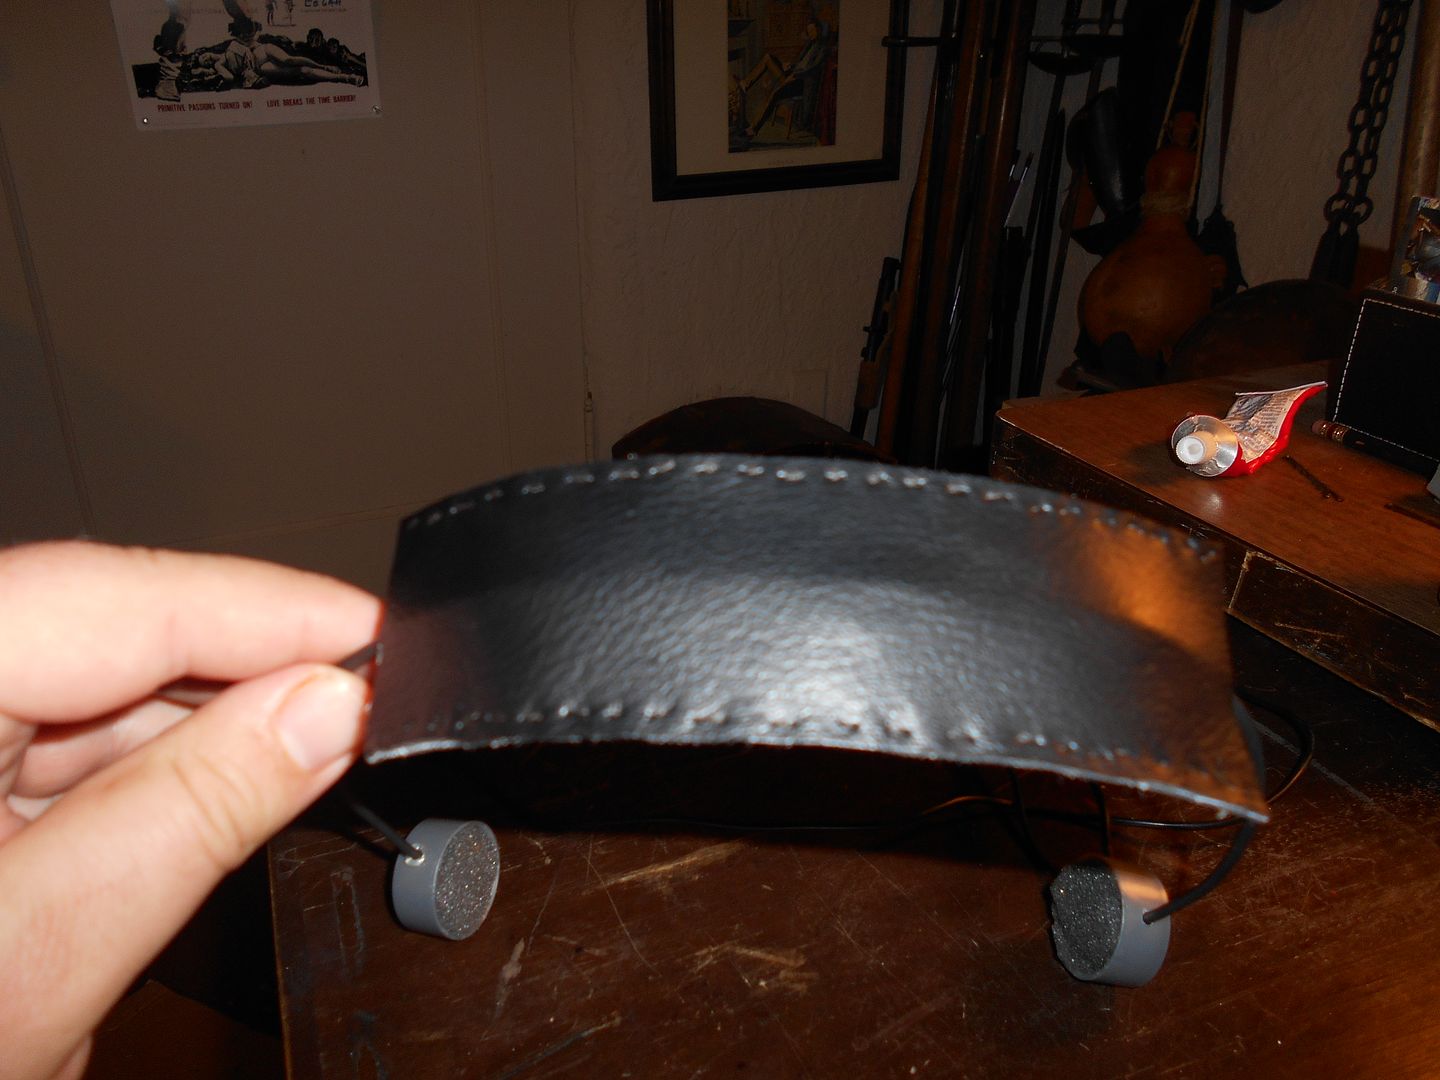
Much happier with how these look and feel! Save yourself grief folks, measure with the hat on! Here is a closeup in one of my submission pics:
-
I would avoid the site, it looks like they are a Cosplaysky copy cat. I like how they say in the description that they have updated their costume for 501st standards. That right there tells me they are a copy cat. As Hawk said, you are better going to cosplaysky and getting theirs.
EXACTLY my opinion. Evasive maneuvers!
-
revamped mine to be longer, bloody big gourd! more pics soonish....
-
Do we have anyone that does the Episode 3 officer even? I know there's no CRL, and I saw a few build threads awhile ago, did anyone complete one?
-
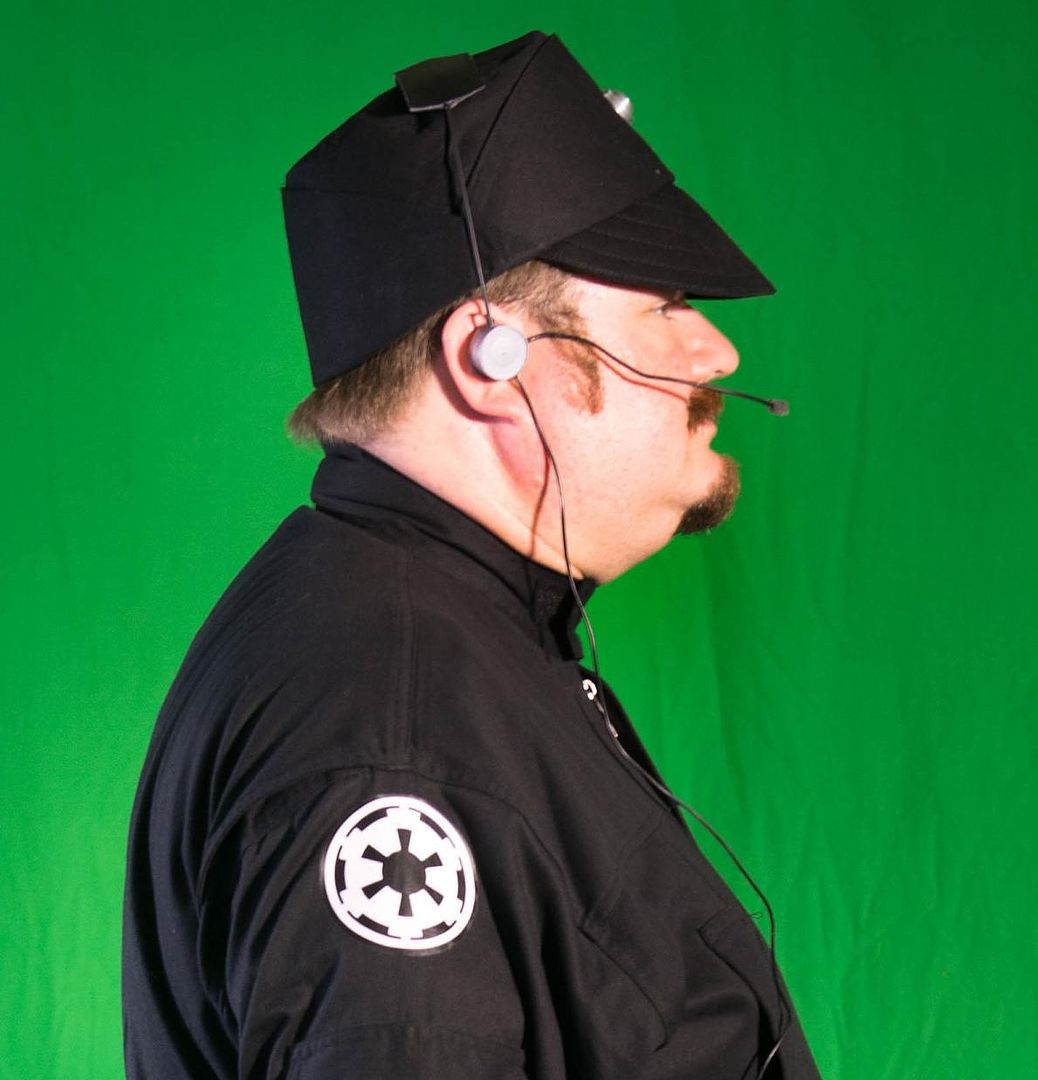
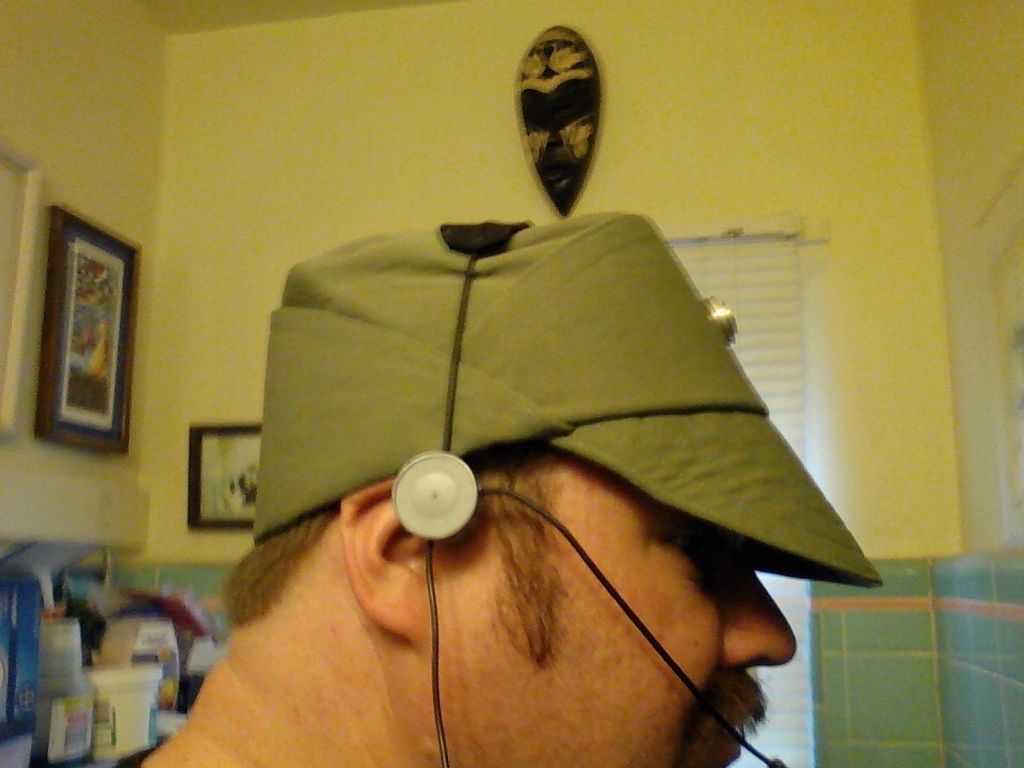
Thanks. Yeah, trial and error, when I measured the first time I forgot to have the hat on! They sit a little better now, but if you look at screen shots, alot of the crewman have them just above the ears. Also, i'm deaf enough as it is, I didn't want them covered completely!
-
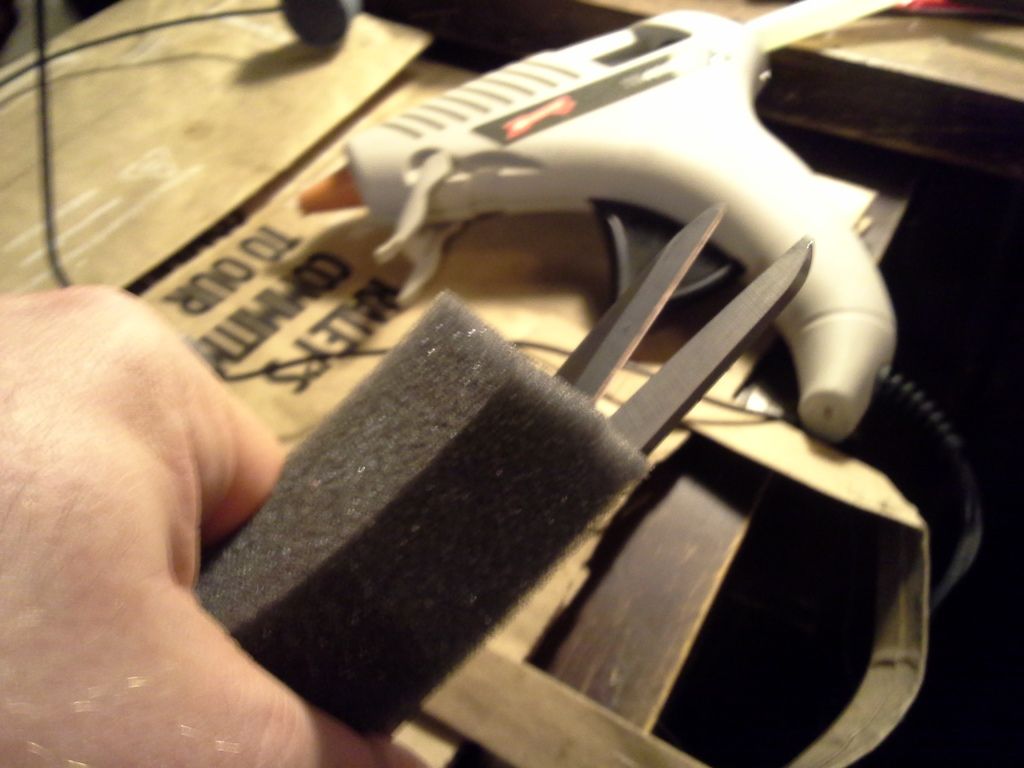
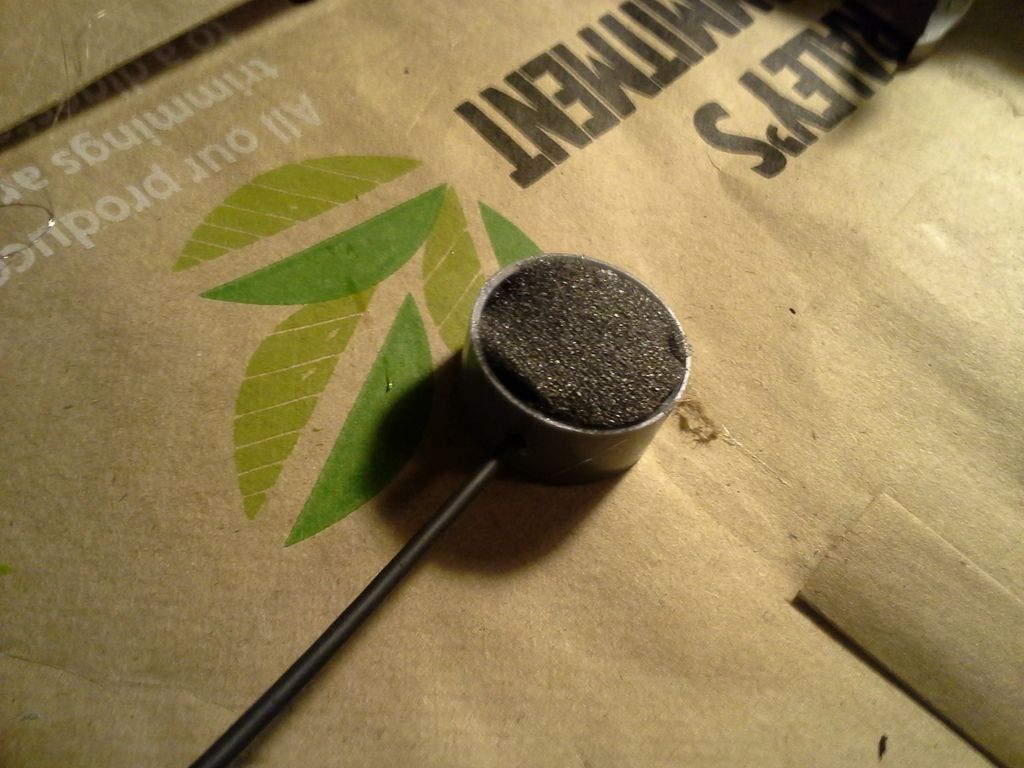
Lastly, cut a thin strip of foam for a mic tip, add a small bead of hot glue, and wrap around boom. Be careful not to burn yourself like I did.
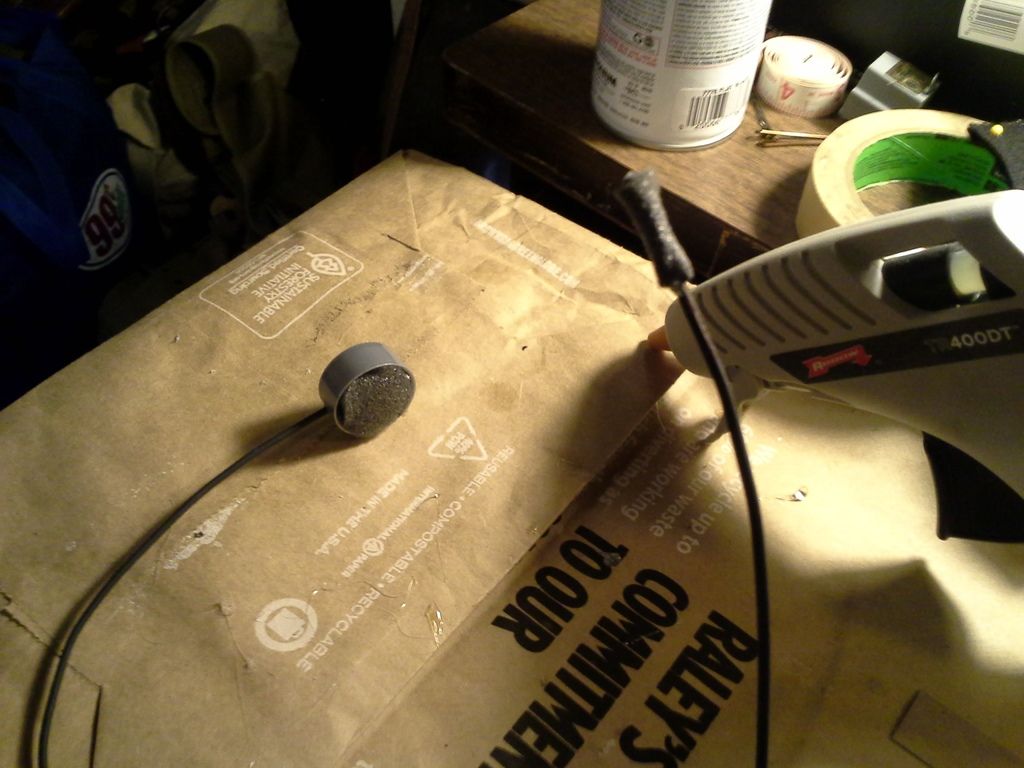
I used shoe goo to glue the felt pieces around my headset wire. Let dry and voila! Here is your completed headset! I left the clamp on the end of my wire to have a way to keep it in my jumpsuit pocket, I glued the wire end into the hole at the bottom of earpiece
Here are some selfies, better pics to come!
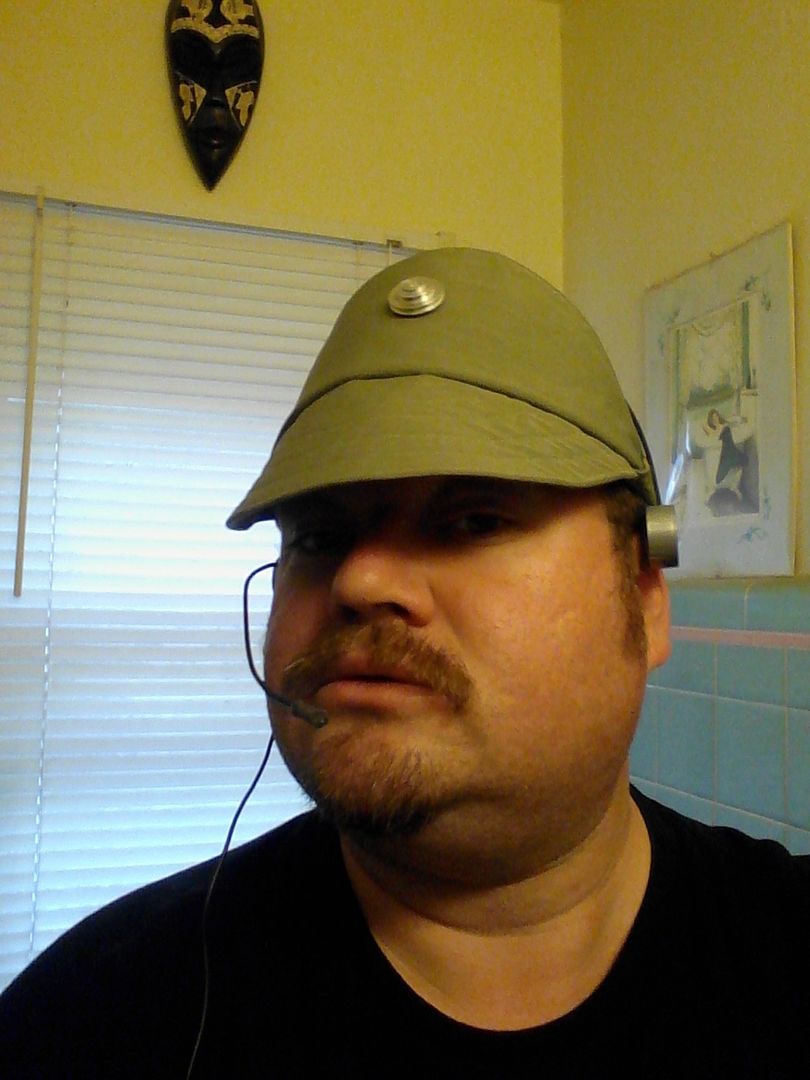
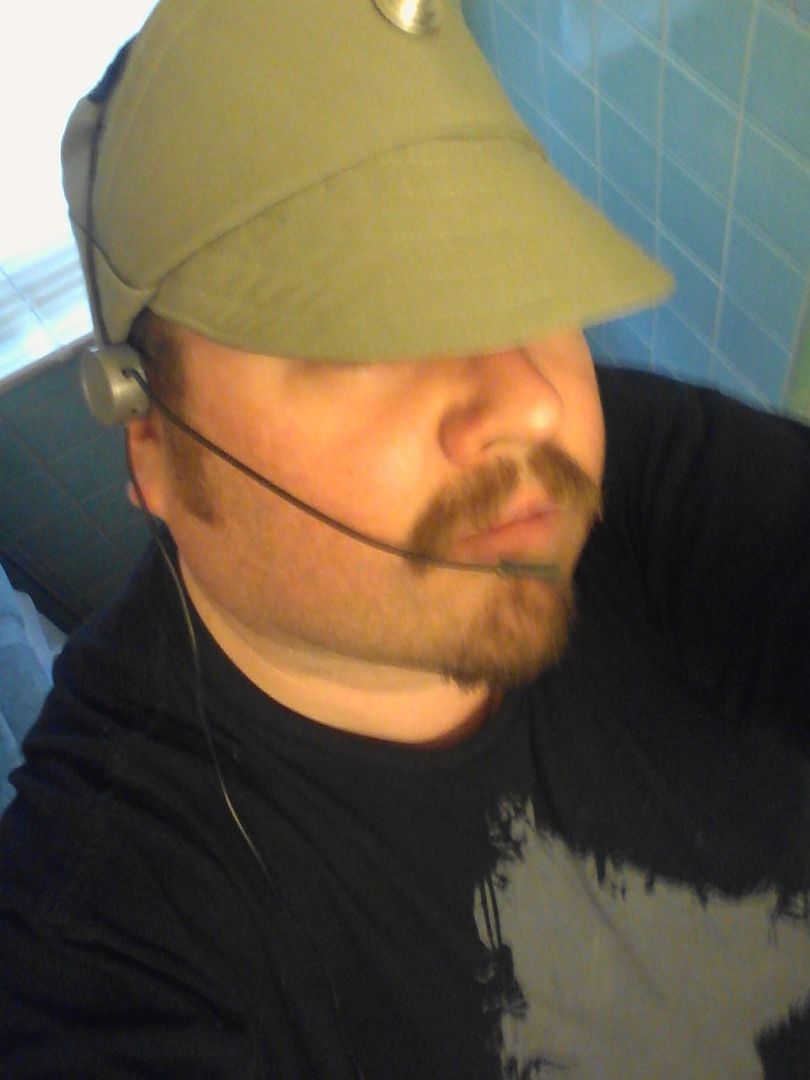
Hope this tutorial helps you to build your own! Good luck and have fun!
- Warhapper, TK1571, jehoshabeath and 4 others
-
 7
7
-
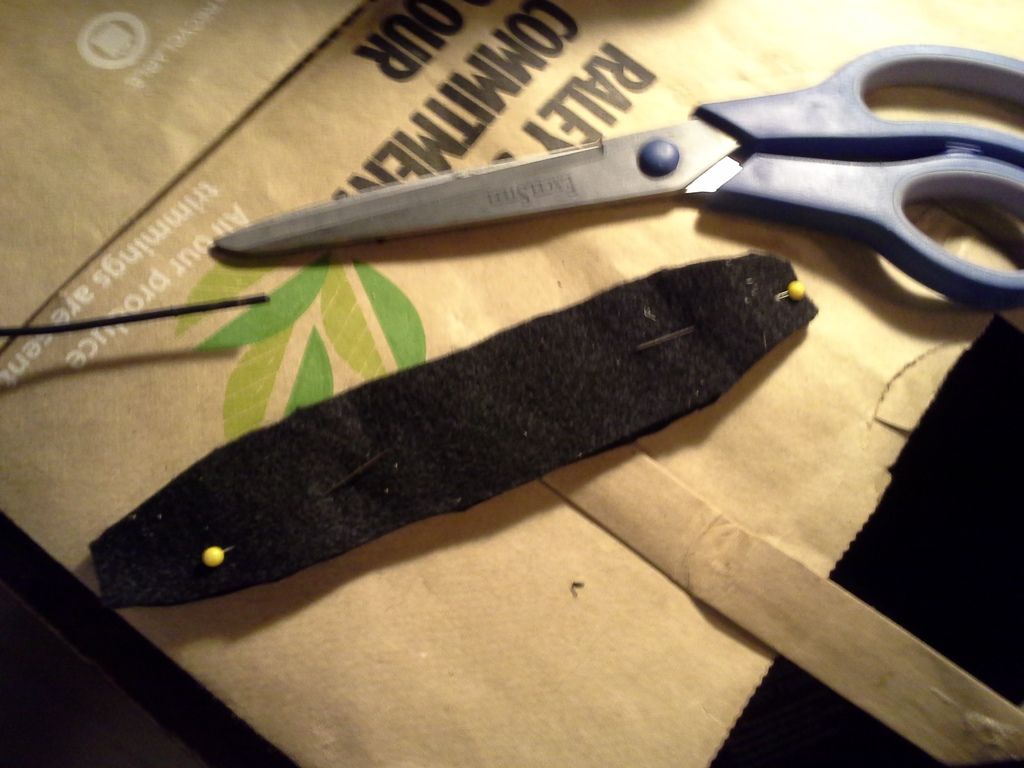
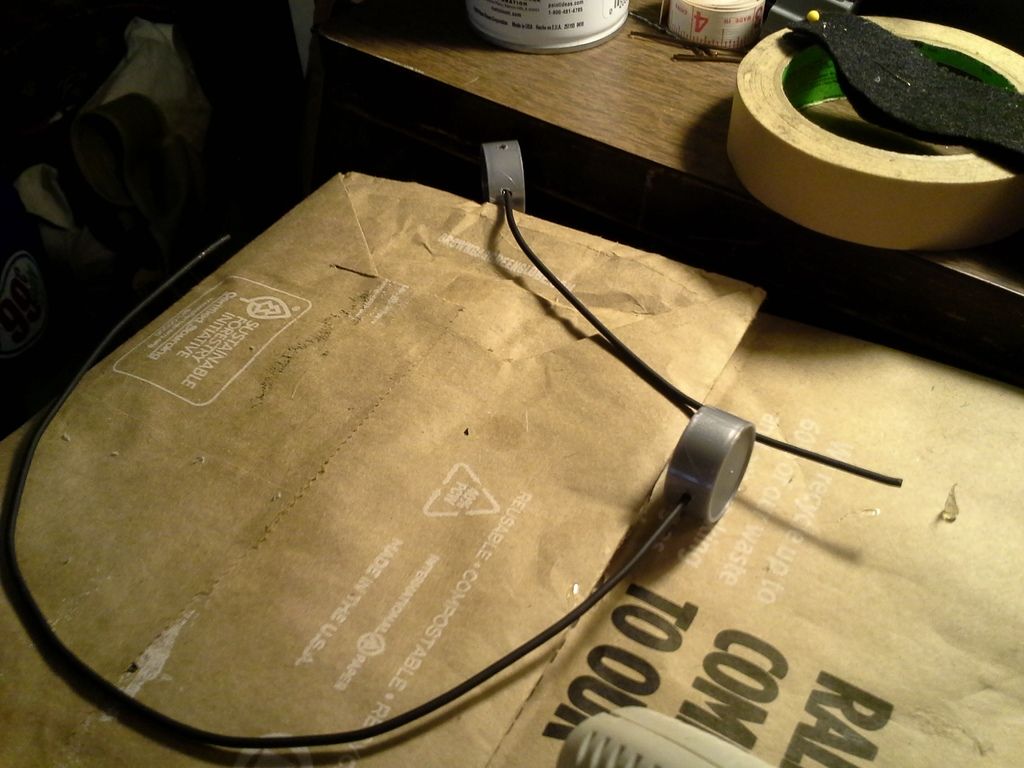
while that dries solid, I take a piece of black felt I had laying around (these are 99 cents a piece in craft stores) I measure and cut into two pieces
Next, I hot glue right earpiece to headset and let dry
I drilled my holes on right earpiece so that boom weaves behind headpiece. Don't be shy with hot glue!
Now is time to cut foam strip
cut a 1/2 inch square off end, then round corners
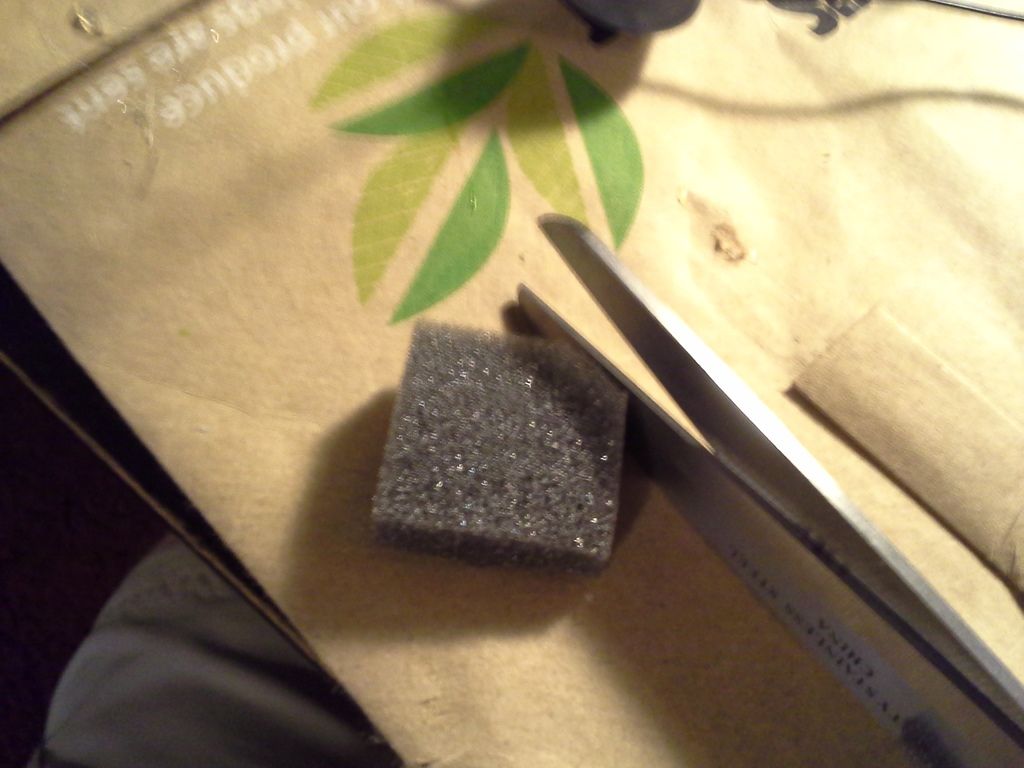
set in earpiece with plenty of hot glue
-
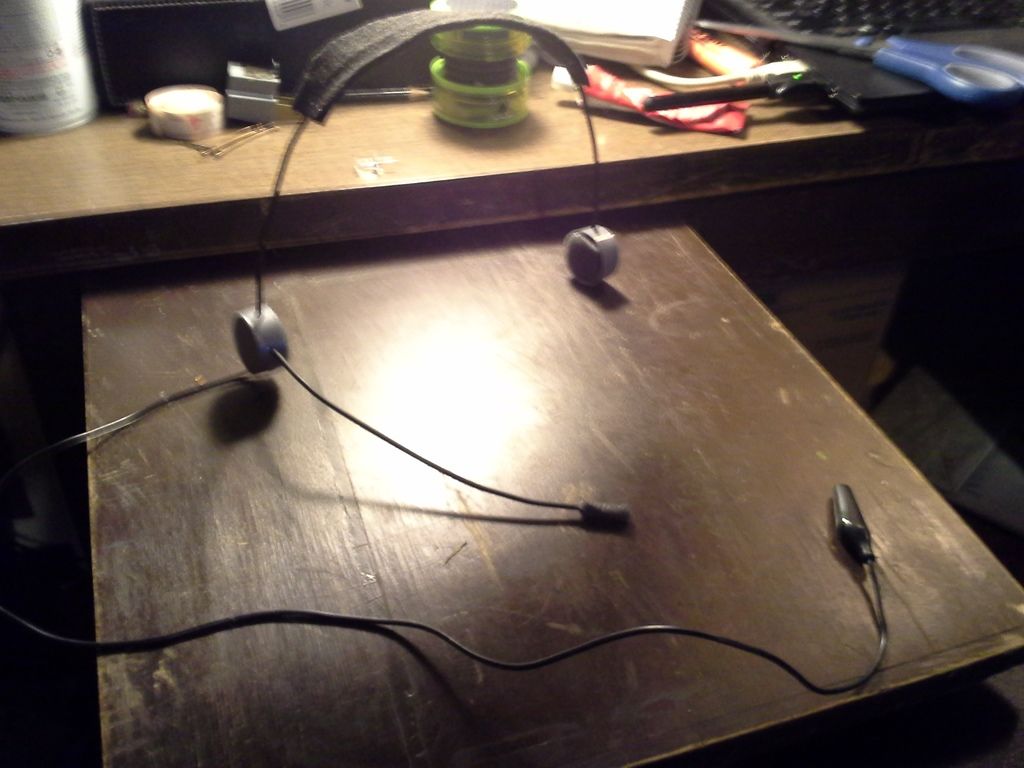
Hello Crewman! Want a headset for that ESB look and don't know where to start? It's easy if you have some basic tools, just many steps. However, got mine complete in an afternoon with mostly stuff around the house! Take a look...
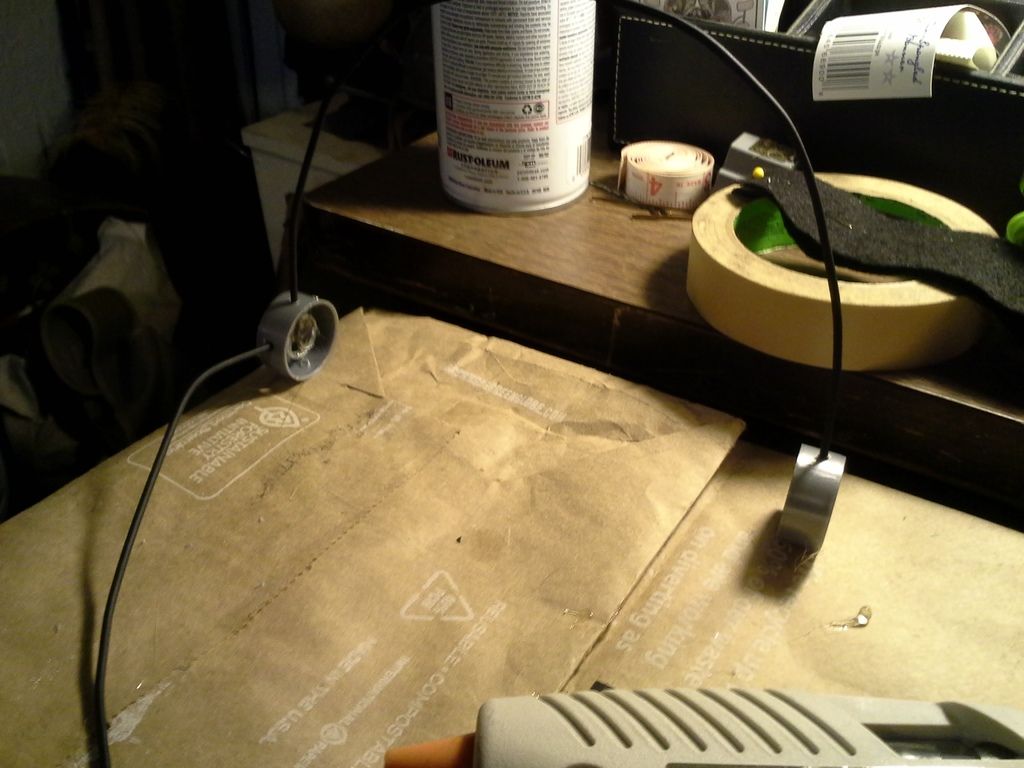
First of all, find some caps that replicate the look of the original turntable knobs used oN ESB. I went to the 99 cent store and found these curel hand lotions. Caps should be bevelled at the top, no grooves or markings on side, and these were already silver, so that saves a painting step. I had a sturdy but rusty hanger sitting around which needs to be painted black, a broken wire tester for chord, and some foam stripping for airconditioning units ($2 home depot).
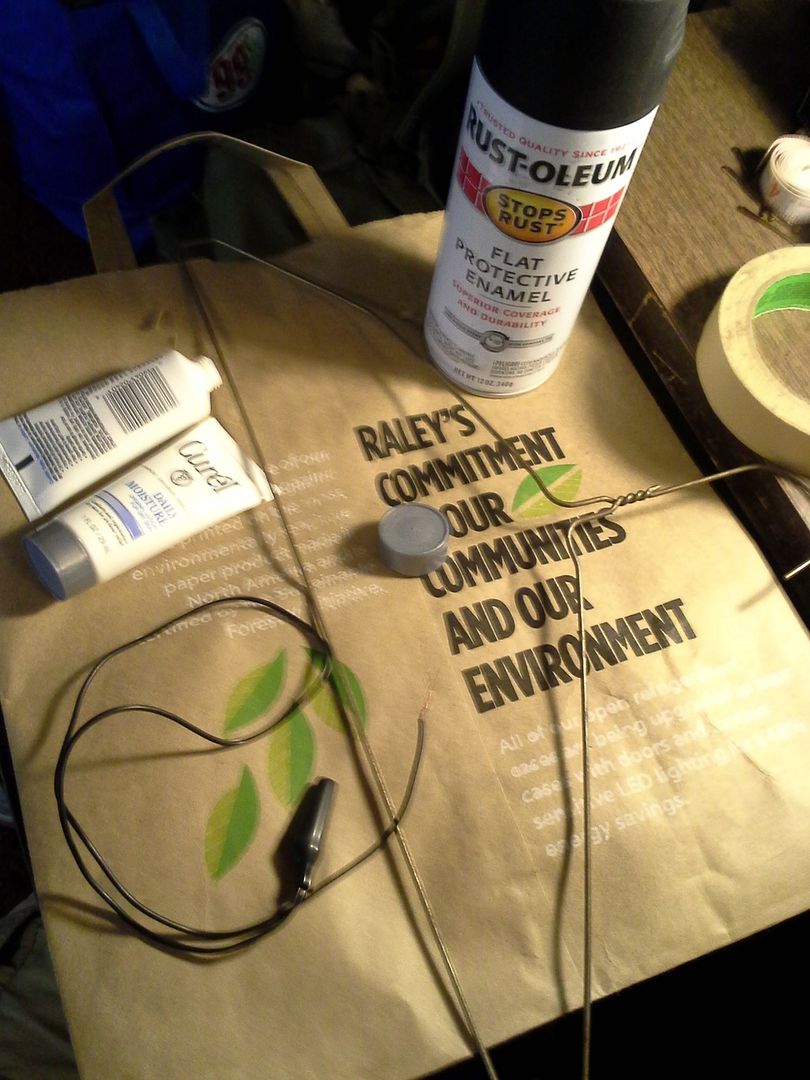
I used tape measure to measure my head over my hat, length of my main "loop" is 13 inches, about 8 inches for speaker boom. Use wire cutters or strong scissors to cut hanger, bend to the shape you want.

Spray paint both sides black
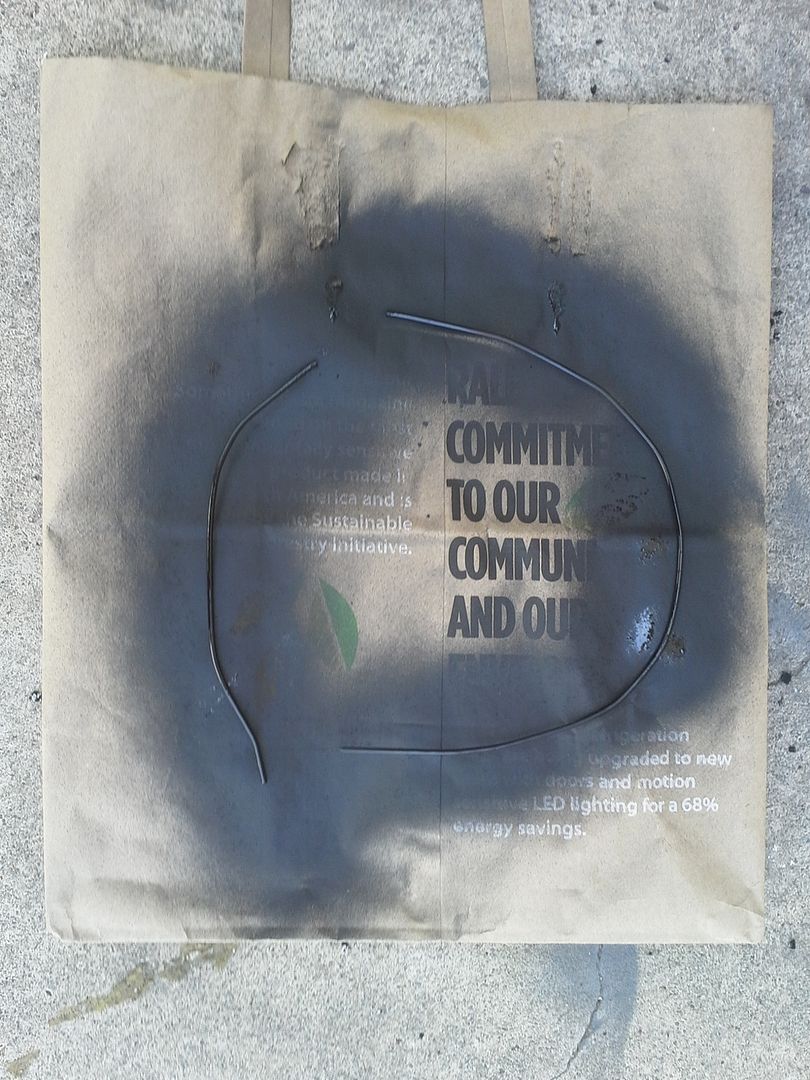
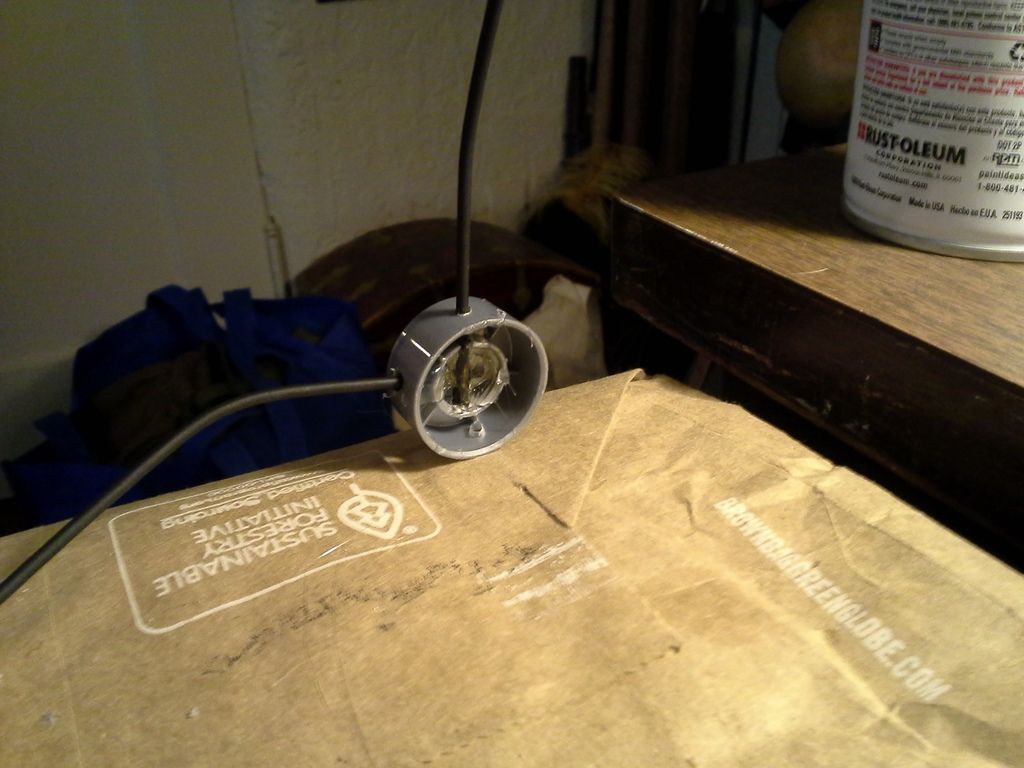
While drying, drill holes in your caps, 3 on right earpiece (headpiece, boom, wire) and one on top for left earpiece

Test your placement, make sure wire fits in snugly. My caps have this inner ring which I drilled through, which stabilize the wire nicely.
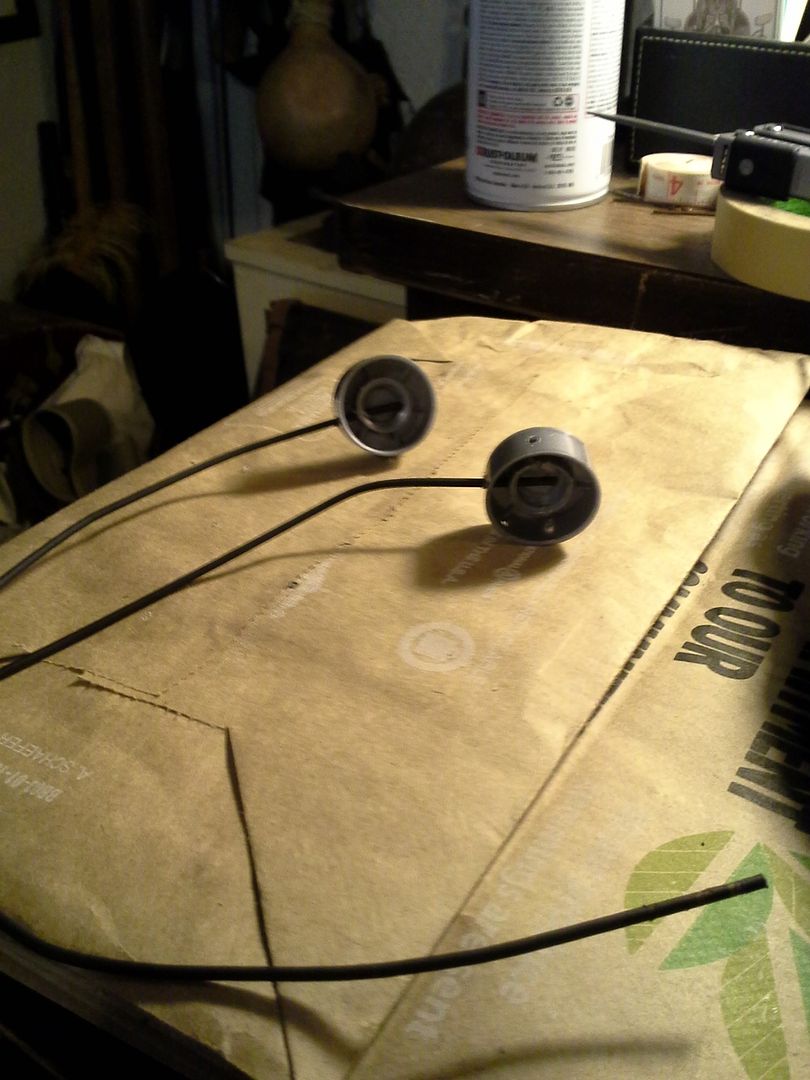
hot glue left earpiece together and boom to right earpiece seperately. Allow to firm up
-
Thanks for putting this up, VooDoo! Your vinyl patches rock, and they were easy to apply with this tutorial, took 5 minutes! Thanks again!


Anovos Imperial Officer Uniform Qs?
in Costume Questions - Ask Here!
Posted
I think he was just abbreviating storm trooper. Anovos looked great for the price, but if you want an olive uniform to start before December, I'd go Cosplaysky.