
BensID39999
-
Posts
2,209 -
Joined
-
Last visited
-
Days Won
62
Content Type
Profiles
Forums
Gallery
Posts posted by BensID39999
-
-
what's OC?
-
-
-
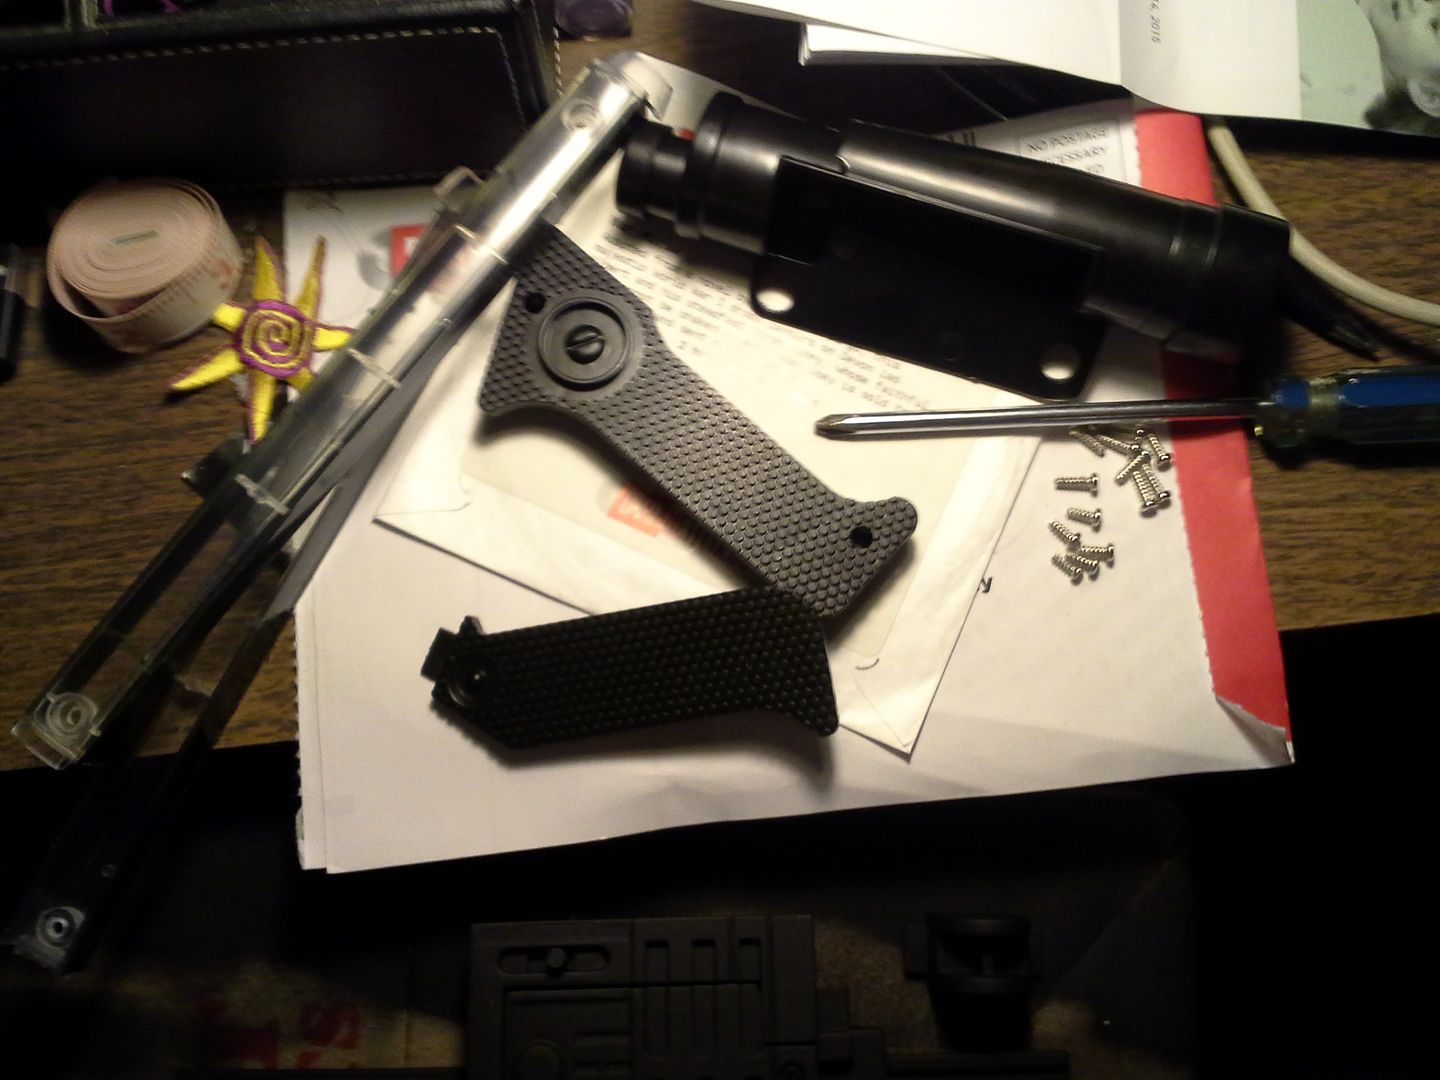
Here are the parts i'm leaving alone to the side. The grips are screwed on through one side, i've seen this done on a real handgun.
I use testors silver on the ejector and dry brush on some wear, which as you know I always love to do.
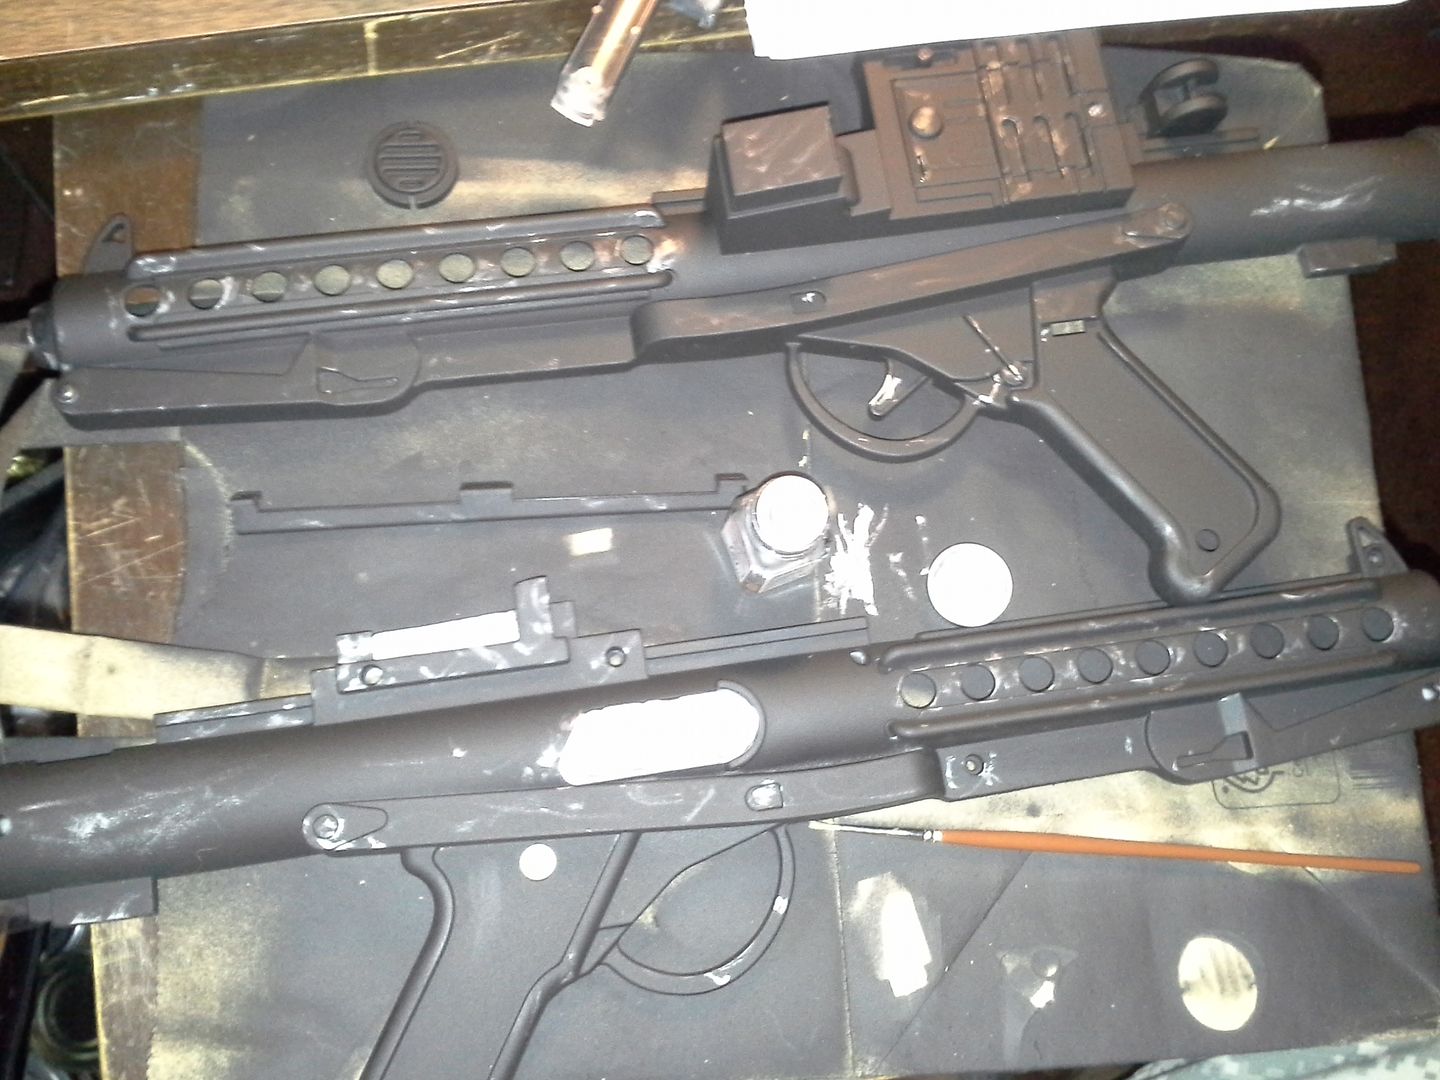
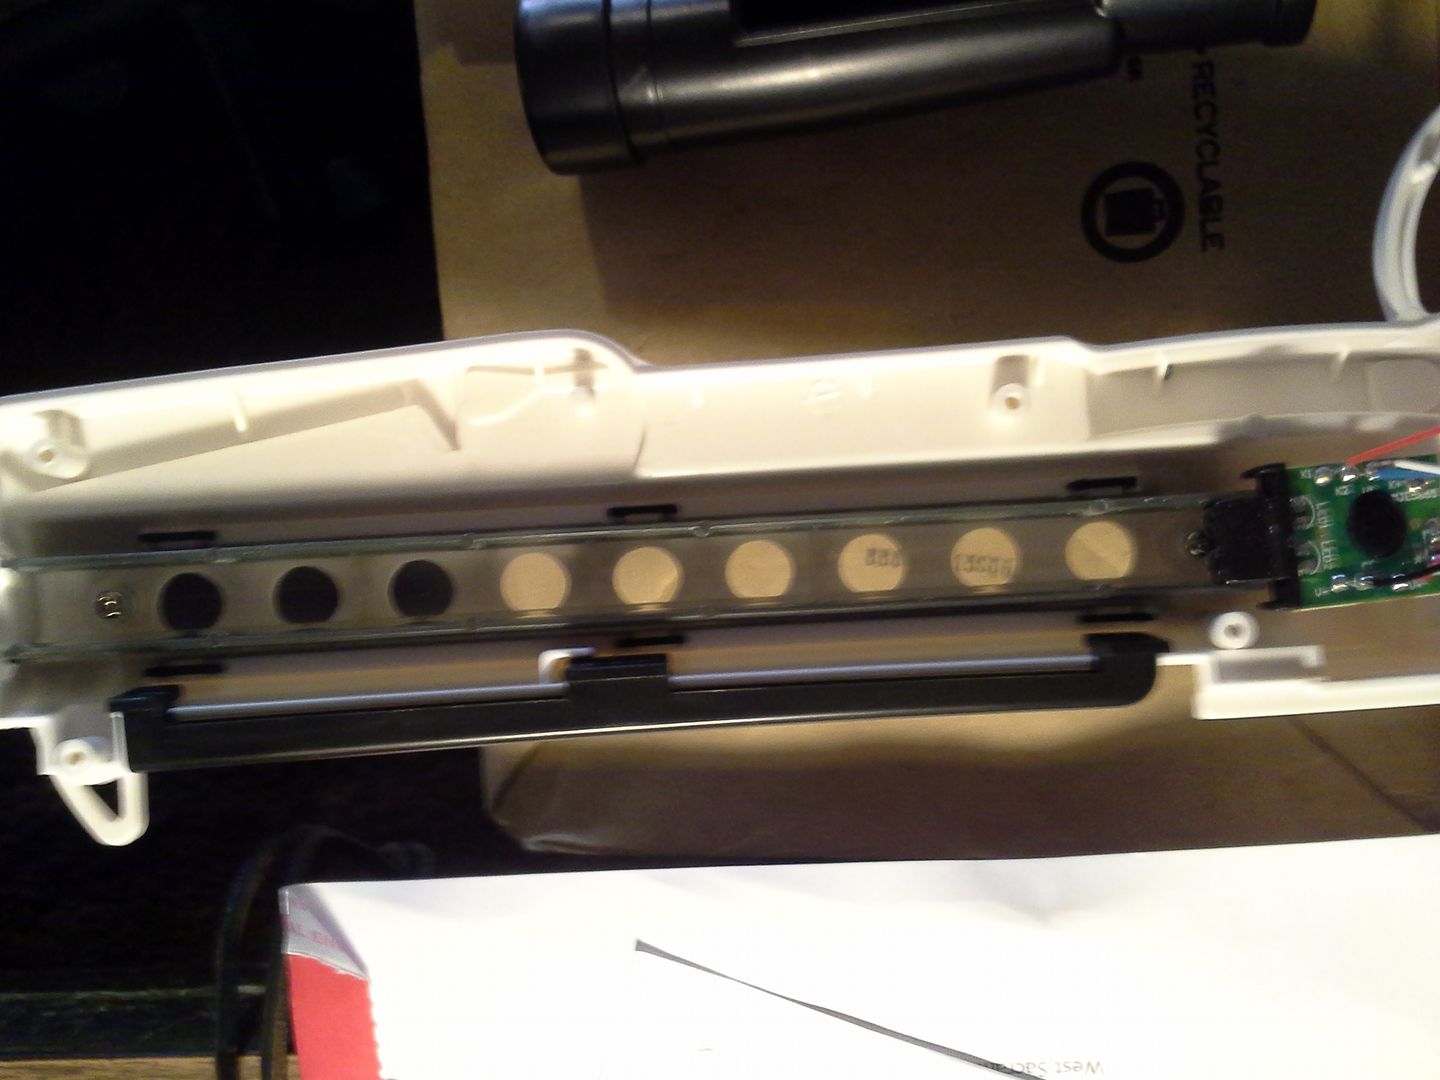
Before installing the clear light channels and reassembling the blaster, I give the finished part 2 coats of flat clear lacquer:
Reinstalling channels after it dried
Here are the LED's and trigger back in place, everything still works!
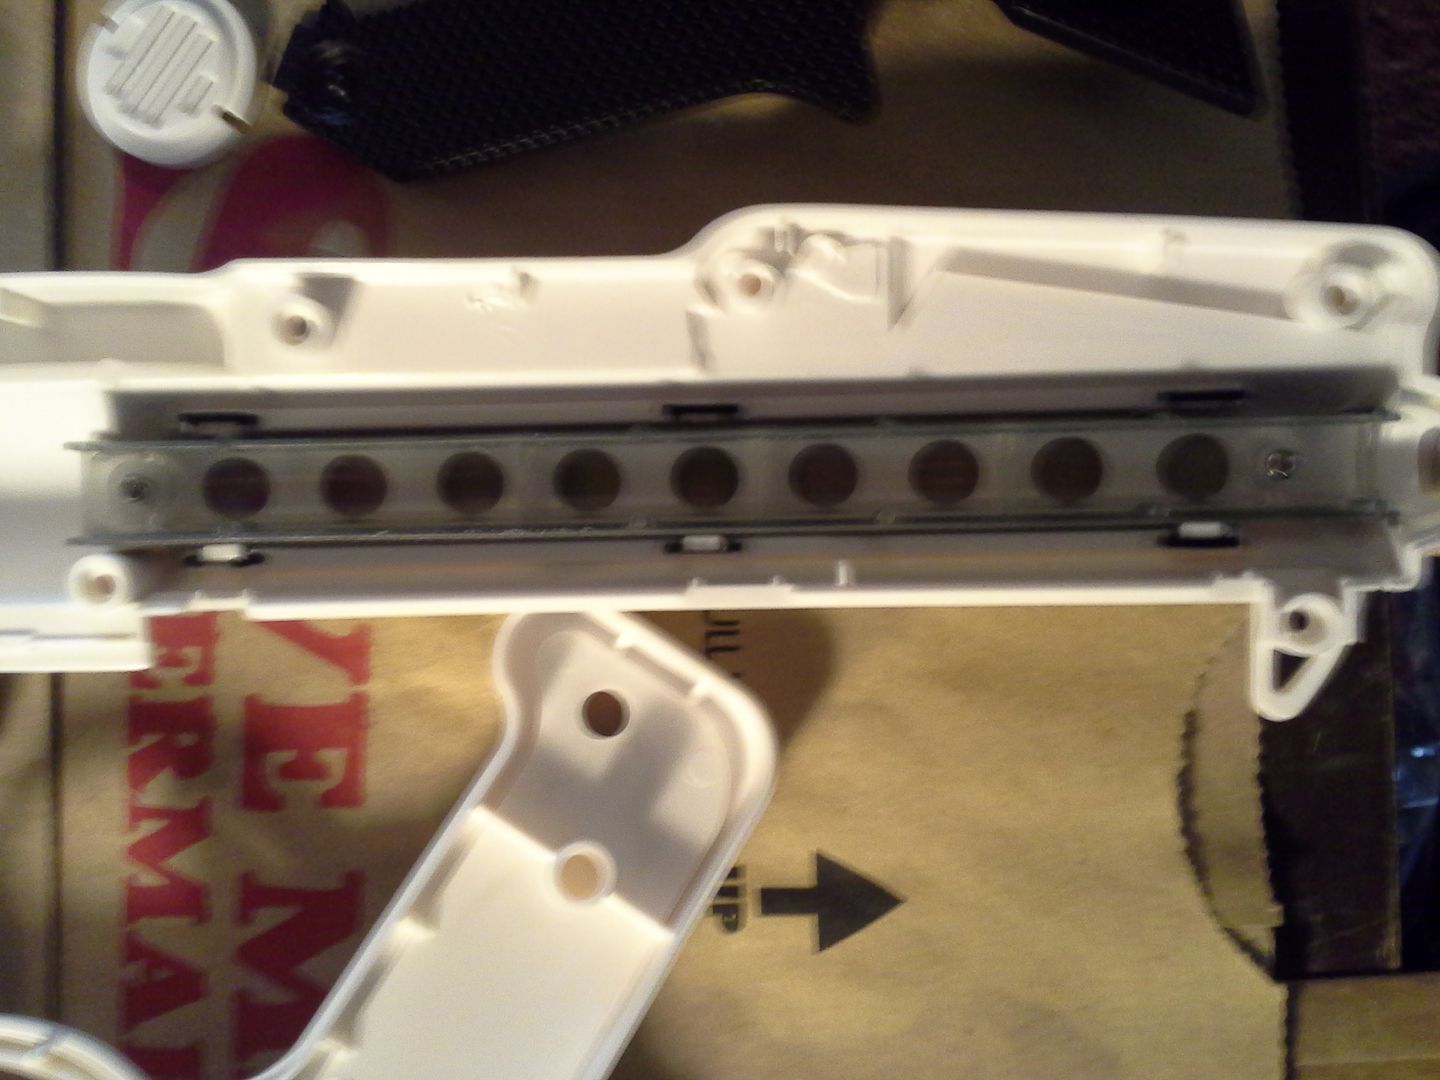
REASSEMBLED!
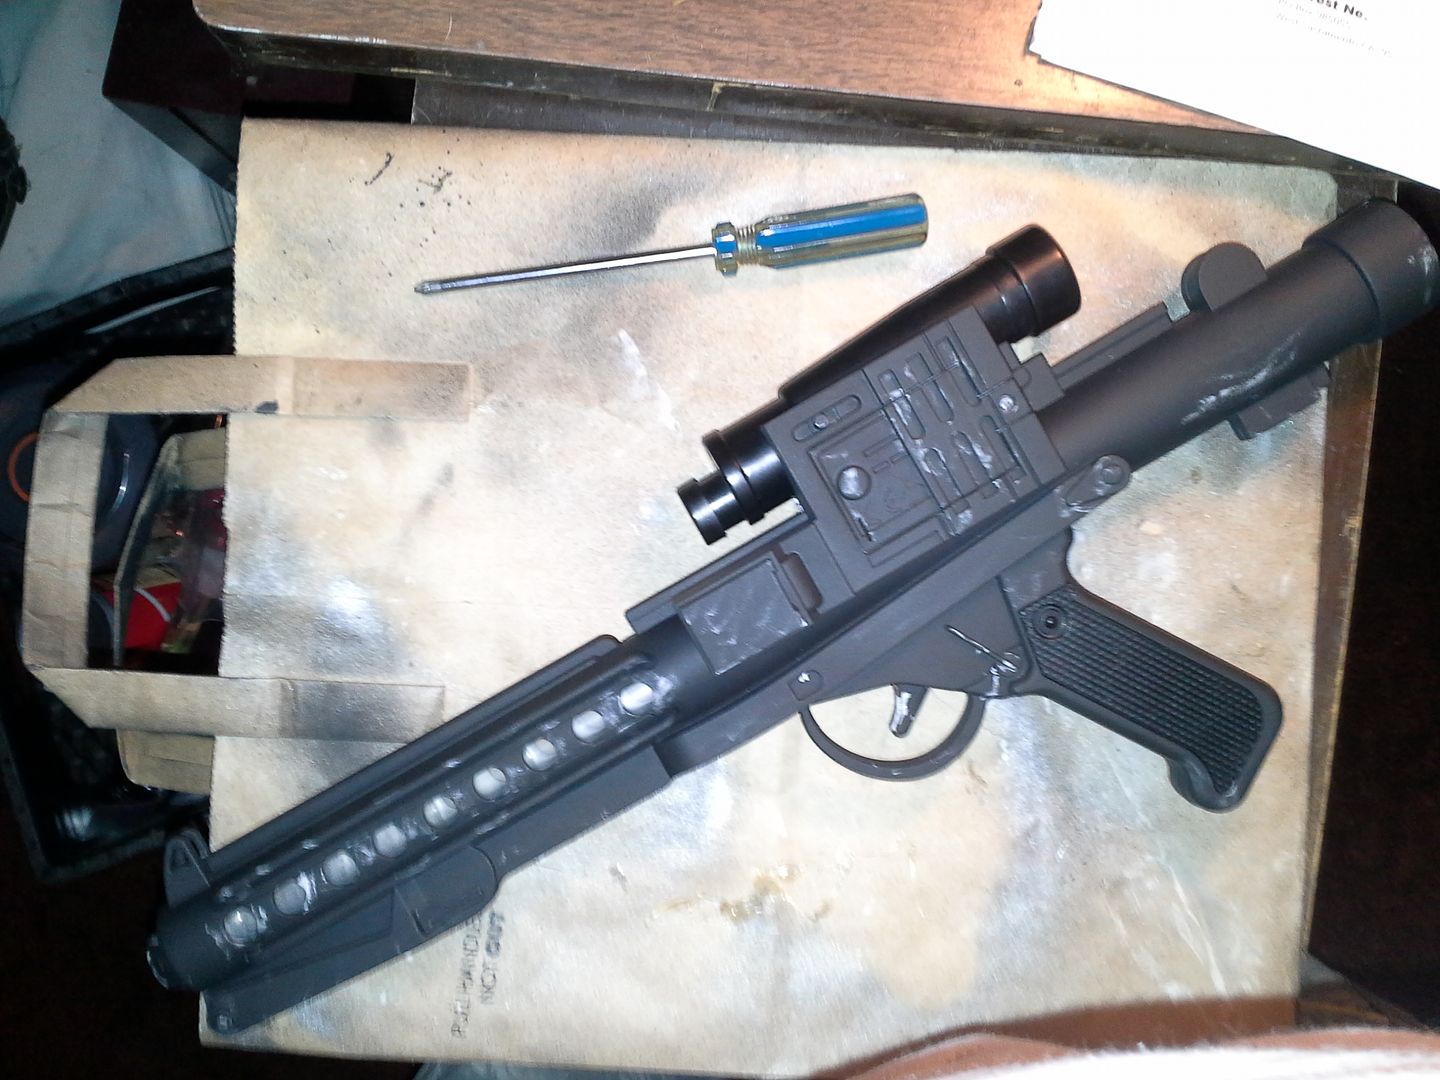
REALLY happy how this came out, now it's ready for trooping! Ironically this morning, I saw the first ebay listing with a painted gun like this for $111! LOL, or do it yourself for 25! Hope you like it, have fun out there!
- eldictator, Arch27 and Hask
-
 3
3
-
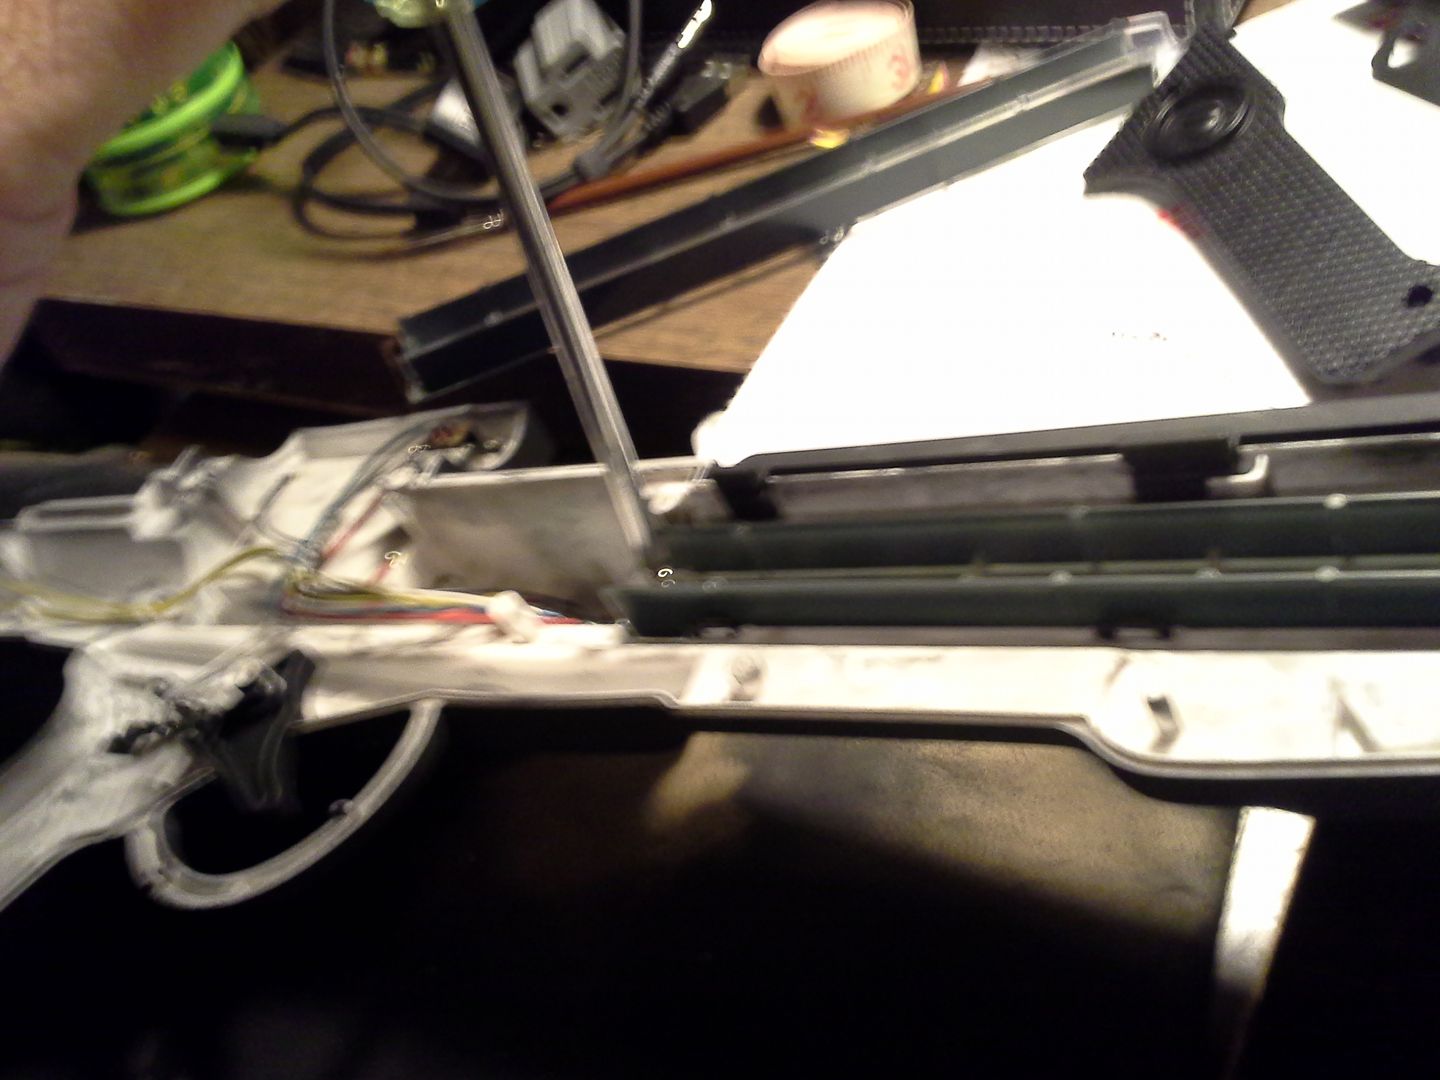
This is the light channel after being unscrewed.
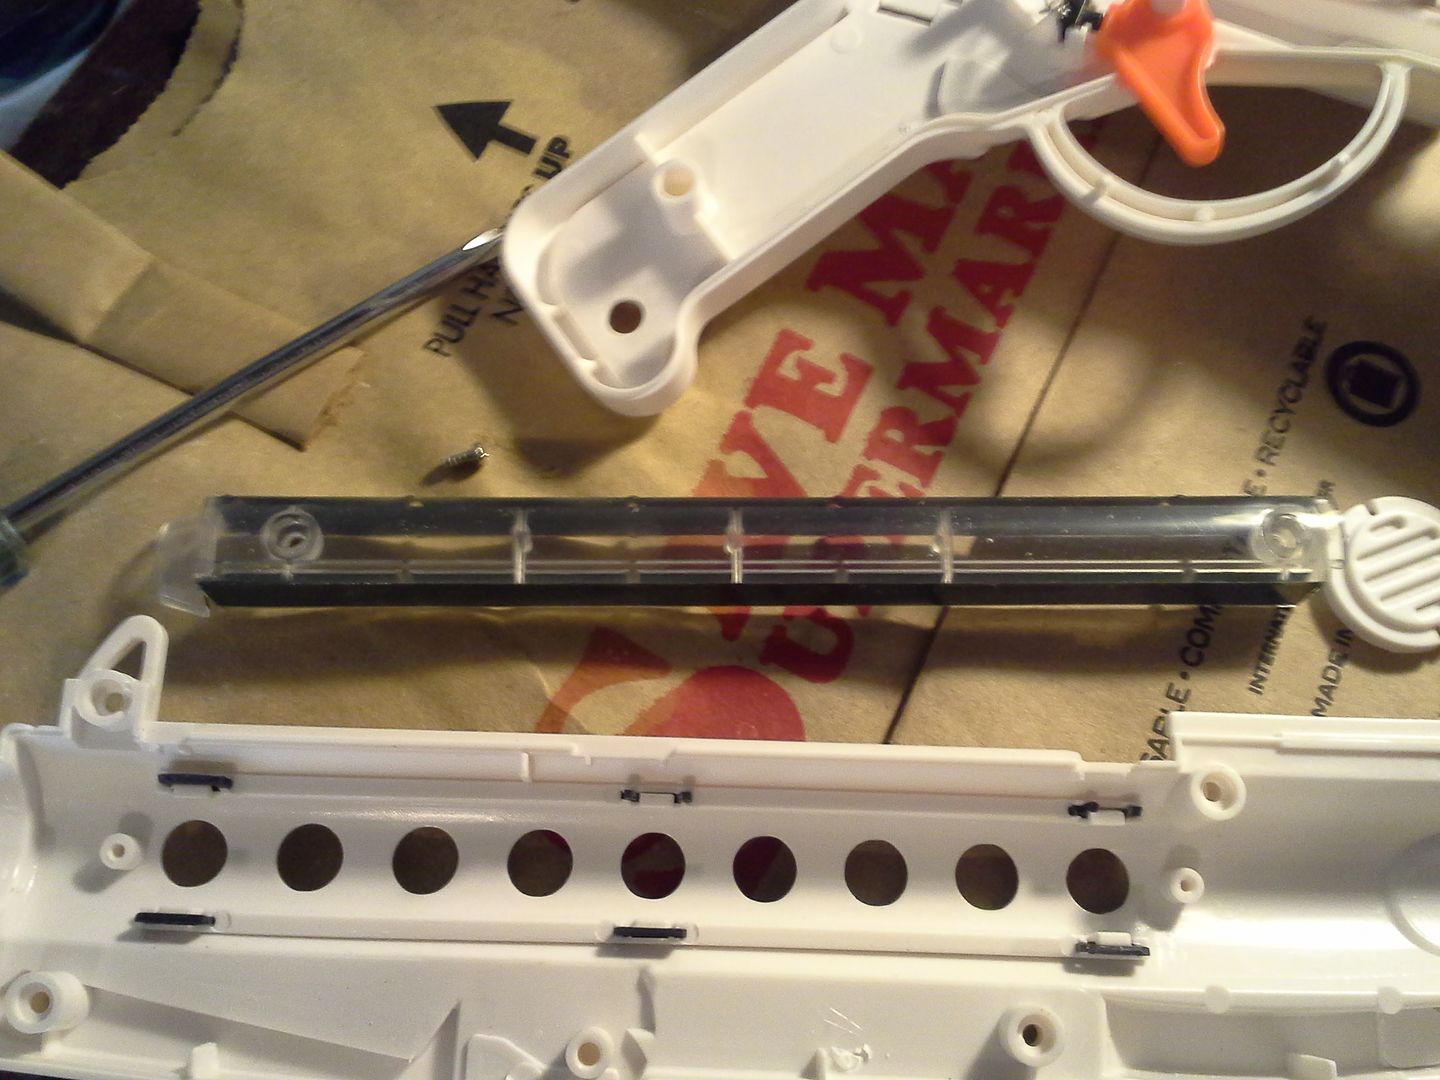

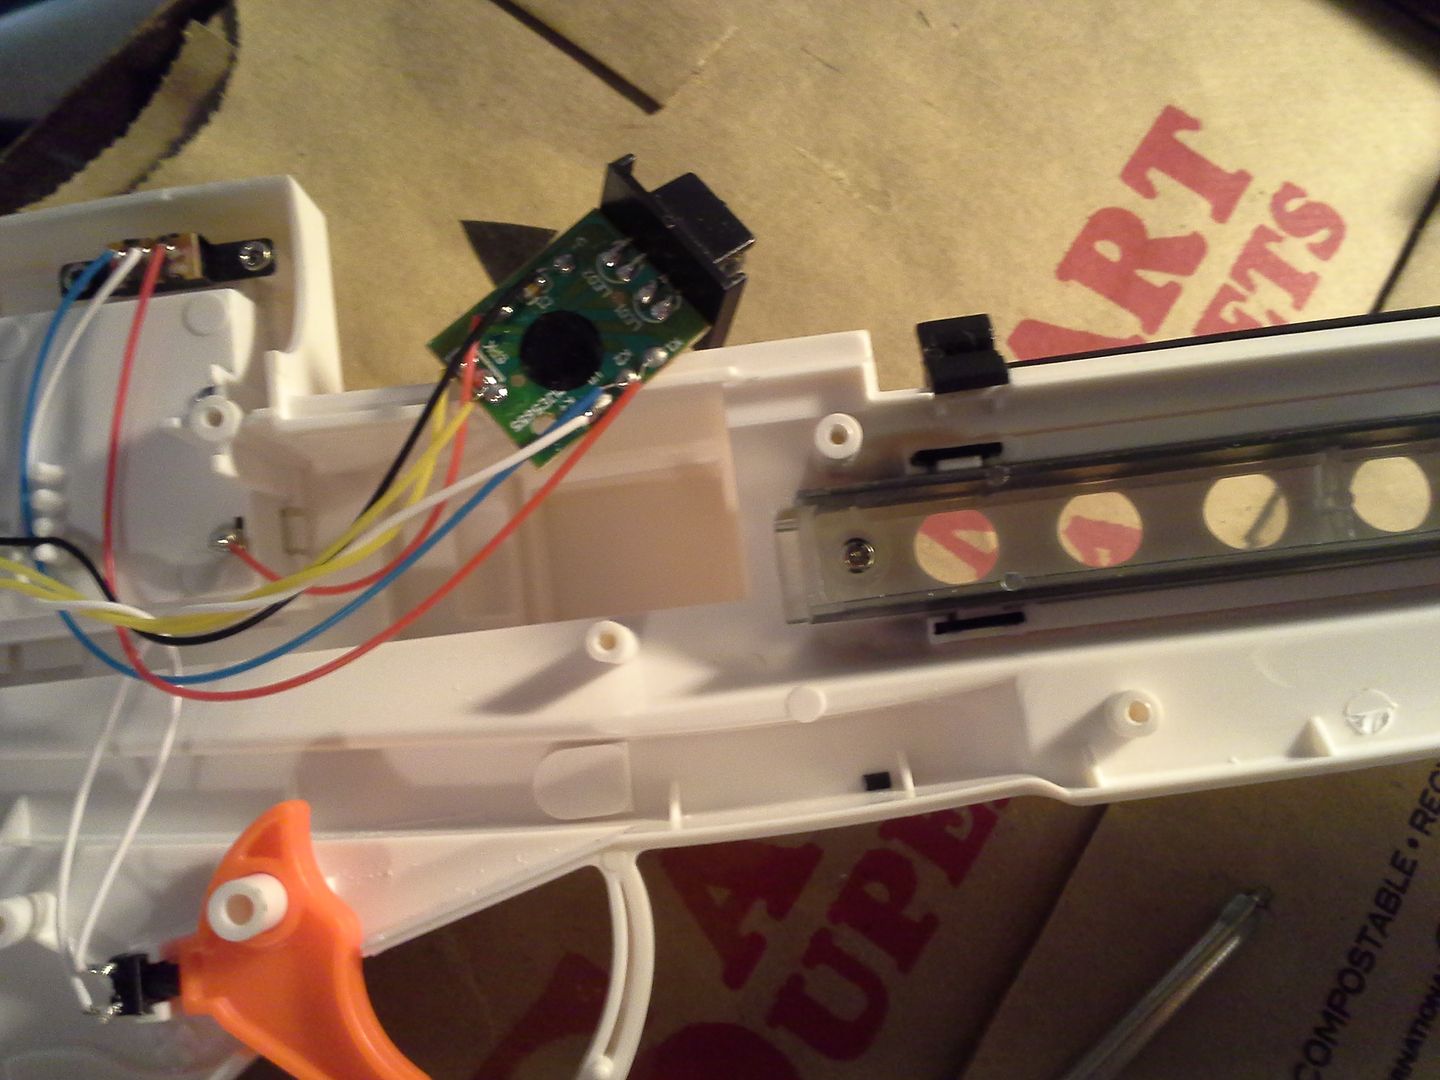
One screw through the card frees the LED's up
I push it out of the way into the cartridge space and tape it so it doesn't get paint on it
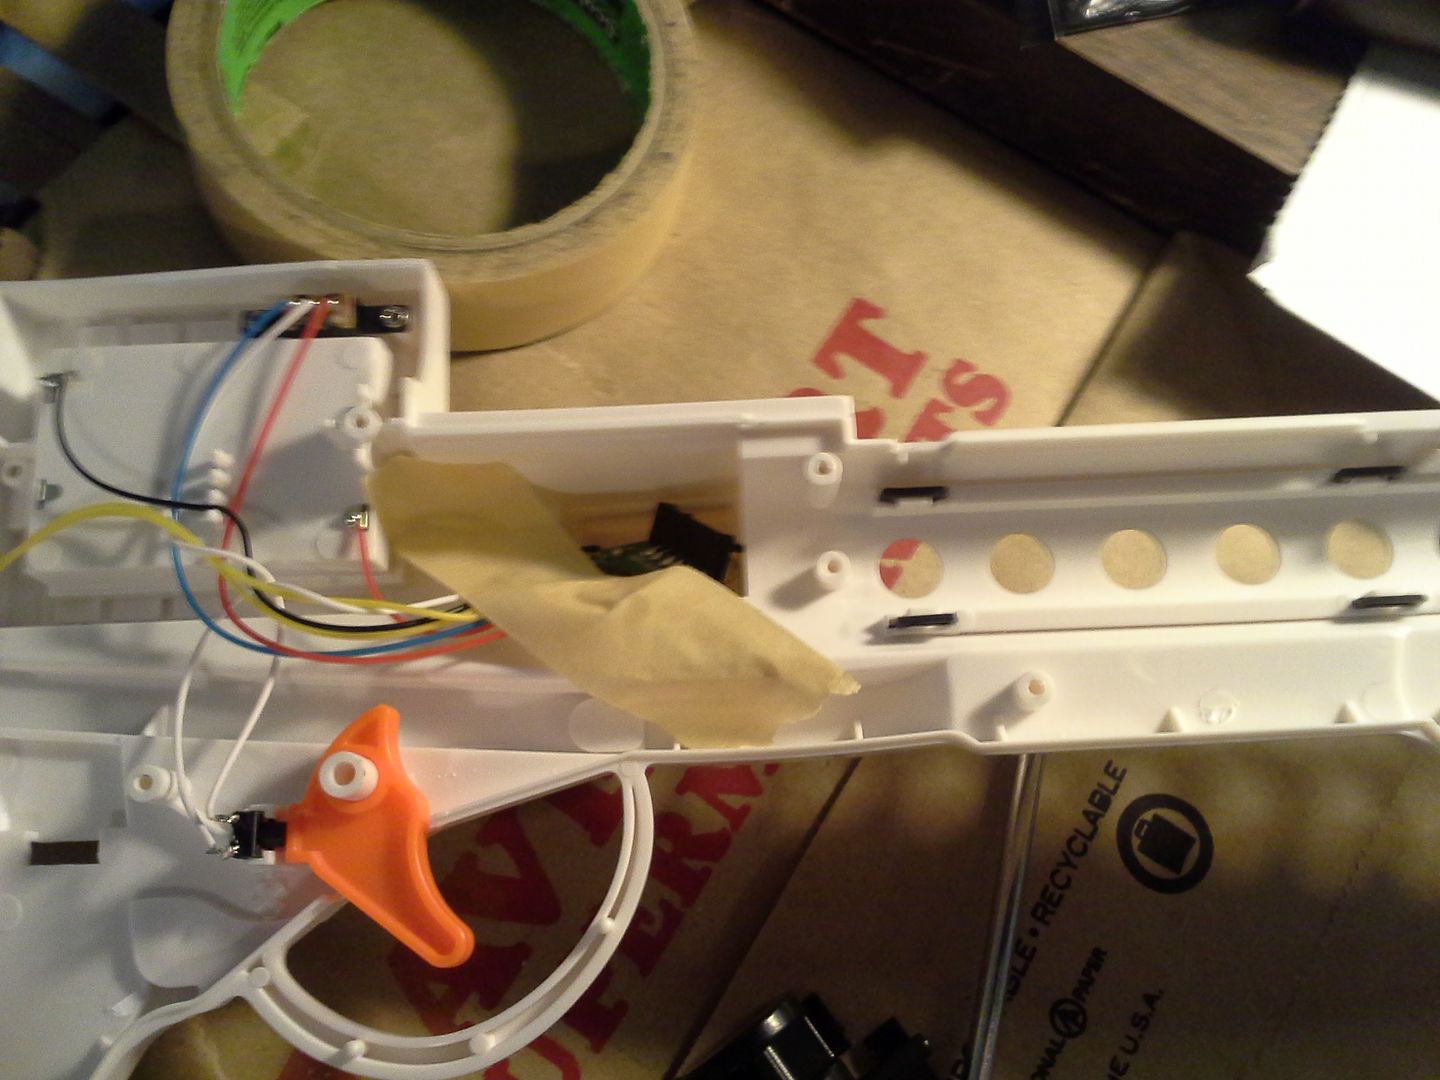
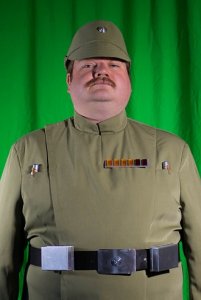
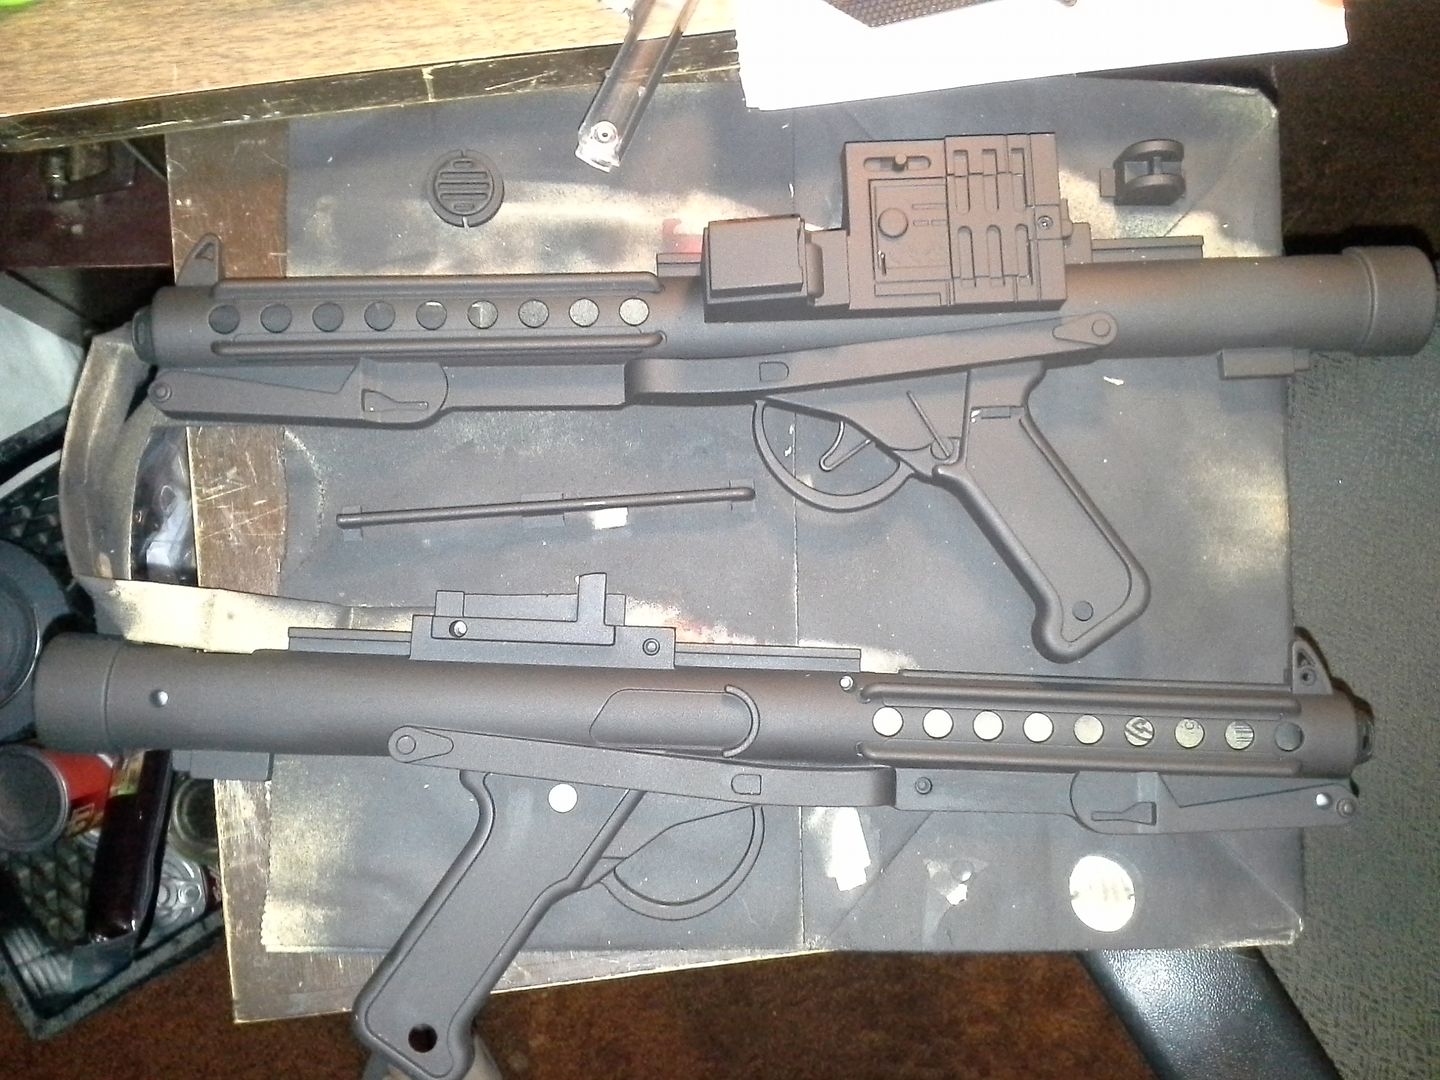
Besides the removable scope, the top rail fin, and the rear sight, the grips also come off the handle. Neat! I decide the grips and scope will be left in their initial gloss black plastic, the rest will get Flat Black Primer spray
here it is back inside
-
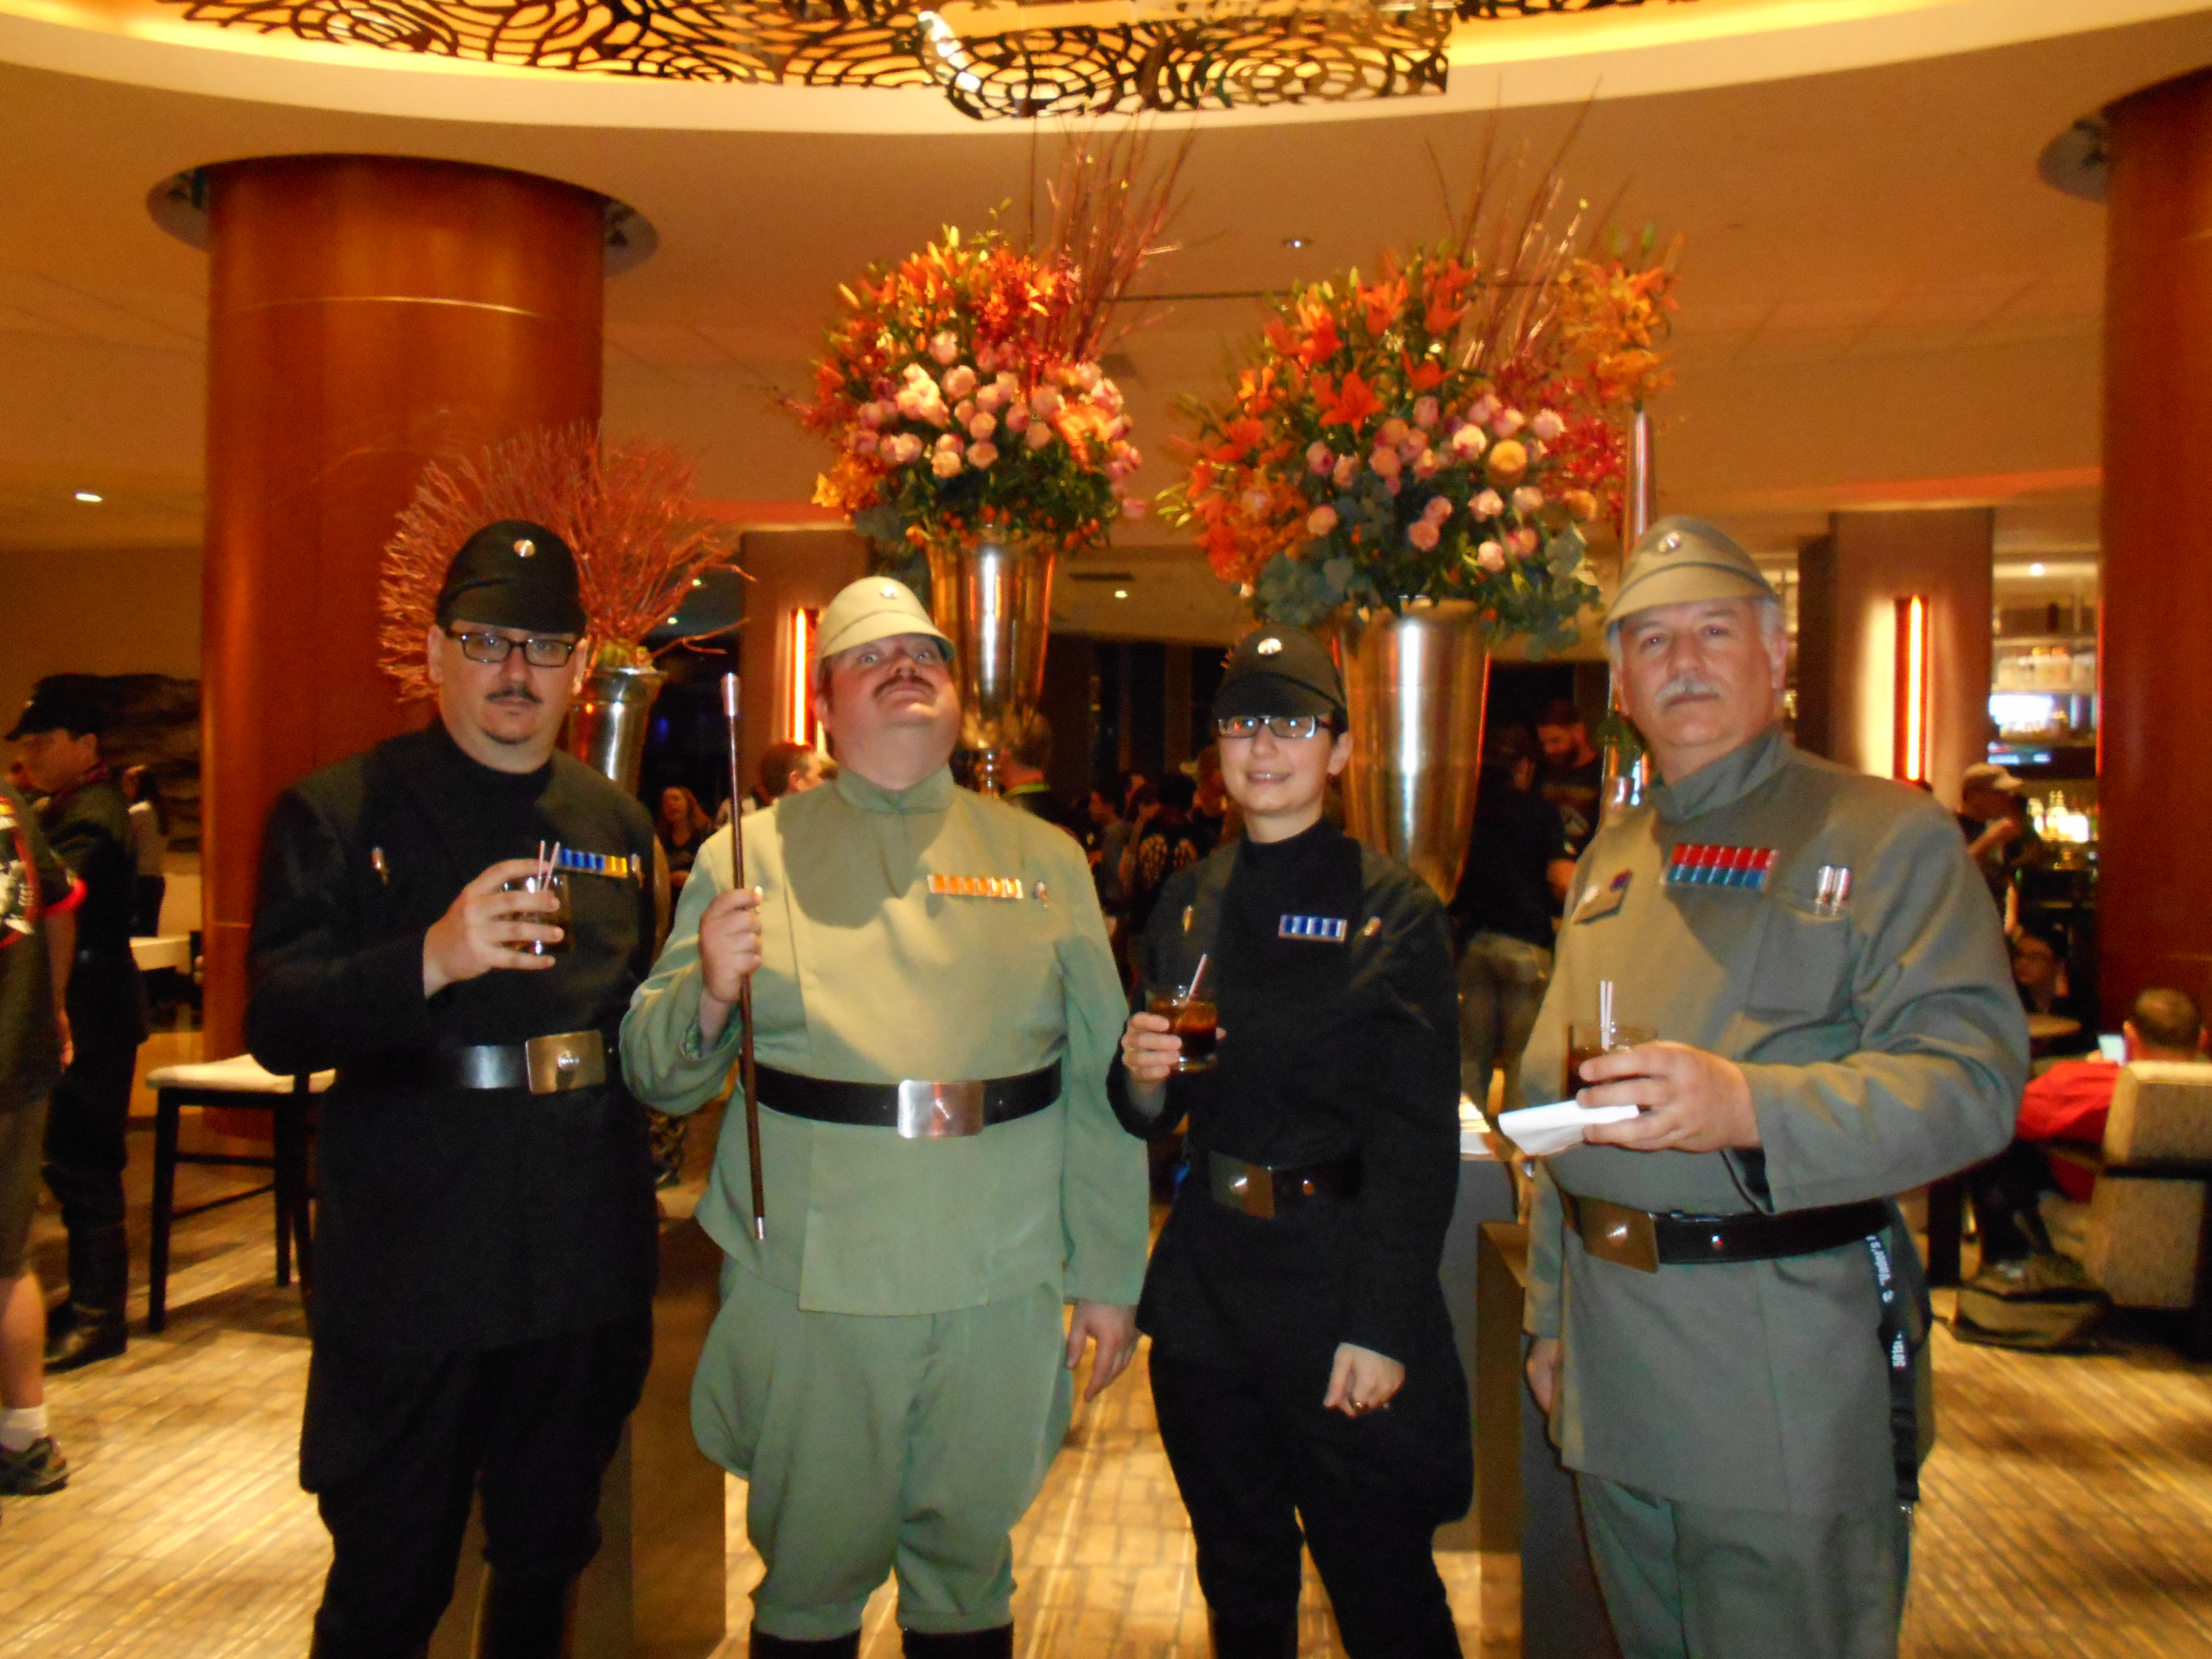
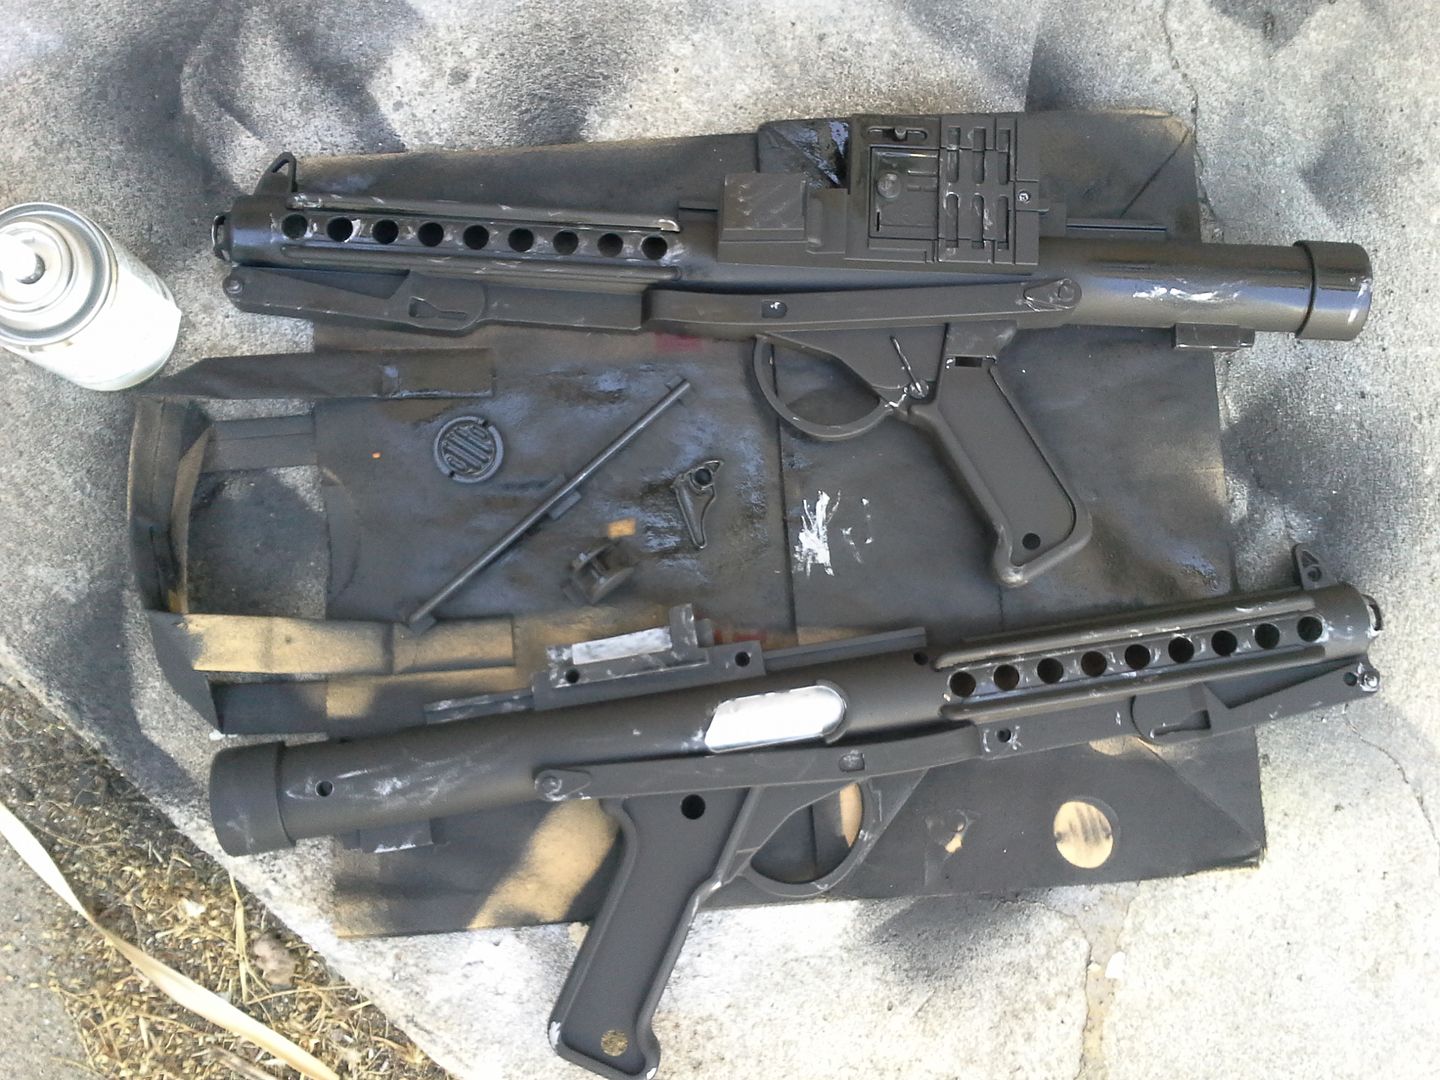
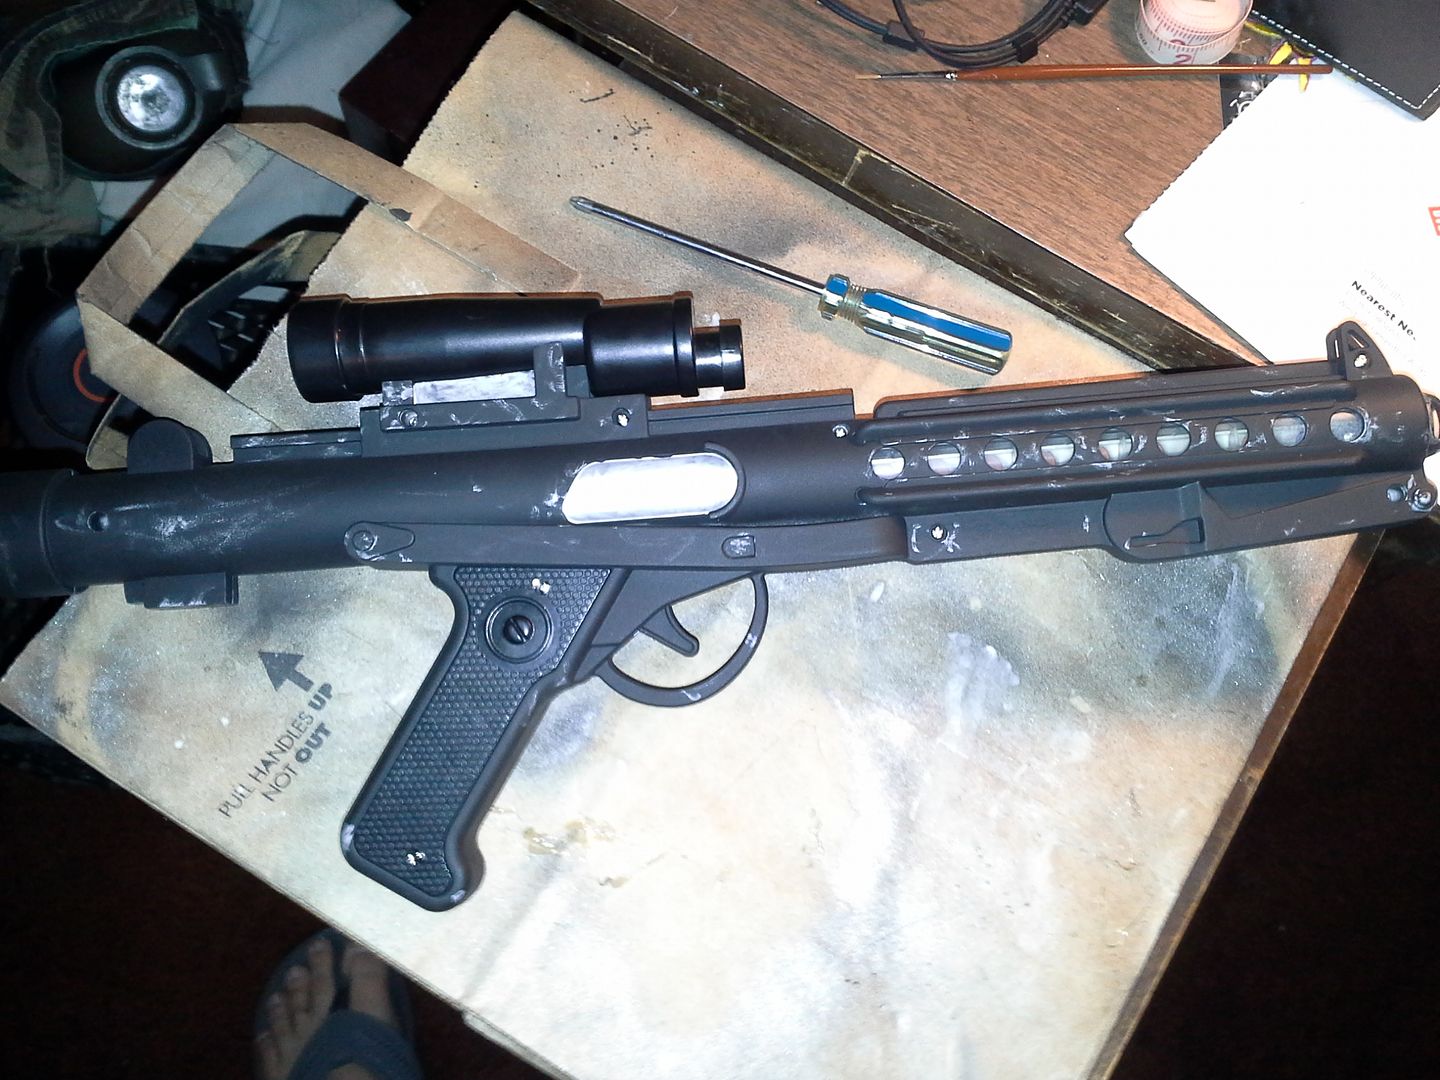
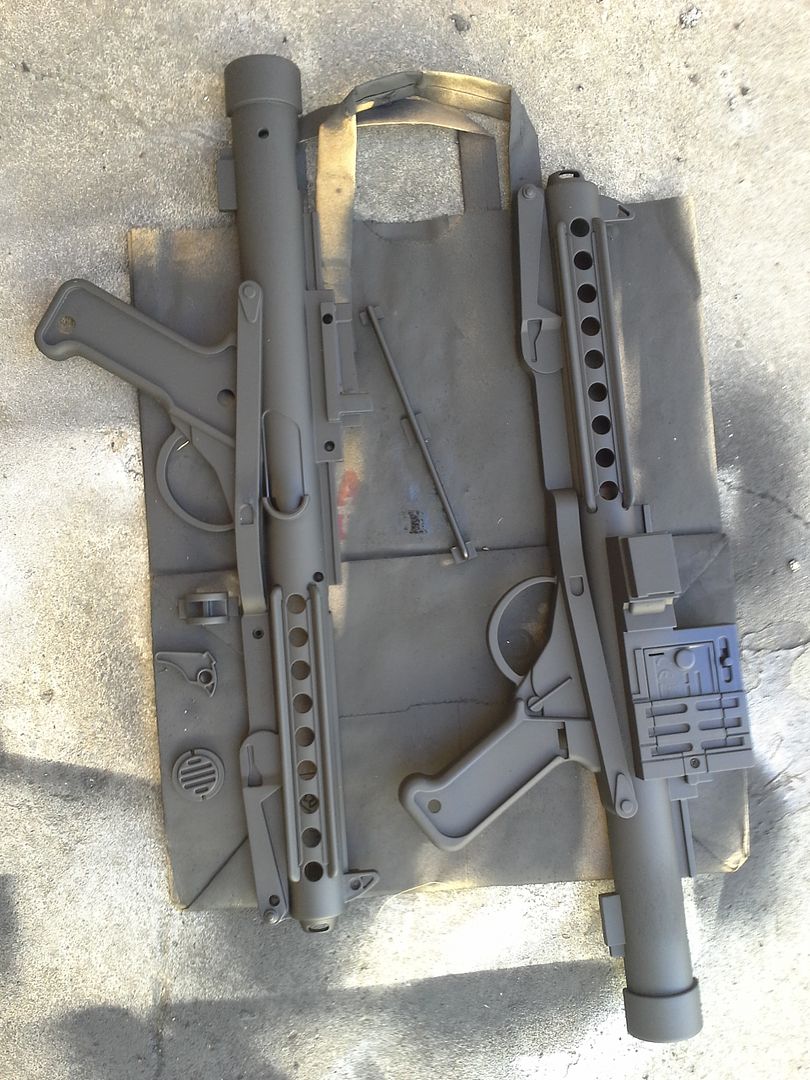
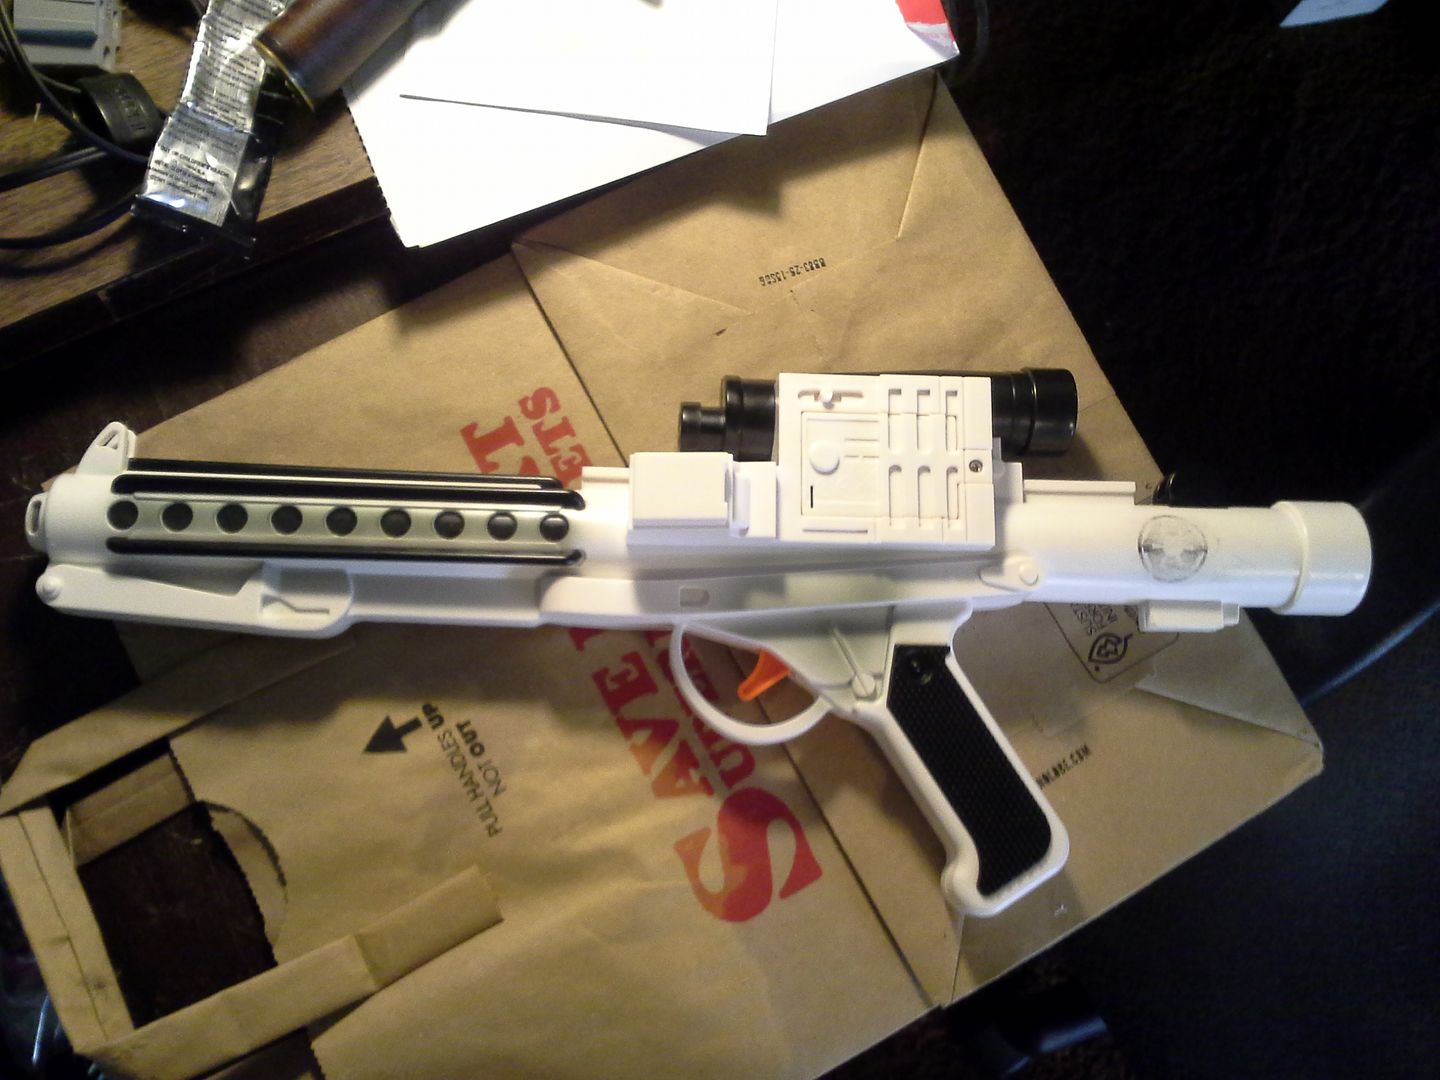
This is the new E-11 Blaster toy for Sale at Disney Parks. They are available at gift shops in the Parks themselves, the main one in Downtown Disney, and are now starting to pop up on Ebay. Overall, the dimensions are much better than the Hasbro one, and feature good LED's and sounds. Before I take it apart and start to paint, I use a jeweler's saw to cut off the barrel endcap, sand it down, and sand off any logos.

The blaster is surprisingly easy to disassemble. This is necessary for painting because of the clear plastic guards where the light shows through. The main body is held together by 8 screws. Unlike the temperamental Nerf DH-17, there is no glue to contend with. The rear tube speaker end cap, scope, top rail, and rear sight are all just held in place. Did Disney know I wanted to repaint this thing?
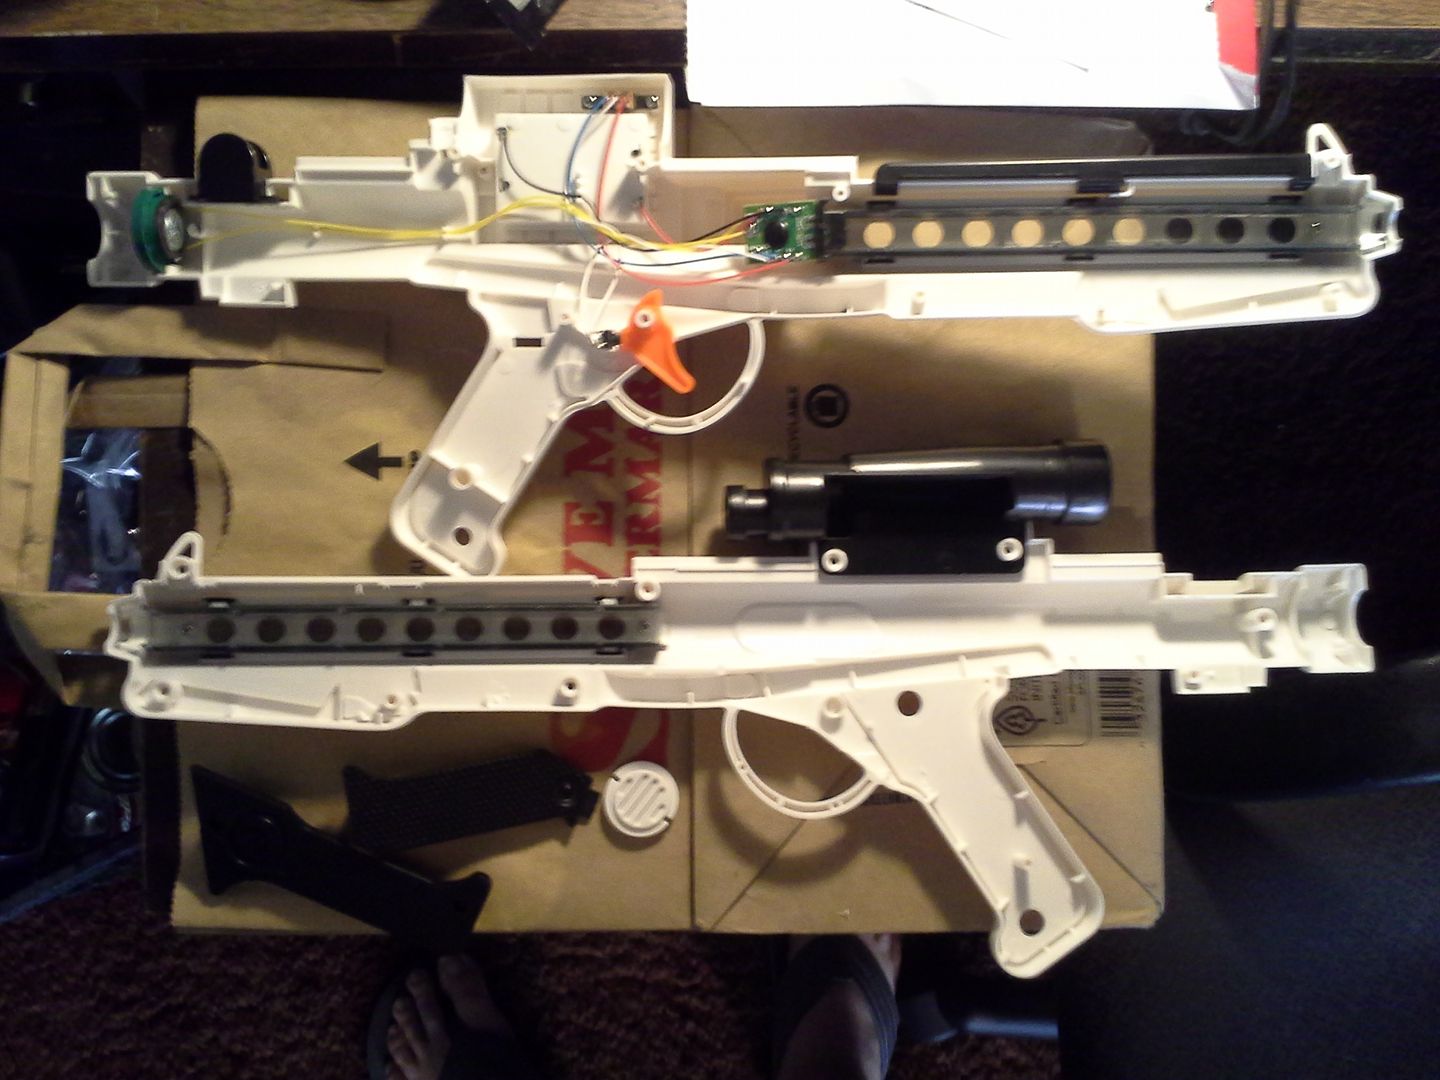
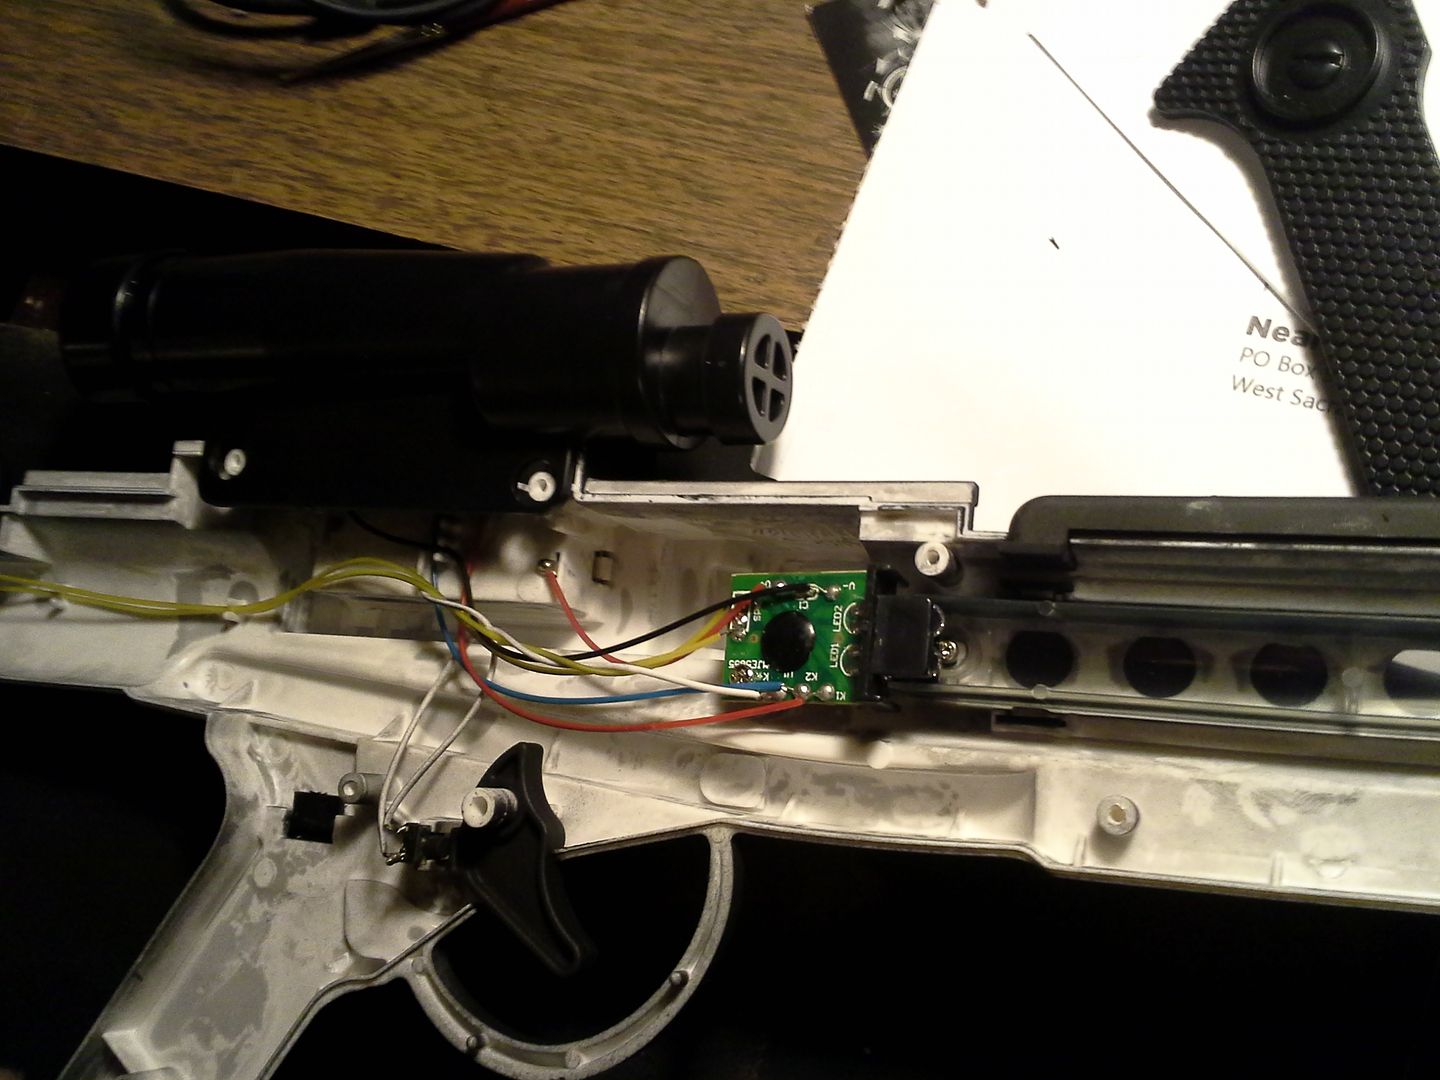
Simply set trigger, easy to remove, simple wiring set up for your modders out there!
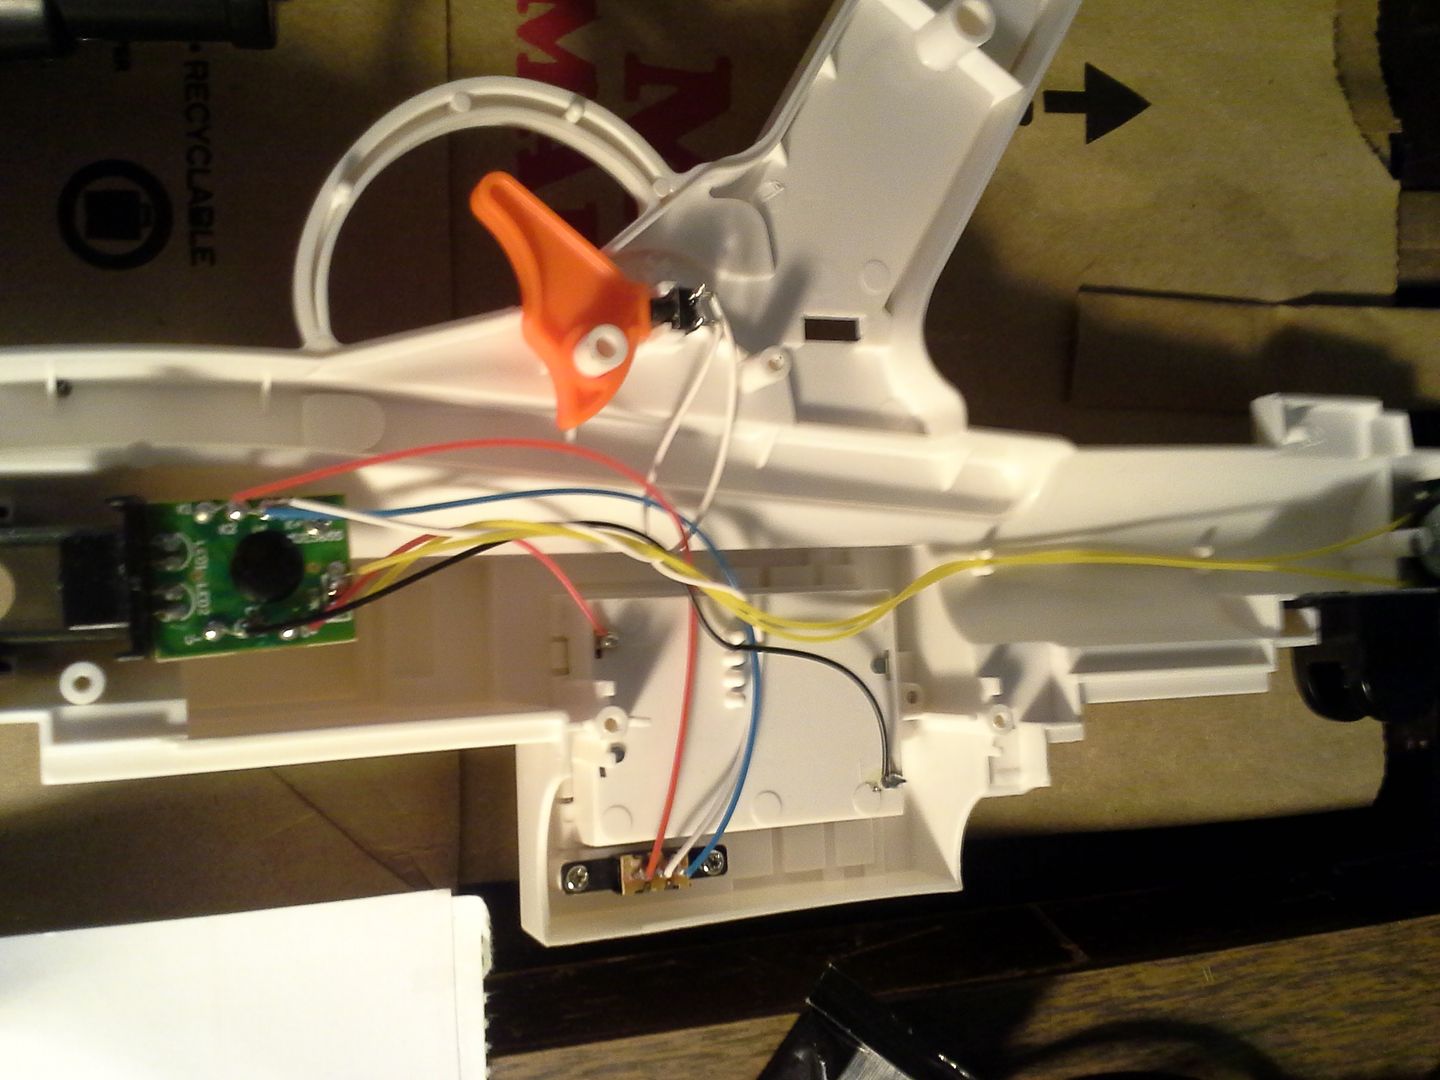
Here is the removable top rail and clear plastic light channel guard. All the fins are separate parts, a nice detail, but only the center seam one comes out easily. The LED's are held in place in the channel by a single screw.
Here is the other side, even simpler.
- DaxCorrin, Mst3cate, Vaderado07 and 1 other
-
4
-
I have had problems with Soviet Boots in the past with my other hobbies. I AM surprised they got up that high on size, usually surplus boots are impossible to find past 48! There width was always my concern. You may be able to trim the tops yourself if they become a problem. I had a slew of Soviet WWII gear on order last year, but because of the troubles in Ukraine I never got any of it. My USSR boots, helmet, overcoat, and gas masks were probably acquired for redeployment in the street riots!
-
I was approved in mine at first but it depends on the GML of the Garrison you would join. I would contact that person before buying. That is also not the best price that I have seen; they can be had for as cheap as 30. They won't work for taller officers because the boot shaft is only 14 inches. I'd say maybe 5 foot 9 and below they look somewhat tall enough. I am 5'10" and have 18 inch boot shafts that actually come to my knees. Funtasma boots will fall apart after 10 or so troops, so they really aren't worth it. If your shoe size runs small you can get good deals on riding boots on ebay or equestrian sites. It is worth it to save up for quality boots; cheap boots will destroy your feet and you will hate trooping in them. It is the wisest investment in this costume.
-
It's not just on forums, its a lifelong condition: "couldtalkunderwateritis"
LOL i'm right there with you Sir!
-
Does that mean you finished your 4-LOM?! Pictures man!
-
How does this progress? Found your dream jacks yet? BTW, I was at Ren Faire yesterday and led a multi-guild drill with pikes and halberds. After getting onto a new kid for not wearing shoes on the battlefield, he showed me his size 22 sneakers! He was 15 years old and already 6 foot 1. I recommended making suede covers to go over his Nikes, since historically accurate Tudor shoes would run him about 600 dollars to be custom made!
-
perhaps they didn't use it because Cushing would start falling back in with his Vampiric ways....
-
-
-
-
Then make them better! I have a couple tutorials on how to trim the jodhpurs so they fit better and you just tell cosplaysky to make the 'bulges' 3 inches smaller. They take some getting used to, but they will give you so many more options, as long as you can get tall boots.
-
I am surprised. I know on the ISB tunic cosplaysky used to just sell it 80 by itself. If you are just doing warrant you may be able to sell the jodhpurs or keep them for a future uniform. You won't save much money getting a tunic alone.
-
Breathing is good however. Don't Motti your self!
-
-
That is good to know. I've heard mixed reviews, everything from "great fit no hassles" to "they didn't remotely fit and he doesn't respond to emails". I have also heard they run quite narrow. Anytime I experience huge wait times to get an email back, I am wary.
-
The short wrist style gloves, not gauntlets. The preferred for ROTJ will have three stitched lines on the back of the hand, but i've seen plain ESB styles as well, like the "You Rebel Scum!" warrant officer in the bunker has on.
-
yeah i'll go to that
fo sure!
-
-
BAD@$$! Pretty awesome version of the trailer! Check the screenshot:
Officer's new hats look kinda goofy, but black trench coats are rad. DISCUSS.


Vader in episode VIII??????
in The Officer's Lounge
Posted
I hope not. That smacks of Reboot and Lucasisms. Vader ghost would be unacceptable IMO because of Anakin ghost in ROTJ that got redeemed. Some dead/clone Emperor action would be acceptable, I read those books.