
maikoaoki
-
Posts
16 -
Joined
-
Last visited
Reputation Activity
-

 maikoaoki reacted to bjsavage7 in The Sewing Dictionary
I receive many questions about sewing terms all the time. Honestly, I can't sew and don't recognize or understand many common sewing terms when they are tossed out there. However, I have found this online resource that might answer some questions folks may have about what is this and what is that. Enjoy!
http://www.thesewingdictionary.com/
http://www.threadsmagazine.com/item/15750/sewing-terms-to-know/page/all
http://en.wikipedia.org/wiki/Glossary_of_sewing_terms
http://www.sewingpatterns.com/sewingdictionary.php
-
maikoaoki reacted to Dimentex in Director Krennic CRL Discussion
Admins, if I picked the wrong area, please feel free to move this to the correct one.
I had started this when the Rogue One trailer premiered, and have gotten more since both the EW photo shoot and SWCE3 where the costume was on display, as well as Ben Mendelsohn wearing it in the Rogue One panel. I figure putting it on hear starts the process of anyone who saw something different.
For reference photos, until my photog guy comes back with better, I am going on the following album for closeups, as she did an excellent job:
https://www.flickr.com/photos/withoutastitchon/albums/72157671245564035
Hair and Facial Features
For 501st approval:
Hair must be medium-dark brown with slightly graying For level two certification (if applicable):
Facial appearance and hair match very closely to that of Ben Mendelsohn in Rogue One Tunic, White
For 501st approval:
Fabric is a medium weight suiting material. Overdyed wool twill Gabardine style weave is most accurate. Tunic is double-breasted with a left over right closure on the tapered yoke. Yoke comes up across the shoulder to the top shoulder seam. The standing collar has square corners and is about 1.25" (31.8 mm) tall. Collar closes snugly and includes a modesty panel behind closure. Collar edges are closed with two eye hooks. There are code cylinder pockets on both outside panels of the jacket from about half way between the top and bottom on the arm hole. Sleeves are long, and without decoration, cuffs or buttons. Sleeves contain 2 seams. One along the bottom and one along the back. Tunic is constructed with no top-stitching (stitches visible on the exterior surface of fabric) Hook and eye fasteners on the uniform should not be visible. Krennic's Rank Bar
For 501st approval:
See the Imperial Rank Bar page for more information. Worn on the left side of the tunic over the heart. Rank consists of colored plastic tiles mounted on metal bar. Each bar is 1" (25.4 mm) height. Length is determined by the number of tiles. Rank tile dimensions are 1/2" (12.7 mm)width x 3/4" (19 mm) height and about 1/8" (3.2 mm). Tiles are mounted with 1/4" (6.4 mm) spaces between them. Rank bar exactly matches the color pattern used in the film. Six Red tiles on the top bar. Six Blue on the bottom bar. Code Cylinders
For 501st approval:
Two Code cylinders are worn on the uniform, one in each pocket. Optional Variations: Basic Style: Silver "chalk holder" tube with a short clip and a blue top. Dosimeter Style: True Dosimeter with correct clip and blue top. For level two certification (if applicable):
Only real or replica dosimeters are used. Dosimeters have a silver, not brass, clip Cloak, White
For 501st approval:
Fabric is of a lightweight cotton Treated lightweight cotton is most accurate The cloak must be fitted to the wearer, and based off the Tunic of the wearer The back of the cloak reaches from the shoulders to the ankle of the boot, with a slit in the middle from the bottom to the top of the inseam approximately the knee Cloak has a collar that is about 2" tall and comes 2/3rds around the neck Collar has 7 evenly spaced (approximately 1/4th of an inch apart) parallel stitches around it, with the topmost stitch approximately 1/4th of an inch from the edge, and follows the front edge down to meet the shoulder, with all other stitches ending into it. Yoke of cloak is one solid piece, running from the collar to the seam line of the shoulder and the arm 1/2" beyond the left seam of the jacket where the code cylinder pocket begins. The right side will be equal length to the left side. The front of the yoke starts at the edge of the collar and comes down to just approximately 2" above the code cylinder pocket on the jacket The back of the yoke extends down approximately 3 5-6 inches from the base of the collar, and is straight across the back The yoke seams are a right angle to the line of the back, and come up over the shoulder to the front For level two certification (if applicable):
There is one stitch line along the front of the yoke, following along from the collar stitch line, and 3 stitch lines along the sides and back, with the first stitch about 1/64th 1/8" off the edge, and spaced about 1/4th of an inch apart. There is an angular stitch pattern as seen in pictures The triple stitch seam follows all other seams except the front seam and the bottom hem (this includes the back slit) There is a triple stitch from the middle of the back down to the slit. Sides have a pattern that may be an arm slit as seen here Belt
For 501st approval:
The belt is constructed from a non-textured leather or a leather-like material. Approximately 2" (50.8 mm) in width, up to 3" (76.2 mm) is acceptable. There are no loops on the belt. A single large snap or rivet is visible approximately 1" (25.4 mm) from the buckle. The belt must be worn with the snap to the right of the wearer. The buckle is constructed from a horizontally brushed metal, or metal looking material. The buckle size is approximately 2 5/8" (66.7 mm) high and 4 1/8" (104.5 mm) wide with 0.5" (12.7 mm) radius rounded corners. Buckle is adorned with an Imperial Code Disk at the center. Please refer to the Imperial Buckle reference page for information on accurate and inaccurate style buckles. For level two certification (if applicable):
Belt is made of leather. Buckle has a slight horizontal curve. Belt has a groove 1/4" from the top and bottom edge along the length of the belt. Gloves
For 501st approval:
Black, wrist length gloves constructed of a non-textured leather or leather-like material. Enclosed fingers. Gloves have a plain back and no visible adornments For level two certification (if applicable):
Gloves have a button on the palm at the wrist Gloves end past the wrist Jodphur Trousers, Black
For 501st approval:
Fabric is a medium weight suiting material exactly matching the tunic. Gabardine style weave is most accurate. Flared riding breeches are canon, with semi-stiff flares to the hip/thigh area. Breeches are worn with boots. Pockets are acceptable, although are not visible with the tunic on. Boots
For 501st approval:
Knee-high, black, lace-less, smooth non-textured, leather or leather-like material. Rubber is not acceptable. PVC or synthetic material is allowed as long as it gives the appearance of leather. There are no stretch panels, buckles, snap tabs, or decoration. Boots have conservative heels. If zippers are present, they are hidden on the inner part of the boot shaft. Not visible from the front, side or back. The top of the boots may be flat or Spanish Style, but not Cowboy or Super Hero (pointed at the front) style. For level two certification (if applicable):
Boots are made of leather For level three certification (if applicable):
Original German Officer Marching boots or an authentic replication thereof (found here) Boots must have the top adjustment strap English riding boots are NOT screen accurate
Optional Accessories
Items below are optional costume accessories. These items are not required for approval, but if present appear as described below.
Eye Color
For 501st approval
Blue contact lenses This style of contact lense may be worn, if desired While encouraged to complete the look of this character, the contact lense requirement will be waived for 501st acceptance, if the applicant cannot wear contact lenses for health related reasons. All persons utilizing contact lenses are encouraged to first see their optometrist for a fitting. Weapon
For 501st approval
TBD Holster
For 501st approval
Holster is black leather fitting the firearm Nozzle of the firearm extends out the bottom of the holster Offset sight of firearm is outside of the holster. Holster is worn on the right behind the belt snap Ammo pouch
For 501st approval
TBD (can be seen behind the gun in reference photos, but cannot be seen well enough) Ammo Pouch(es) are worn on the right hand side behind the holster. -
maikoaoki reacted to mdb in Uniform Mods for women
Probably some helpful hints for men in here as well (Edited Jan 2016 to fix links.)
https://www.flickr.com/photos/toromodel/albums/72157620678880774/with/3667713545/
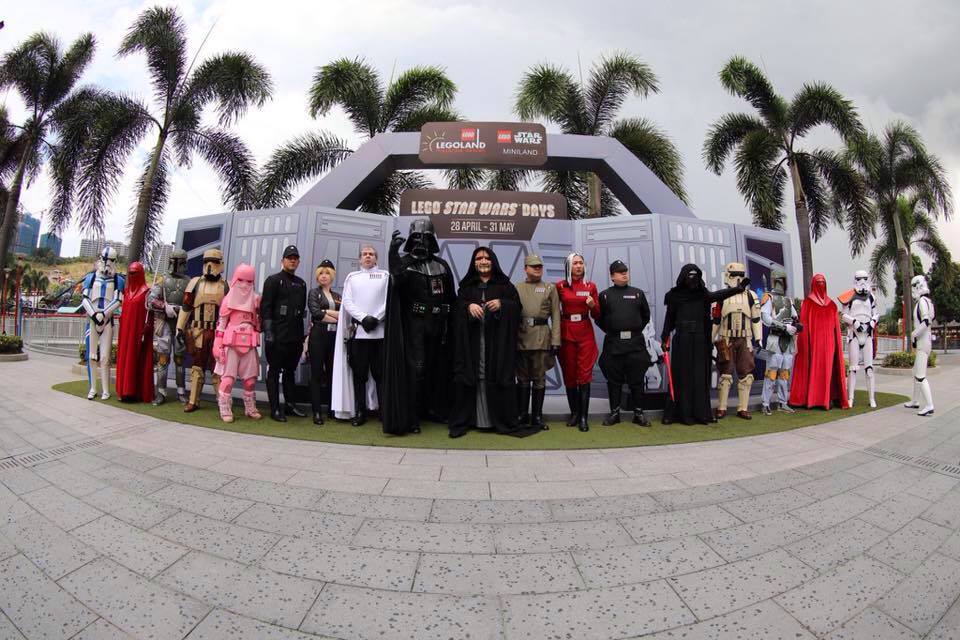
Star Wars- The Exhibition by Toromodel, 2009
Women are very differently shaped to men, and generally vary more in shape regardless of size, but these uniforms are actually well designed to allow for shaping for complex curves. It's just tricky because of the different outcomes of tailoring vs dressmaking. The aim is to shape to fit but retain the tailored effect which is to create an angular shape.
Tunic front
Upper tunic front showing collar and dart, and pockets.
I've mainly used the Angels auction for referencing the front of the tunic as it is the most female friendly. Those underbust darts really help to fit the female curves not just from bust to waist but in the underarm to bust area. By using darts you affect the grain of fabric around this area which helps it stretch and smooth over complex curves. In order to fit the complex curves of a bust these darts really do need to be extended to allow them to affect the shape in the upper half of the torso.
There does appear to be a dart on the European tour uniform but it is extremely short. Note how it follows the shallow fold. It is very difficult to see in the madrid photos, but it is there- you can see it alter the grain of the fabric.
The vertical curved seams can also be functional for shaping to fit but this is mainly on the outside panel rather than the central overlapping panel. This is one of the reasons I have not used the original seaming under the overlap because it doesn't work as effectively over a complex curve. This is because the bust is soft and so will push and put stresses on the seams that will show through and even affect the hang of the canvas lined overlap.
I have a left and right side that are identical and it helps to match up the overlap!
The pockets will be on a slightly different angle in the flat pattern pieces to have them sit perfectly horizontally when worn. I need to unpick mine and make the angle lower. This is due to the princess seam being functional- the direction of the fabric is altered when it is shaped over a convex curve. This is a vital adaptation at the test fitting stage. Leave it out of an initial test and use a line to mark the level. When cutting care will be needed and pressing vital to avoid the cut edge stretching.
The neck dart is more vital for fitting to the male shape than for women so the dart will mostly be decorative than functional. I am making a very shallow tuck. This is because the bust tends to be more of a fitting point than at the neck. If you have a high ribcage this will still be very much needed.
Another thing to note is that Canon seems to have established that all uniforms fasten on the RHS. In reality uniforms, suits, sportswear tend to fasten right over left in women's wear. However this is a modern idea and can be easily worked around when using modern patterns.
Tunic back
Back views showing well defined princess seams, straight side back seams and matching darts at the back skirt (they match with all the seams in the upper.)
The back is easy to adapt though just as tricky to fit as for men. Also because we do tend to come in further at the waist some of the proportions will be "off" a little. I found the best way to keep the balance of the panels was to make the back panel narrower. This way I could fit the princess seams and the extra side back seam (very straight in comparison) without making any one of them too small.
The lack of a centre back seam does make fitting a little tricky, the shoulder line and neck curve will change a little to compensate. But again this is an issue with the style- and is a general fitting issue.
Tunic sleeves
The main care points here are balance of the fit of the sleeve. It just needs a bit of tweaking to get the balance of fit so the sleeves neither look too baggy nor too fitted.
Otherwise the curve of the two panels doesn't need to change that much.
Tunic neck
Again it is a balance of getting the right height to be in proportion. There are no seams in it so you need to take care with the curve.
Tunic skirts
There is usually a larger hip to waist ratio and so care needs to be taken in making most use of any darts and seams there are.
The skirts should sit right at the seat, due to the relative position and size of waists this can appear much longer than they are. So care with this is needed.
The European display shows what appears to be a dart that matches to the side seam of the torso:
Cap
Well not a huge amount of difference but I did notice that the flaps have self bias trimming around them rather than being topstitched.
Along with the tunic and jodhpurs these would also have been sized to fit, though probably not custom.
And even in one scene there appears to be variation on actual size. I liked the fit of the very first cap in that post as it neither looks like his head is too big or too small for it.
I took my head circumference where the lower edge sits. The top is approx 2/3 the size of the bottom so that's the proportion I used on my cap. I made the top a plain oval though as the slight peak happens naturally when it is worn. The visor sits to about 1.5-2cm from the ear so I took that as my visor width. The depth varies a little but I went for half the width of the cap depth and once made up it winds up a little larger due to all the fabric and interfacing. Then I made the flaps the same size and as wide as the non visored part of the cap as the back flap comes to that point or just short of it depending on the exact reference.
Jodhpurs
Well we tend to have deeper seats than men so most of the shaping will be in the seat seam and the top of the side seams. Fastening is probably going to be the same. However as the Empire tends to be backward looking in our own time it could be that the original costume designers would have put the fastening to the side hip as women's trousers fastened this way until fairly recently. Some sort of modesty issue probably.. But I will do a typical fly closure and probably on the same side as the original. If the tunic overlap follow masculine lines the the fly should as well.
I highly recommend using a plain sloper as a base pattern for this. Once you get the basic shape fitted you can then work on drawing in seam lines and then tweaking them. I also fitted my initial patterns with the overlap pinned just as seams. You could make it easier and put in a zip up the CF of the test pattern to take it on and off. Just make sure to keep the seam perfectly straight.
Also make the pockets last. Do all the fitting without them and then choose where they should go.
-
maikoaoki reacted to spree610 in How-to: Flare Stiffening
There are lots of ways to stiffen the flares on your officer pants. This is how I do it.
Purchase an iron-on fabric stiffener product that you like. I've use this one (HeatnBond) and one from Sulky:
Cut the stiffener to the size you want. This depends on how stiff you want the flare of the pant to be. I typically go with a width of the flare to the inside where it meets my leg.
Turn the pants inside out and place the cut out pieces under the flare to the edge and trim off to a rounded edge.
Iron the rounded cut out to the inside of the pant leg. Depending on how stiff you want the flares to be you may just want to stabilize the front of the flare or both front and back. I personally do both.
When the heat cools off peel the paper off.
Enjoy the stiffened flares. (that's an order)
-
maikoaoki reacted to Hawk in Imperial Officer ID Sewing Tutorial
Alright. First off this is going to be a work in progress tutorial. I would say that this is a intermediate level tutorial. You should know how the machine works and be confident that you can sew a straight line, and there is NOTHING wrong with getting some cheap fabric and making a mock up. I am going to upload it in stages. This is my first tutorial, so there are likely to be loads of questions and changes. I do ask that you let me finish it before asking., It should take me a few weeks.
The pattern I am using can be found at:
http://s268.photobucket.com/user/Hawk220/library/Officer%20Pattern%20ID
This pattern fits M-XL, (slight thin to slightly over weight) for anything else, the pattern will need to be modified.
You will need:
2 1/2 yards of Fabric at 52" wide
2 1/2 yards of Lining at 52" wide
4 yards of interfacing (I use 950F Shirtailor)
I will start this tutorial just after the pieces have been cut out. All seam allowances are 1/2 inch.
-
maikoaoki reacted to lantern2745 in Q1 Anovos stuff
I finally got fed up and cancelled my order. I had a black and an olive hat for myself, and a black hat for a friend. I scored a pair of XL MUR black hats at the two for one on eBay for my buddy, cause his melon is huge.
Now I'm waiting for the fabric from cosplaysky to arrive so I can send it to Gina and have a hat that matches perfect.
Basically, what I should have done from the get go.
Good luck to the folks who stick it out though!
-
maikoaoki reacted to Ozzkar in Q1 Anovos stuff
I'm so impatient! What does final packaging and product safety testing even mean?! Will the collar clasps kill us if they don't test it? I hope nothing pushes this back any further. People seem to have been waiting a long time for this. In Q3 it will be 1 year since I ordered my uniform. Already got riding boots, code cylinders and rank bar, just need ... the rest.