

kman
-
Posts
6,188 -
Joined
-
Last visited
-
Days Won
387
Content Type
Profiles
Forums
Gallery
Posts posted by kman
-
-
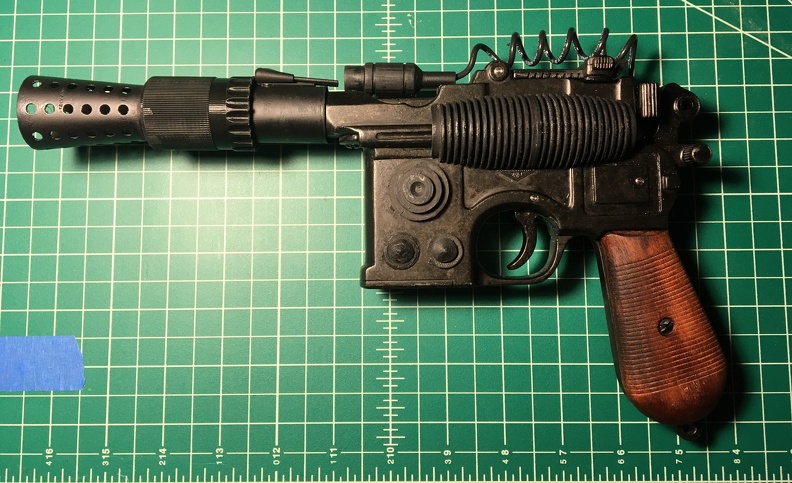
We need to get some shots of the two side by side so we can see if there is any difference in the armor, at least. Just for full due diligence.
-
We obviously have a ways to go before a full CRL can be launched (and the LMOs have to allow new CRLs, as well, since the wiki system is messed up now), but this is a good start.
Antonio is correct about a few things he called out. And we have to match the references... an optional component doesn't get added to THIS CRL unless we see it in the references for THIS CRL. Costumer comfort was never part of the CRL process LOL. So the holster and gloves (or lack thereof) needs to match the references we have for this CRL.
-
1 hour ago, Kandosii said:
I saw their replies right as I sent my question. Good to know, glad I asked before purchasing. Is there a good recommendation for an ISB uniform that can be tailored?
Thanks for the help,
Re-Tailoring a tunic is always a bit tricky. Many vendors, especially the larger ones that mass-produce things, use a lot of manufacturing shortcuts to keep costs down. They also make them with the bare minimum of seam allowance inside, again, the less fabric they use, the cheaper they are. Many use various glues and interfacing inside, which makes construction easier, but RE-construction fairly difficult.
This is definitely the case with most of the bigger makers. The more custom the garment is made, the less likely they'll use such mass-manufacturing techniques (but the higher the price, but also the less likely you'll actually need to retailor anything).
Unfortunately I can't say with any certainty which are good to re-tailor. Also bear in mind some aspects of these uniforms don't really lend themselves to re-tailoring. Some of the Cosplay shops make tunics with huge necks, for instance, in an effort to make "one size fits more". But unfortunately making the neck smaller means making the hole smaller... which means you need extra fabric available that was not exposed before. And this is rarely there, especially in those cheap mass-produced Cosplay versions. Once upon a time they would custom size them for an extra fee, letting you get close to the right side, even if you didn't get all the way there, it was close enough a little tailoring would get you across the line. Those days seem to be over, sadly.
My recommendation, at this point, is to either go high end (full custom) with an actual tailored uniform, from Clothears or MazCave, OR go lower end with one from Jim Tripon, who knocks out "semi-custom" versions that work reasonably well, from his shop in the Philippines. Neither should need any additional tailoring out of the box. Although with the inexpensive one, if you do need a little adjustment, at least you'll have saved a lot so some extra fees aren't a big deal.
-
Not 100% certain if this is the right place, but it might be. I will check later if I think about it.
")
I'm not sure what ponte is; I'd need to look more into that. But what the CRL is looking for fabric that looks at least visually similar to the Cavalry Twill used on the real costumes. Cav Twill is SUPER hard to come by (and expensive when you can find it), but a key characteristic is the diagonal lines inherent to the weave, which a simple gabardine twill captures reasonably well. And of course gabardine is super easy to come by, and usually fairly reasonably priced.
Stretch gabardine is a thing. It would not be hard to use such fabric to make an officer tunic. And it fully meets the goals of the CRL.
I'm less sure if it has enough stretch for your needs, but I'd be surprised if there wasn't something pretty darned stretchy out there.
Does that help, or did you need something more specific?
-
14 hours ago, AntonioTony said:
Welcome! Here is an okay pattern to start with. It's not the greatest but definitely more than okay for a con.
For fabric, you'll want gabardine, it's fairly cheap and is what is used in Rogue One and beyond. There is also a pattern for the hat on youtube somewhere, I'm sure someone here has the link lying around.
There are instructions in the pattern to help size it to you.
Hopefully this helped!
Gabardine is not what is used in Rogue One and beyond... nearly all officer uniforms you see on screen are made of Cavalry Twill. There are a few rare exceptions, but yeah. Cav Twill is the standard, not Gabardine.
That fabric is very difficult to come by, however, so gabardine is often recommended as a "close enough" since it's readily available and has a similar directional grain.
I recommend this thread for a good discussion on the hat pattern that most use:
-
1 hour ago, Kandosii said:
Hello,
I was thinking on buying an ISB uniform from magnoli clothiers they say they meet 501st requirements and it looks like they make it to your size.
I'm new to this and would appreciate any advice.
IOC staff no longer recommends Magnoli. Some of the reasons are discussed in the posts just above.
-
-
I tend to agree that the white armor with black undersuit is likely to end up with SpecOps, although I'd love it if we could get them. They're really identical to the Aldhani and Ferrix soldiers but with white armor bits instead of black.
https://databank.501st.com/databank/Costuming:Imperial_security_trooper#tabber-Version_One
I do think we should get the Marshall, though, especially since Heert was handed the exact same tactical setup.
-
On 5/17/2025 at 9:19 AM, Sn4k3 said:
Isn't clothears and magnoli clothears the same?
God no. There's no such thing as "magnoli clothears" it's "Magnoli Clothiers" (clothe-E-ers vs cloth-ears). Magnoli is a semi-custom shop based in New Zealand, who contracts all the actual work out to Asian factories (which is fine as long as the quality is there, but really complicates matters when a return is involved). Clothears is a small British tailoring shop in the England.
-
On 5/18/2025 at 5:13 AM, Aesmodan said:
@kman I think we may have avoided a chart like this in the past (unclear?), but I get that a lot of people arrive at IOC trying to find a current "vendors list" as you'd find on a lot of other detachment forums?
Here are my thoughts (and re-ranked into my mental note / impressionistic order of cost vs quality?) This is just my own opinion of course, happy for it all to be adjusted:
- Clothears - I think Kal would say they are top tier, especially for Feldgrau? (Green line officer). Tailored fit. Does not do ISB (white).
- Denuo Novo - @ChrisLie likes them best I think, but he's at a distant troop this weekend. Fair to call this 'a better quality Wampa' option? Comes in off-the-rack sizes.
- Magnoli Clothiers - No experience (is a generalist costume vendor, not Star Wars specific). Tailored?
- Mazcave - Expensive for not being gabardine wool (uses cotton), but is tailored. Has some options no one else/few others do (e.g., 181st officer dress uniform, First Order officers). Also makes valued gauntlet gloves.
- Keep Trooping - Expensive for not being gabardine wool (uses cotton). Also makes valued gauntlet gloves. Does have an Andor ISB attendant grey tunic option (but I am uncertain of its approval status, looks dark?) Can be tailored, but that costs extra ("blue label" service).
- Wampa Wear - For some time was the go-to, mid-tier, off-the-rack option and uses gabardine wool. However, seems to have announced that he will be concentrating on flightsuits in the future; selling what he has, but won't be restocking officer uniforms (tariffs). Anyone confirm?
- Jim Tripon - Cheapest mainstream option, quick turnaround, tailored fit, but uses cotton, not gabardine wool. Best option for ISB off-white attendant uniforms.
"Gabardine Wool" is not the best, for what it's worth. It's just readily available and approximates the look of the actual Cavalry Twill, which is real deal. Clothears, Denuo Novo, Wampa Wear, and Keep Trooping all use legit Cav Twill, albeit at varying quality levels. (KT's is probably the worst of the lot... but it IS Cav Twill, or at least it was at one point, you never know if a vendor will change things which is one of many reasons we've avoided official endorsement lists)
I'm not a big Magnoli fan anymore... they have certainly made some lovely pieces, but their fabric is more like MazCave (they do not have a proper Cav Twill, but sure charge like they do), and seem to have tons of issues with custom fitting based on internet measurements, far more than other vendors, and yet are also known to have abhorrent customer service. Most of the time. And considering they charge top of the deck prices, there's just no excuse.
KT is a fairly solid option... except you pay a lot for what you get. For what you pay, I feel you should get better, and you just... don't. But for what they offer, they seem to be fairly reliable, which is a plus for sure. Customer service certainly better than Magnoli's, but bear in mind you're still order overseas which complicates things.
Denuo Novo is good stuff and actually accurate fabric, but their hat kinda sucks, and there's no real customizing option, even less so than WampaWear, who at least would sell you fabric separately to have your own hat made. (Because Wampa's hat ain't great, either)
MazCave is fantastic and probably #2 only to Clothears... except fabric is their weak point, being relatively common stuff, and not having any good Cav Twill options unless you source it yourself and supply it to them.
It's a genuine tragedy that Wampa is not restocking their officer costumes. I really hope they reconsider that, once the tariff situation calms down. Although I know they had to stop using their old supplier for some reason, and were struggling to find a new one, which may be yet another wrinkle.
Tripon is the budget option for sure, in so many ways compared to the others (including fabrics, general fit and finish, overall quality and durability, you name it), but at the low price, I'm less inclined to complain than I am at the higher prices.
-
-
Interesting idea, but we should probably discuss that in a thread of it's own, not in the Andor Dress uniform thread.
")
-
I'm glad our chat finally made matters clear for you. Welcome to the IOC, looks like you're off to a great start already!
-
On 5/11/2025 at 6:36 AM, Ti4019 said:
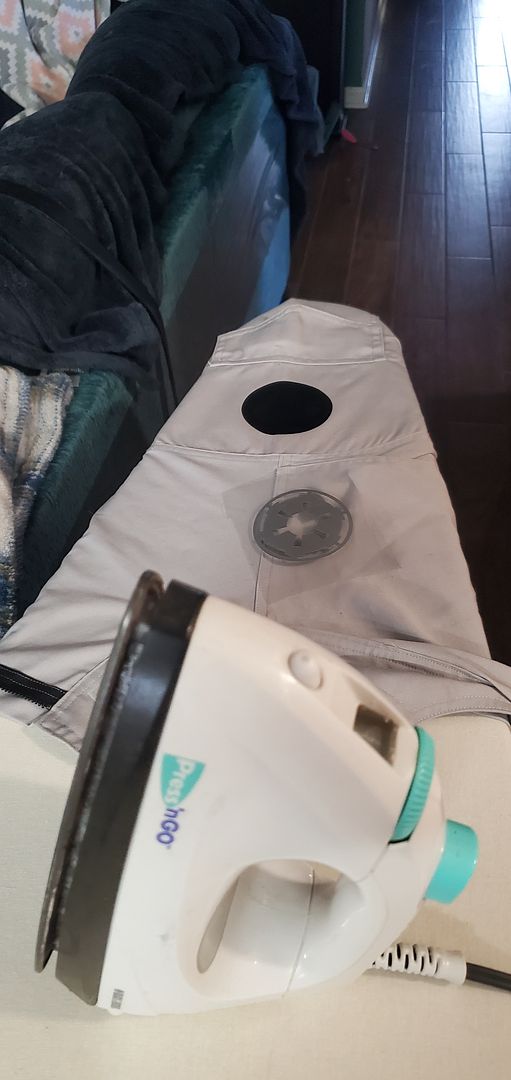
years ago when VooDoo in Bast Alpha Garrison started making these, he supplied them to WampaWear. He made them becaues he had a full size US Plotter machine and he could not get embroidered patches in time to submit, to be approved, for an event.
So, my job was to figure out how to get them on WITHOUT destroying them, and what it would take to actually destroy them. In normal use they last a long time. A warm iron can be used to touch them up should the edges come loose.
Most irons have a steam/dry setting. I gave my mid-priced iron to one of our new guys and had him put them on with only the MOST minimal instructions to see how he would do. We had the iron up on the hot setting and he got them on just fine. Based on that I set the iron down to about midrange, I guess that would be wool or synthetic setting. I put my own on just fine.
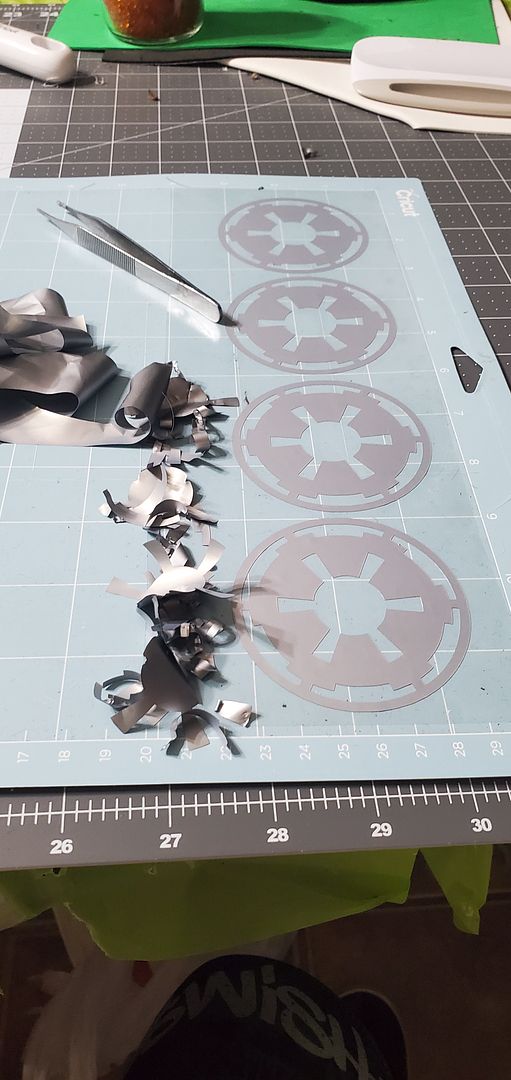
Here are my photos. I cut these on my own plotter now, using HTV.
iron- warm to warm-hot, dry setting, no steam
clean pressing cloth or plain white paper with no printing on it. You dont want anything to transfer. a pressing cloth "may" tranfser something of a pattern.
ironing surface
Preheat the fabric thirty seconds to smooth it and get the fibers ready for transfer
apply the transfer as Kman has described above , black circle first.
Iron until the plastic removes itself from the black disk and let that cool.
Align the cog and center it, tack it really quickly with the iron, and then proceed with pressing. Let it all set for a day before you wash, it helps with the adhesive bonding to the fabric.
So Voodoo3 was in your garrison? What happened, do you know? It was a serious shame when he stopped offering those. I still have his on a couple of my flight suits. I ended up making my own when I needed to replace one and he was gone, though.
-
Assuming your cog is standard HTV (heat transfer vinyl), there are tons of YouTube videos out there on how to do these iron-on transfers. I would check the instructions for the particular brand you have, in case there is a specific temp setting they prefer for your iron, or ask whoever sold it to you.
There are usually two "stickers". A plain back circle that acts as the backing, and the white cog that will go over the circle. It's usually attached to a clear plastic protective cover... the "up" side is on the sticker. The glue side is what you're staring at directly.
The general process usually involved a damp (barely, not dripping) towel and an iron, and a nice flat surface you can iron on (like an ironing board but a table with a dry towel on it works too).
Position everything (meaning the first black backing circle carefully, place the damp towel over it (this helps distribute the heat more slowly and protects the vinyl from the hot iron surface) and push down firmly with the iron for about 30 seconds. Check cautiously (its hot) to make sure it bonded, if needed, do it again. The clear sheet will release and the glue side will basically melt into the fabric slightly, making a very strong bond in the end.
Once the base is down, position the white cog part over it. Pay attention to the CRL text for where it should be positioned: For Bridge Crew and similar, that's about 1" down from the shoulder seam, and above the pockets.
Giving this warning just in case. Most know this but we get applicants all the time who do this wrong, so I always tell everyone: Be sure to position the spokes vertical, in line with the arm, and NOT horizontal (where two spokes point directly out to the sides and you get two spokes up and two spokes down at the top and bottom... just look online for how a cog is supposed to look)
Repeat the same basic process to bond the white cog onto the black backing.
That's about it.
-
It technically ticks the boxes, but... it's a pretty bad hat.
The code disc, ironically, looks fairly decent. Although photos have been known to deceive.
The final call is up to your local GML. Some are going to take one look at say no, that's just not right. Others don't seem to care as much as they probably should, but there you go.
Antonio is correct that the green fabric has to match the tunic (and pants), however. I would usually recommend buying a tunic and then getting a matching hat, not the other way around. Matching the fabric from a random internet vendor is going to require a LOT of luck.
(Wearing as an ESB bridge crew would be fine, however, from a color standpoint, since they don't match in that case... tho the shape issue remains)
-
4 hours ago, Fletcher said:
Thank you very much for answering my question.
You can find the required stitching in this section of the CRL:

I apologize, I had not actually consulted the CRL and was speaking off the cuff. We get these costumes so rarely I have not looked over the text in quite some time.
And yes, I guess they're right. Personally I'd have made that an L2 or L3 requirement, but between the plain text and the GML's marked up photos, yes, I would say the idea seems to be a row a stitching to support the code cylinders. That means you'll want the stitching approx 9-10cm below the top pocket opening based on the size of the real dosimeters used in ANH, and where the clip hits the pocket.
-
No images showing in your first post, btw.
Those gloves look great.
-
I have no idea what their source for that top stitched requirement it. It's NOT in the CRL, and not required for approval.
If they have proof that such a seam exists, I'd love to see it, and would be happy to add it to the CRL as a L3 requirement. I assume it's something to keep the code cylinders in place, but again, I've never seen any evidence of such a seam, so I can't say for sure.
But as of today, that is NOT a requirement for approval. Please do quote me on that, to your GML.
-
14 hours ago, AdoptaUnAlien said:
Hello, just found this STL file, maybe someone with 3D print skills can modify it
https://www.printables.com/model/45053-snake-keychain-print-in-place14 hours ago, charlyselo said:
OK I am this one, I don’t know why tapatalk posted it with that account or how it even had permissions to do it *facepalm*That's interesting, but it's a square as opposed to flat, and of course far too big.
Making that look NOT 3D printed is going to be HARD, as well. Not sure that's a viable path, but if someone can pull it off, I'd be interested in seeing that done. -
Until we have licensed artwork (or better still live actual examples) showing more, with the exact same setup, we won't have a generic. That's a hard rule with the 501st, despite what terrestrial military traditions might imply. Currently, all examples we have are different from each other, so there's no baseline.
-
I've always used FB but I'm sure he responds via IG, too
-
5 hours ago, jtcool44they said:
That's super cool. I was just surprised with one from Droid Depot that got released for May the 4th. It won't be as good as yours, but I hope it's still cool and fun to drive. I will post pictures when it arrives.
Lucky! Those things sold out in minutes. I wasn't able to get one. I sure hope they do another run!
-
It's most similar to "snake chain" but I've never seen anything exactly like it, or if I have I sure haven't been able to turn up anything close.
 It's sure chonky, though.
The hunt continues...
The collar pips are pretty straightforward, but its going to be interesting since collar heights vary quite a bit, so one size may not fit all... I'll need to experiment a bit.


Sienar Engineer?
in New CRLs
Posted
I believe we are going to ask for it, but JRS wants it and I suspect the LMOs will place the CRL with them, as much as I'd like it here, too.
So it's in the LMOs' hands at this point.